Hello everyone who loves amigurumi,
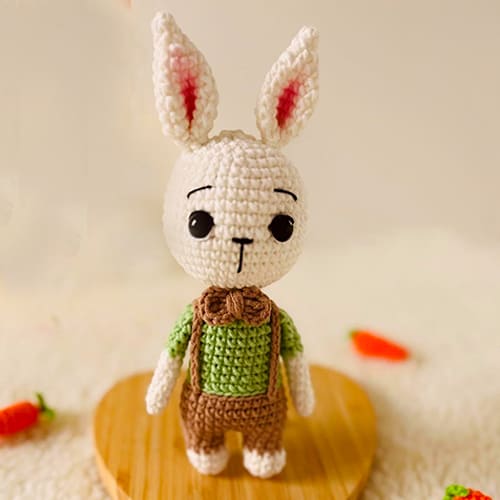
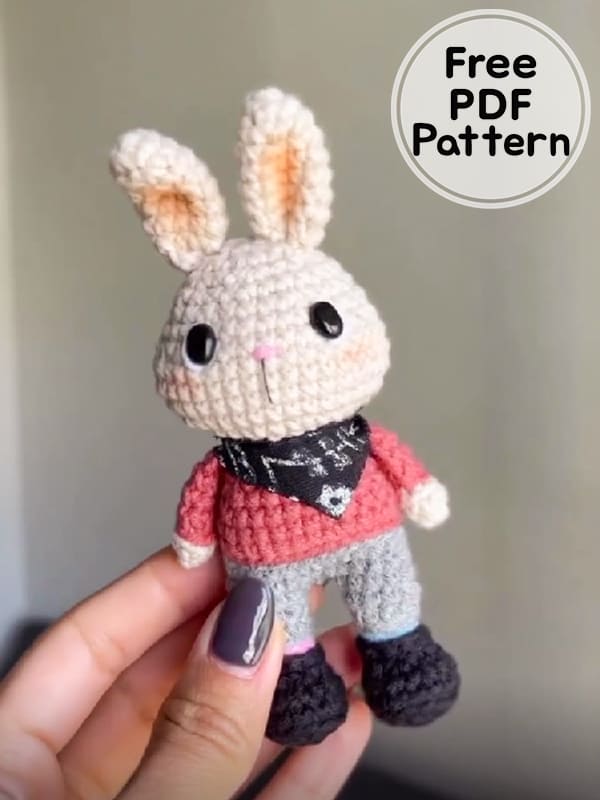
Are you ready to make a handsome crochet bunny amigurumi?
It’s easy to crochet a cute little amigurumi bunny pattern step by step. You can crochet the amigurumi patterns, which is small enough to fit in the palm, for children or for your loved ones. It will be the most loved gift.
You can make different accessories using small pieces of fabric. You can change the yarn colors of the crochet pattern bunny. The amigurumi toy crocheted with yellow and green yarns will look very cute. It will look very nice with a hat and glasses. Thank you to the creator of the bunny free amigurumi patterns .
Easy Crochet Bunny Miles Free Amigurumi Patterns PDF
Designer: caiu.na.teia
Materials
2mm crochet hook or compatible with the yarn chosen
Oval eyes with safety lock 6 x 8 mm
upholstery needle
Scissors
safety pins
filling fiber
Wire to put in the ears (optional)
Fabric of your choice (optional)
blush (optional)
Abbreviation
ch – chain
Rnd- round
MR – magic ring
slst- Slip Stitch
dec- decrease
inc- increase
BLO- Back loop only
FLO- Front loop only
(..) x n° – repeat
[..] – Total rounds stitch
Yarns and colors I used
(feel free to use any yarn and color you like)
Black Balloon 100
Balloon Millennium 1538
Balloon Banana 784
Balloon Itapua 5217
Balloon pink 377
Balloon light blue 9545
Thin black thread for muzzle embroidery and white thread for eye expression
Difficulty level: Basic
The bunny with these materials=12cm
Legs and Body
Make 2 legs. Working in oval crochet.
With black color:
Rnd 1. 6 ch, from the 2nd ch. go back making 4sc, 1 inc, on the other side of the ch. 3sc, 1 inc [12]
Rnd 2. 1 inc, 3sc, 1 inc, 1sc, 1 inc, 4sc, 1 inc [16]
Rnd 3. in BLO: 16sc [16]
Rnd 4. 16sc [16]
Rnd 5. 2sc, 6 dec, 2sc [10]
Add stuffing as you weave
Change to blue color (on second leg torque to pink color)
Rnd 6. in BLO: 10sc [10]
Switch to gray color
Rnd 7. in BLO: 10slst [10]
Rnd 8. in BLO: 10sc [10]
Rnd 9. 10sc
Fasten off the first leg. Finish the other and don’t close
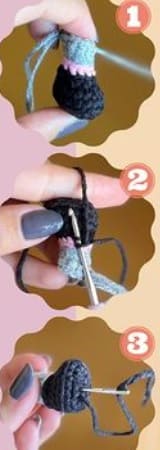
Finish of the boots:
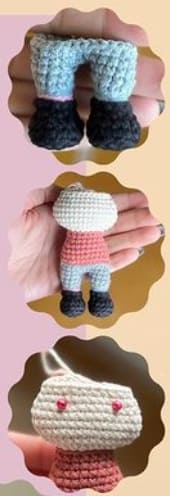
With the leg turned upside down: FLO on row 6 make 10 slst (photo 2)
Take the opportunity to use this thread and the tapestry needle to make the sole more concave: pass the needle through 1st in the middle of the sole and pull so that the sole “enters”.
Tie a knot. The base of the feet will be straighter (photo3)
Now, we’ll proceed with the body:
Continue on the 2nd leg, crochet 4sc more (or the amount needed to be positioned on the side), ch 3 up. and secure with 1 sc in the 1st leg.
This will be the 1st st on row 10. Place the marker.
Continuation
Rnd 10. 10sc in the 1st leg, 3sc in the ch, 10sc in the other leg, 3sc in the ch [26]
Rnd 11-12. 26sc [26]- 2rnds
Change to coral color
Rnd 13. in BLO: 26slst [26]
Rnd 14. in BLO: 26sc [26]
Rnd 15. 5sc, 1 dec, 11sc, 1 dec, 6sc [24]
Rnd 16. 4sc, 1 dec, 10sc, 1 dec, 6sc [22]
Rnd 17. 3sc, 1 dec, 9sc, 1 dec, 6sc [20]
Rnd 18. 2sc, 1 dec, 8sc, 1 dec, 6sc [18]
Rnd 19. 18sc [18]
Now let’s head up
Switch to beige color
Rnd 20. in BLO: 18slst [18]
Rnd 21. in FLO: 4sc, 1 inc, 8sc, 1 inc, 4sc [20]
Rnd 22. (1sc, 1 inc) x 10 [30]
Rnd 23. 6sc, 1 inc, 1sc, 2 inc, 11sc, 2 inc, 1 sc, 1 inc, 5sc [36]
Rnd 24-26. 36sc [36]- 3 rnds
Rnd 27. 8sc, 1 dec, 1sc, 1 dec, 12sc, 1 dec, 1sc, 1 dec, 6sc [32]
Rnd 28. 8sc, 1 dec, 14sc, 1 dec, 6sc [30]
Rnd 29. (3sc, 1 dec) x 6 [24]
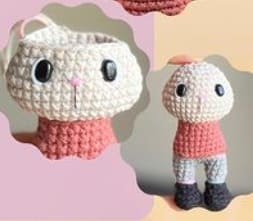
Place the eyes between rows 27 and 28 with 7 st between them. Embroider the muzzle of the muzzle of the eyes
Rnd 30. 24sc [24]
Rnd 31. 1sc, 1 dec, (2sc, 1 dec) x 5, 1sc [18]
Rnd 32. (1sc, 1 dec) x 6 [12]
Rnd 33. 6 dec [6]
Close with inverted MR and hide the thread.
Little Ears (x2)
Do not fill
With the beige color
Rnd 1. 6sc in the MR [6]
Rnd 2. (1sc, 1 inc) x 3 [9]
Rnd 3. 9sc [9]
Rnd 4. 1sc, 1 inc, (2sc, 1 inc) x 2, 1sc [12]
Rnd 5-8. 12sc [12] – 4 rnds
Rnd 9. 1sc, 1 dec, (2sc, 1 dec) x 2, 1sc [9]
Before fasten off
Apply blush to the inside of each ear
If you want, cut a wire in the compatible size, over the ends with pliers and project with an adhesive tape. Place inside the part.
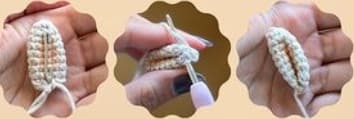
Fold the ear as shown in the image and join the two sides that you folded with 2slst (see the photos)
Now fasten off leaving a long thread for sewing
Sew to top of head between rows 31 and 33
Arms (x2)
Do not fill
Start with the beige color
Rnd 1. 6sc in the MR [6]
Rnd 2. 6sc [6]
Change to coral color
Rnd 3. in BLO: 6slst [6]
Rnd 4. in BLO: 6sc [6]
Rnd 5-6. 6sc [6] – 2rnds
Flatten the little arm and close by joining the two sides with 3sc
Fasten off leaving thread for sewing
Sew to the sides of the body, between rows 18 and 19
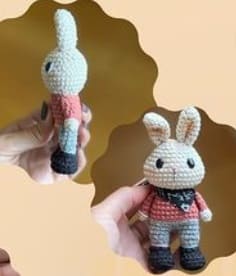
If you have some nice fabric, cut it and tie or sew it around the neck for extra flair. Use creativity.
Tail
Rnd 1. 4sc in the MR [4]
Rnd 2. 4sc [4]
Sew between rows. 12 and 13.
Correction: 10 of the body is written “10sc in 1st leg”, the right one is “10sc in 1st leg” (just a typo).
You have completed the amigurumi bunny


