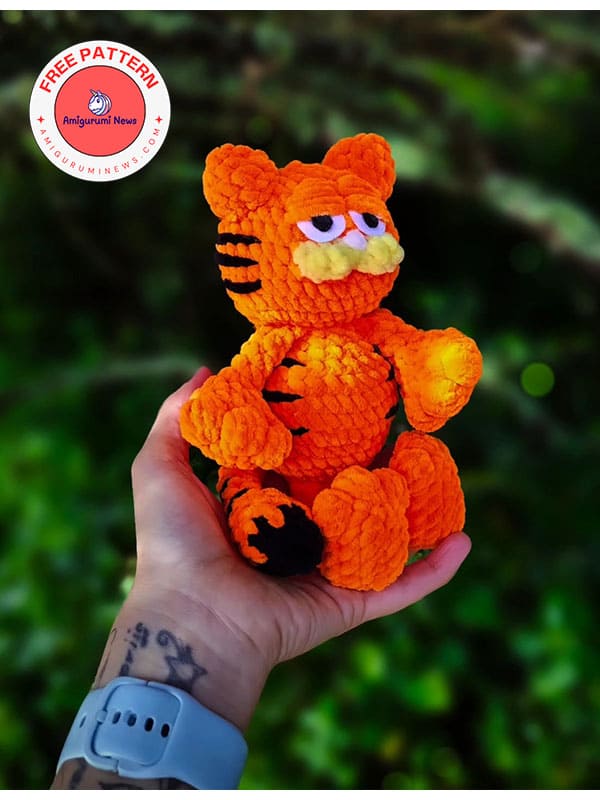
Amigurumi crochet cat lovers gather around. I brought you the world’s cutest cat crochet garfield pattern. Today we will make this wonderfully cute and lazy crochet garfield amigurumi toy. The crochet garfield pattern, which you can follow step by step and is full of details, is with you for free. Don’t forget to follow me for such free crochet cartoon characters. This crochet garfield pattern, which requires low stitches, is extremely easy. Also, your children will love it. Here is the cutest and laziest of cats now below.
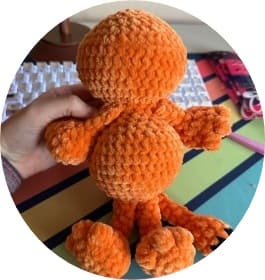
Amigurumi crochet garfield pattern
Via: talentlys_crochet
Materials:
Material estimates are based on a 4.5mm hook and himalaya dolphin baby yarn.
• Size 6 plush yarn (orange,yellow & black).
• 4.5mm hook (or your preferred size)
• Yarn needle.
• Scissors.
• Polyester stuffing/filling.
• Stitch marker.
• Safety eyes (recommended 20mm) or felt eyes.
Abbreviations:
MR- magic ring
ch- chain
sc- single crochet
st- stitch
slst- slip stitch
inc- increase
dec- decrease
hdc- half double crochet
FLO- front loop only
BLO- back loop only
R- round
CC- change color
BOB- 5 st bobble stitch
spk sc- spike st/a sc that is worked into the row below the previous round.
(…)x8- repeat this pattern the number of requested times.
(x)- number of stitches in a row
Arms- make 2
Use orange yarn.
R1. 8 sc into a MR (8)
R2. (inc)x8 (16)
R3. 5sc, (BOB,sc)x3, 5 sc (16)
R4. sc around (16)
R5. 2 sc, (dec)x6, 2 sc (10)
Stuff hand lightly. You will not be stuffing the arm.
R6. 5 dec (5)
R7-9. sc around (5) – 3 rnd
Make 2 sc across the top to close. Make sure you are on the side of the arm when crocheting across.
Leave a short tail as you will crocheting them into the body.
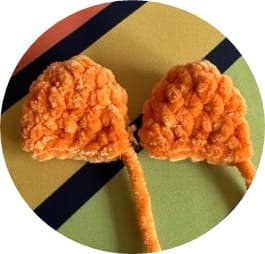
Ears- make 2
Use orange yarn.
R1. 4 sc in a MR (4)
R2. (inc)x4 (8)
R3. (sc,inc)x4 (12)
R4. sc around (12)
FO and leave a long tail for sewing later.
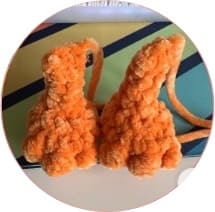
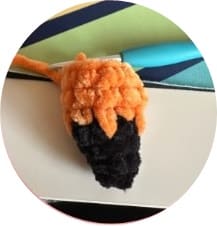
Tail
Start wiht black yarn.
R1. 4 sc into a MR (4)
R2. (sc,inc)x2 (6)
R3. inc, (sc,inc)x2, inc (10)
R4. sc around (10)
CC to orange and FO black.
R5. (sc, spk sc)x5 (10)
R6-7. sc around (10) – 2 rounds
Stuff the tip of the tail. You will not be stuffing the rest of the tail.
R8. (dec)x5 (5)
R9-18. sc around (5) – 10 rounds
Make 2 sc across the top to close. FO and leave a short tail. You will be crocheting it into the body.
Legs- make 2
Use orange yarn.
R1. Ch 6, starting from the second ch from the hook: 4 sc, 3 sc in the last st. Turn and working on the other side of the ch: 3 sc, inc (12)
R2. inc, 3 sc, 3 inc, 3 sc, 2 inc (18)
R3. 6 sc, (BOB,sc)x3, 6 sc (18)
R4. sc around (18)
R5. 2 sc, 7 dec, 2 sc (11)
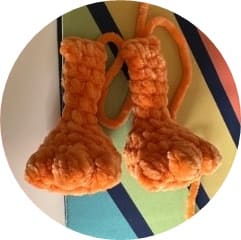
Stuff foot lightly. You will not be stuffing the leg.
R6. sc, 5 dec (6)
R7-11. sc around (6) – 5 rounds
FO the first leg but DO NOT the second leg. Continue to the body.
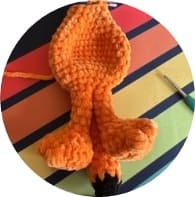
Body
Continue from the second leg.
R1. (joining the legs): Make sure you are on the side of the leg with the toes facing you. Add or take away a 1-2 sc until you are on the side the of the leg.
Sc into the side of leg 1. Make 5 more sc around leg 1. Sc back into leg 2. Make 5 more sc around leg 2. The next st will be the start of your next Rnd (12).
R2. (inc)x12 (24)
R3. (3sc,inc)x6 (30)
R4. sc around (30)
R5. 14 sc, 2 sc through the tail and body, 14 sc (30)
R6. (sc,inc)x2, 20 sc, (sc,inc)x3 (35)
Note: the (sc,inc)s in R6 should be the front of the belly. Adjust if needed.
R7-8. sc around (35) – 2 rounds
R9. (5sc,dec)x5 (30)
R10. (4sc,dec)x5 (25)
R11. (3sc,dec)x5 (20)
R12. (2sc,dec)x5 (15)
R13. sc around (15)
R14. 2 sc through arm and body, 2 sc, 2 sc through arm and body, 9 sc (15)
Start stuffing body here and pay extra attention to his tummy. He just had a big meal. Do NOT FO. Continue to the head.
Note: the 2 sc between the arms should be centered, adjust if needed.
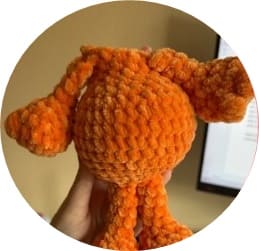
Head
The head will be worked immediately after the body.
R15. (inc)x15 (30)
R16. 2 inc, 10 sc, 4 inc, 12 sc, 2 inc (38)
R17-20. sc around (38) – 4 rounds
R21. 6sc, 8 sc in the BLO, 24 sc (38)
R22. (3sc,dec)x7, sc, dec (30)
R23. (4sc,dec)x5 (25)
R24. (3sc,dec)x5 (20)
If you plan to add safety eyes do so now. Place eyes between Rnd 23 & 24 with 2-4 sts between.
Make sure not to cover the front loops of R20. If needed, move eyes up 1-2 rows. Start stuffing the head and continue as you go.
R25. (2sc,dec)x5 (15)
R26. (sc,dec)x5 (10)
R27. (dec)x5 (5)
FO and use tail to close hole.
Notes: The inc’s for Rnd 16 will be his cheeks. Adjust if needed.
Mark the first front loop of R21 as you will be making the lip here later.
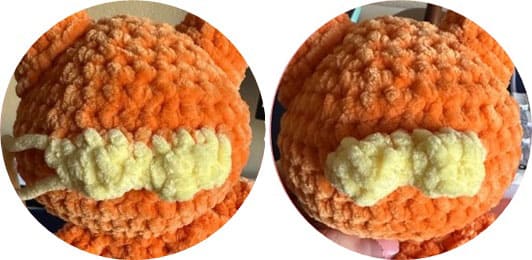
Lips
Attach yellow yarn to the last front loop of Rnd 20 with the top of Garfield’s head facing you (see reference picture).
R1. 8 sc across, ch 1, turn
R2. slst, 2 dc, 2 slst, 2 dc, slst
FO leaving a long tail. Use the tail to sew down both edges of the lips inward to make a more circular shape. Do not sew down the middle of the lips.
See pictures for reference.
Assembly and finishing touches
Sew on the ears
The ears should be on between Rnds 22 & 26. Make the ears slightly angled. Add a little stuffing before closing.
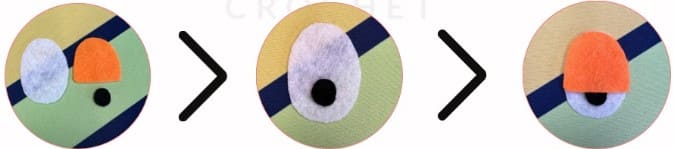
Garfield’s eyes (if using felt):
Step 1- cut out the pieces: You will cut out a long white oval. Cut out an orange oval that is the exact same size. Once identical, cut a straight line at the bottom having off about 1/5th of the oval. Then cut out a small black circle.
Step 2- glue/sew the black and white pieces together: the black circle should be glued/sewed on towards the bottom middle. Be sure the orange piece will slightly cover the black circle (as shown in the 3rd picture).
Step 3- glue/sew the orange piece on: you should align the orange piece to the white piece making sure the entire top part is covered. The black circle should alsı be partially covered.
Step 4- sew/glue the eyes on: the eyes should be placed directly above the lips. Make the eyes overlap just a bit.
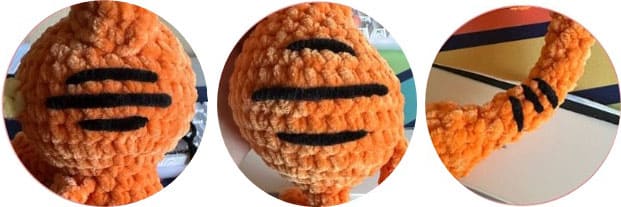
Garfield’s stripes: using black yarn make all the following stripes:
3 on each cheek: the top one will be between Rnd 20 & 21 and cover about 6 sts.
The middle one will be between Rnd 19 & 20 and will cover about 8 sts. The bottom one will be between Rnd 18 & 19 and will cover about 5 sts. Make sure both sides are equal distance from the lips and identical.
3 on each side of the body: the top one should go between Rnds 9 & 10 and span about 5 sts. The middle one should go between 7 & 8 and should span about 10 sts. The bottom one should go between Rnd 5 & 6 and should span about 6 sts. Make sure both sides are identical.
Tail: put 3 small stripes towards the bottom of the tail. I made the span 3 sts each.
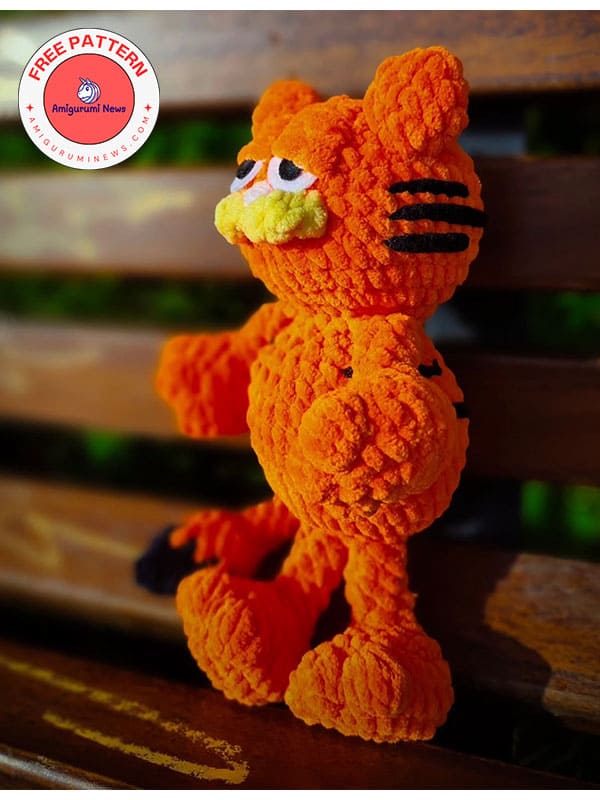
Amigurumi crochet garfield is ready!