Looking for your next fun and creative DIY crochet keychain project? Then look no further than our crochet cat keychain! These adorable little friends are not only cute and adorable, but also make practical and wonderful gifts. Whether you’re a beginner or a seasoned crocheter, making a mini cat keychain using free amigurumi patterns is both rewarding and enjoyable. These little crochet cat keychains come in two different versions and are so much fun. You can make them just for the head or for the entire body. The sakura blossom detail on the back is simply stunning. Now, let’s take a look at the step-by-step keychain pattern instructions.
Sakura the 2 in 1 crochet cat keychain
Designer: iuli.crochets
Materials:
Sport weight fluffy/chenille yarn in white/ black & light pink/ dark pink.
2.5mm crochet hook.
5mm safety eyes.
Scissors, stitch marker.
Yarn needle.
Keychain/ yarn in desired colour & weight
Fiber filling
Abbreviations:
R: round
sc: single crochet
MR: magic ring
ch: chain
dec: decrease
inc: increase
slst: slip stitch
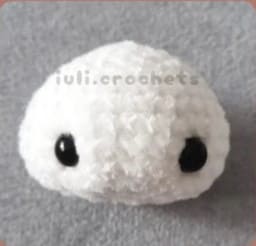
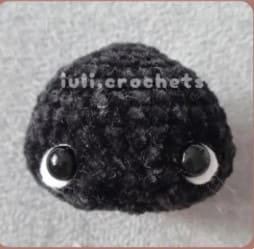
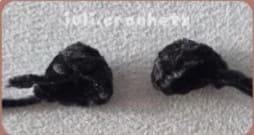
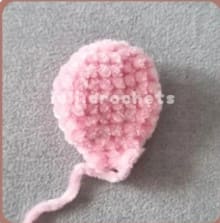
Head- (in white/ black)
R1. 6 sc in MR/ 6 sc in 2 ch (6)
R2: (2sc, inc) x2 (8)
R3: (sc, inc) x4 (12)
R4: (sc, inc) x6 (18)
R5 (2sc, inc) x6 (24)
R6: 24sc (1 round)
R7: (3sc, inc) x6 (30)
R8: 30sc (1 round)
R9: (4sc, inc) x6 (36)
R10: 36sc (1 round)
R11: (4sc, dec) x6 (30)
R12: (3sc, dec) x6 (24)
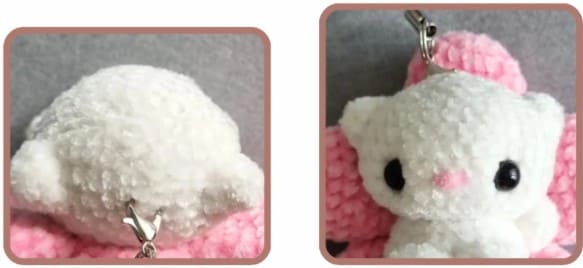
Insert the eyes between R10-R11, about 6 visible sts apart. If you are making a black kitty, first put the eyes through a white piece of felt and cut it in an oval shape, and then insert them into the head.
R13: (2sc, dec) x6 (18)
Fully stuff the head.
R14: (sc,dec)x6 (12)
If you are making the plush ver. (full body), fasten off here. If you are making the keychain version, continue with the instructions below.
R15: 6 dec (1 round)
Cut the tail short and sew the stitches together to close the hole.
Ears- make 2 (in white/black)
R1: 4 sc in MR/ 4 sc in 2 ch (4)
R2: (sc,inc)x2 (6)
R3: (sc,inc)x3 (9)
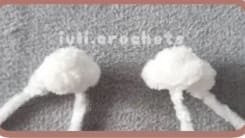
Do not stuff the ears yet. Fasten off and leave a long tail for sewing.
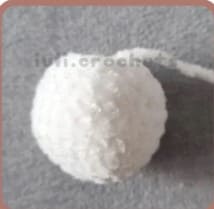
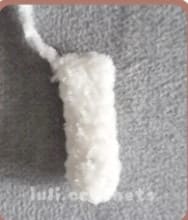
Body (in white)
R1: 8sc in Mr/8sc in 2ch (8)
R2: (sc, inc) x4 (12)
R3: (sc, inc) x6 (18)
R4: (2sc, inc) x6 (24)
R5-R7: 24sc (3 rounds)
R8: (2sc, dec) x6 (18)
R9:18sc (1 round)
R10: (sc, dec) x6 (12)
Fasten off, leave a long tail for sewing the body to the head)
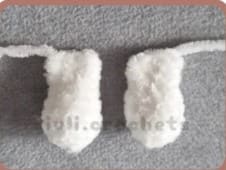
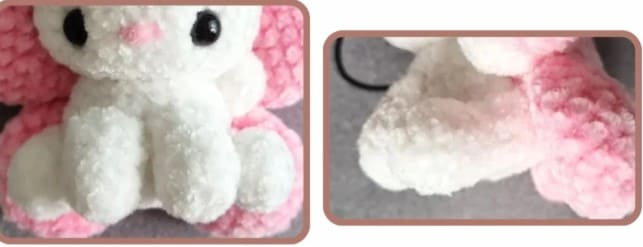
Front Paws – make 2 (in white)
R1: 6sc in Mr/6sc in 2ch (6)
R2: (sc, inc) x3 (9)
R3: 9sc (1 round)
R4: (sc, dec) x3 (6)
R5: 6sc (1 round)
Lightly stuff the paws, fold the last row of the paws in half and connect the 2 sides with 3 sc. Leave a long tail for sewing.
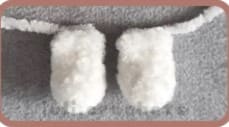
Back Paws – make 2 (in white)
R1: 6sc in Mr/6sc in 2ch (6)
R2: (sc, inc) x3 (9)
R3: 9sc (1 round)
R4: 4sc, dec, 3sc (8)
R5: 2sc, dec, 4sc (7)
R6: dec, 5sc (6)
R7: 6sc (1 round)
Lightly stuff the paws, fold the last row of the paws in half and connect the 2 sides with 3 sc. Leave a long tail for sewing.
Tail (in white)
R1: 6sc in Mr/6sc in 2ch (6)
R2-R8: 6sc (7 rounds)
Do not stuff the tail, fold the last row of the tail in half and connect the 2 sides with 3 sc. Leave a long tail for sewing.
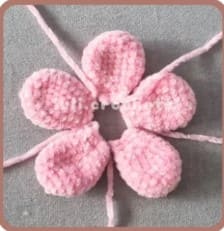
Flower Petals – make 5 (in lightnpink) – plushie version
R1: 6sc in Mr/6sc in 2ch (6)
R2: 6inc (12)
R3: (sc, inc) x6 (18)
R4-R5: 18sc (2 rounds)
R6: (4sc, dec) x3 (15)
R7: 15sc (1 round)
R8: (3sc, dec) x3 (12)
R9:12sc (1 round)
R10: 6dec (1 round)
Do not stuff! Fold the last row of the petals in half and connect the 2 sides with 3 sc. Leave a long tail for sewing.
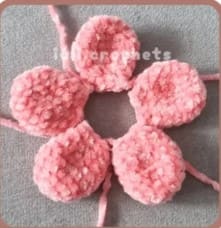
Flower Petals – make 5 (in dark pink) keychain version
R1: 6sc in Mr/6sc in 2ch (6)
R2: 6inc (12)
R3:12sc (1 round)
R4: (sc, inc) x6 (18)
R5: 18sc (1 round)
R7: (sc, dec) x6 (12)
R7: 12sc (1 round)
R8: 6dec (1 round)
Do not stuff! Fold the last row of the petals in half and connect the 2 sides with 3 sc. Leave a long tail for sewing.
Assembly
~Plushie version~
• Sew the head attached to the body stitch to stitch.
• Sew the front paws 2 rows lower than the head onto the body, right next to eachother. Make sure they are secured to the body.
• Sew the back paws 5 stitches away from the front paws on either side, and 3 rows lower than the front paws. The back paws should be sewn on 3 rows since they are in a horizontal position.
• Sew the last 2 rows of the tail at the back of the kitty on a 65 degree angle. Sew the tail on the same rows as the back paws.
~Both versions~
• Sew the ears onto the head in a circular shape (not flat!) between R4-R8 (the ears start 1 Row higher than the eyes). The ears should be 3 sts away from the eyes. Very lightly stuff the ears while sewing.
• Sew a small nose across 2 stitches right between the eyes as shown below.
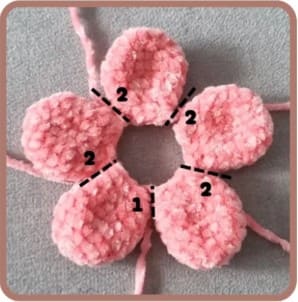
• First, sew the petals together by attaching the last 2 rows of one petal to the next. Since the flower is in a star shape, between 2 of the petals only attach the last row. These will be the bottom petals of the flower.
• After sewing the petals either sew or glue the flower to the kitty.
• Keychain version: Sew the flower attached to the head.
• Plushie version: Sew the top petal attached to the head, the 2 side petals attached to the sides of the head and top part of the body, and the 2 bottom petals to the middle part of the body and middle of the tail.