
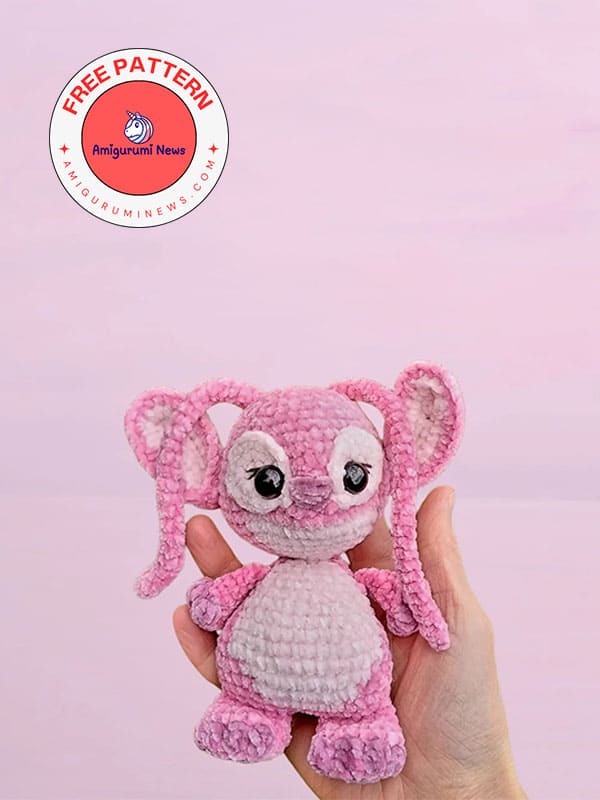
If you love Disney’s Lilo & Stitch and enjoy crocheting adorable characters, you’ll adore this free Angel Stitch amigurumi pattern. Perfect for both beginners and experienced crocheters, this adorable plush toy makes a charming handmade gift or a lovely addition to your collection. This adorable crochet angel stitch pattern, made with plush yarn, makes a wonderful amigurumi plush toy for your children. If you’ve never crochet amigurumi with chenille yarn before, you should definitely try this amigurumi pattern. It’s so fun to make and the texture is just as beautiful.
Designer: manicula.magica
What You Need to Crochet Angel Stitch Amigurumi
• Light chenille yarn (130m/50g) in pink, pastel pink and pale purple.
• Black embroidery thread/thin yarn.
• 3mm crochet hook.
• Darning needle.
• Stuffing material.
• Safety eyes (12mm)
• Stitch markers.
List of Crochet Terms for This Angel Stitch
sc= single crochet
hdc= half double crochet
inc= increase
dec= decrease
mr= magic ring
st= stitch
ch= chain
pc= popcorn stitch
slst= slip stitch
BLO= back loop only
Eyepatch (pale pink, make 2)
R1) 6 sc in mr
R2) 6 inc (12)
Ch 2, 1 sc into the 2nd ch
Continue to crochet normally in the round.
R3) 4sc, inc, sc, inc, 4sc, slst, slst into the corner of the eyepatch (14)
Finish off, leave a tail for sewing.
Arms (make 2)
R1) In purple: 6 sc in mr
Change to pink:
R2) 6 inc (12)
R3) 3 sc in BLO, (pc, sc in BLO)x3, 3 sc in BLO (12)
Change to purple only for the popcorn stitches.
R4) (dec,sc)x4 (8)
R5-6) 8 sc
R7) (dec,2sc)x2 (6)
R8) 6 sc
Fold and sc the edges together with 3 sc. If you didn’t end up right in the middle of the back, just make an extra sc and then crochet together.
Finish off.
Tail
In pink.
R1) 8 sc in mr
R2) 8 sc
R3) 4 dec (4)
Fold and crochet the edges together with 2 sc.
Finish off.
Feet/body
We will work bottom up, starting with the feet.
R1) In purple: 6 sc in mr
R2) 6 inc (12)
Change to pink:
R3) inc, (2sc,2inc)x2, 2sc, inc (18)
Change to purple only for the pc.
R4) 5 sc in BLO, (pc, sc in BLO)x3, pc, 6 sc in BLO (18)
R5) 18 sc
R6) (dec,4sc)x3 (15)
R7) 5sc, 3 dec, 4 sc (12)
Finish off.
Make a second one which you don’t finish off.
On this 2nd foot, crochet another 3 sc so you end up at the side of the foot.
Ch 2, connect it with a sc into the side of the first foot. Mark this sc as the first st of round 8.
Body
R8) 11 sc, 2 sc in the ch, 12 sc, 2 sc in ch (28)
R9) (3sc,inc)x7 (35)
In the following rounds (10-28) we will do colour changes between pink and pale pink, our pink main colour will the written in black, the stitches that are supposed to be pale pink in blue.
Keep your already crocheted parts ready.
R10) (inc, 3sc)x3, sc, 3sc, inc, 3sc, (3sc,inc)x3, sc, 2sc with tail. (42)
R11) 15 sc, 10 sc, 14sc, 3sc (42)
R12) sc, 13sc, 12sc, 12sc, 4 sc (42)
R13) 2sc, 4sc, dec, 5sc, 14sc, dec, 4sc, dec, 2sc, 5sc (39)
R14) 3sc, 5sc, dec, 2sc, 6sc, dec, 6sc, 2sc, dec, 4sc, 5 sc (36)
R15) 3sc, 6sc, dec, 13sc, dec, 6sc, 4 sc (34)
R16) 2sc, 2sc, dec, 4sc, dec, 9sc, dec, 4sc, dec, sc, 4sc (30)
R17) 2sc, 5sc, dec, 11sc, dec, 2sc, dec, sc, 3sc (27)
R18) sc, 5sc, dec, 11sc, dec, 3sc, 3sc (25)
R19) sc, 6sc, dec, 7sc, dec, 5sc, 2sc (23)
In row 20 we will join the arms. Crochet through arm and body st at the same time where indicated.
Make sure that the claws are facing the front where the bigger pale pink patch is.
R20) 3sc, dec, 3sc with arm, 7sc, 3sc with arm, dec, 3sc (21)
R21) 7sc, dec,3sc, dec, 7sc (19)
R22) sc, dec, 4sc, dec, sc, dec, 7 sc (16)
Body/head
R23) sc, dec, sc, dec, 3sc, dec, 2sc, dec, sc (12)
Stuff the body, do not stuff the feet!
R24) (inc, sc)x2, inc, sc, inc, (sc, inc)x2, sc (18)
R25) (inc, 2sc)x2, inc, 3sc, inc, (2sc, inc)x2, sc (24)
R26) (inc, 3sc)x2, inc, 5sc, inc, (3sc, inc)x2, sc (30)
R27) (inc, 4sc)x2, inc, 7sc, inc, (4sc, inc)x2, sc (36)
R28) (inc, 5sc)x2, inc, 9sc, inc, (5sc, inc)x2, sc (42)
R29) (6sc, inc)×6 (48)
R30-32) 3 rounds 48sc
R33) 7sc, dec, (14sc, dec)x2, 7sc (45)
R34) (13sc, dec)x3 (42)
R35) 6sc, dec, (12sc, dec)x2, 6sc (39)
R36) (11sc, dec)x3 (36)
R37) 5sc, dec, (10sc, dec)x2, 5sc (33)
R38) (9sc, dec)x3 (30)
R39) 4sc, dec, (8sc, dec)x2, 8sc (27)
R40) (7sc, dec)x3 (24)
R41) (2sc, dec)×6 (18)
Insert eyes through the patch (between rows 1&2, the corner has to be visible under the safety eye), then into the head between rows 32&33, about 8-9st in between, symmetrical to the pale pink belly part.
R42) (sc, dec)×6 (12)
Finish off, close.
Antennae
In pink, make 2.
R1) 4sc in mr
R2-27) 4sc (or until it measures ~15cm/as long as you like)
Finish off, leave a tail for sewing.
Ears
Part 1: in pale pink, make 2
ch9, in 2nd ch from hook:
R1) inc, 6sc, inc / inc, 6sc, inc (20)
R2) 8sc, hdc, 2hdc inc, hdc, 8sc (22)
Finish off.
Part 2: in pink, make 2
Repeat rows 1 and 2 from part one.
R3) inc, 6sc, 2hdc, 4hdc inc, 2hdc, 6sc, inc (28)
Don’t finish off, place the smaller pale pink part on the pink part of the ear (wrong sides are on the inside). Crochet them together. The stitch count doesn’t match, so you have to crochet into a pale pink st twice for 6 times.
Ear details
We will have to crochet twice into a pale pink stitch where we did the increases: the first and last st of the round and the four middle stitches. Crochet the first set of st together normally. Then insert into the same pale pink st, but the next free pink st and sc together. Connect the next 8st normally, then (connect 1 st normally, connect the next using the pale pink st from last sc for a second time and the next free pink st)x4, 9st normally and the last one using the pink pale st a second time.
Sewing
• Sew the ears on the side of the head at rows 30-32.
• Sew on the eye patches, make sure the corners are symmetrical and pointed down and inwards.
• With the black embroidery thread sew some lashes.
• With the purple chenille, sew a little nose.
• Sew Antennae on the back of the head, at the fourth last row.
🖨️ Free Printable PDF Crochet Pattern


