
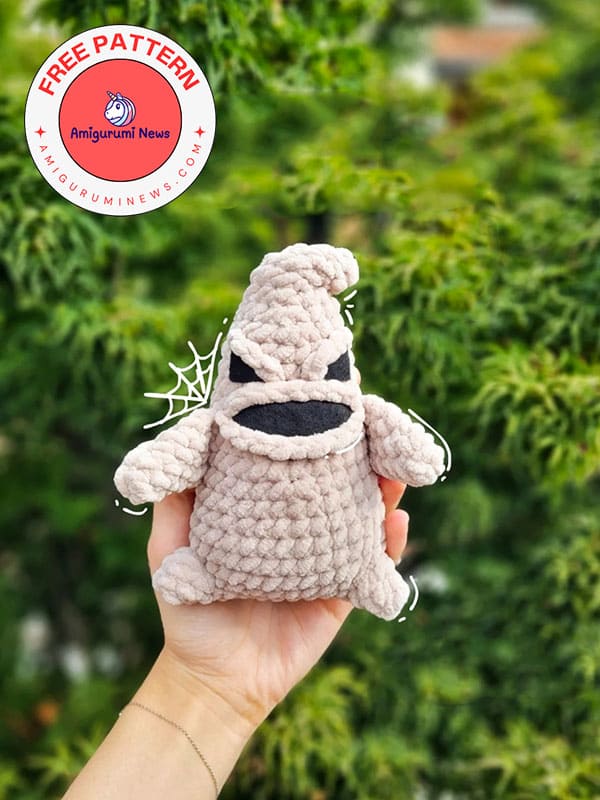
Oogie Boogie, the movie character that comes to mind when everyone thinks of Halloween, is now making his way into our homes as an amigurumi. This free crochet Oogie Boogie pattern is here for Halloween. Follow along step by step and complete it in a simple way. It’s incredibly easy to make. I think even beginners can make it. It might be a bit scary for younger children, so you might want to make it for older children. Enjoy this free Amigurumi Oogie Boogie pattern, which looks great with its plush texture.
Crochet oogie boogie free pattern
Designer: eliyarnart
Materials:
• Hook 5mm
• Beige chenille size 4 medium
• Stuffing
• Tapestry needle
• Stitch marker
• Scissors
• Black felt
• Fabric glue
Abbreviations:
• R: round
• St: stitch
• MR: magic ring
• Ch: chain
• Sc: single crochet
• Dec: decrease
• Inc: increase
• FO: fasten off
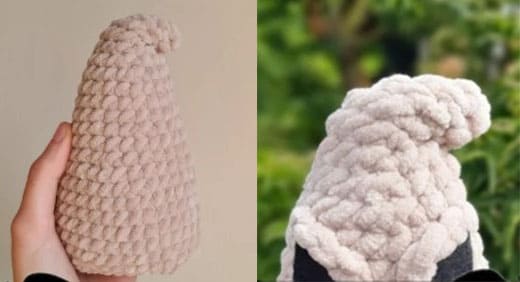
Body
Use beige yarn;
R1: ch10, starting from the 2nd ch from the hook and make 8sc, 3sc in the same st on the other side of the ch make 7sc, inc (20)
R2: inc, 7sc, 3inc, 7sc, 2inc (26)
R3: 26sc (26)
R4: 3sc, inc, (5sc, inc)x3, 4sc (30)
R5-8: 30sc (30) – 4 rounds
R9: 6sc, dec, 14sc, dec, (28)
R10: 28sc (28)
R11: 5sc, dec, 12sc, dec, 7sc (26)
R12: dec, 9sc, dec, 13sc (24)
R13: 2sc, dec, (6sc, dec)x2, 4sc (21)
Start stuffing as you go.
R14-16: 21sc (21) – 3 rounds
R17: sc, dec, (5sc, dec)x2, 3sc (18)
R18: sc, dec, (4sc, dec)x2, 3sc (15)
R19: 15sc (15)
R20: dec, 2sc, inc, sc, inc, sc, dec (10)
From now don’t stuff.
R21: 10sc (10)
R22: 3sc, dec, 4sc (8)
R23: (2sc, dec)x2 (6)
R24: (sc, dec)x2 (4)
Cut yarn leaving a long tail for sewing.
Sew closed and with the remaining ends sew the top of the head like in the pic.
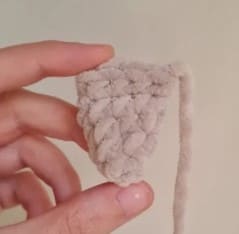
Arms (x2)
Use beige yarn;
R1: 4sc in a mr (4)
R2: (sc, inc)x2 (6)
R3: 6sc (6)
R4: (2sc, inc)x2 (8)
R5: 8sc (8)
Don’t stuff the arms.
Fold in half and make 4sc (4)
Cut yarn leaving a long tail for sewing.
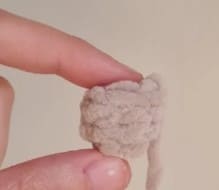
Feet (x2)
Use beige yarn;
R1: 4sc in a mr (4)
R2: (sc, inc)x2 (6)
R3: 6sc (6)
Cut yarn leaving a long tail for sewing.
Stuff if needed (I didn’t stuff mine)
Sewing
Sew the legs on R2-3 on the sides.
Sew the arms on R12-9 on the sides.
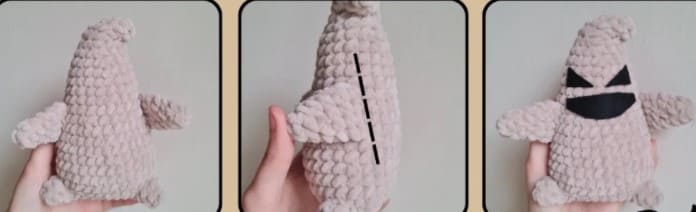
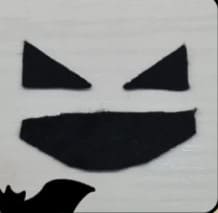
Cut felt to make the eyes and mouth.
Glue the eyes on R15-16, 1-2 visible sts apart.
Glue the mouth on R12-13 (don’t worry if the mouth hasn’t a perfect shape, you are going to hide its edges).
Now let’s get into the details;
Eyes detail (x2)
Slip knot, ch 4 and cut yarn leaving a long tail for sewing.
You may need to vary the number of chains depending on your tension.
Sew them following the felt’s line (use pics for reference).
Mouth details (x2)
Slip knot, ch 10 and cut yarn leaving a long tail for sewing.
You may need to vary the number of chains depending on your tension.
Sew them following the felt’s line (use pics for reference).


