Crochet Christmas gnome amigurumi projects are so much more than simple holiday decorations; they reflect the warmth and personality of handmade work. During the Christmas season, small details like handmade ornaments and figurines can completely transform a space, making it feel cozy and inviting. This crochet Christmas gnome amigurumi is designed with this feeling in mind, offering a creative and relaxing project to enjoy in your own space. You can also choose the yarn colors as you wish, creating your own unique crocheted gnome.
The design focuses on clean shapes and balanced proportions, allowing the gnome to stand out without being overly complex. Each piece is crochet individually, making the process orderly and enjoyable rather than overwhelming. This gnome pattern is especially helpful if you enjoy working on projects in short sessions, as you can complete one section at a time and easily continue where you left off.
What makes this crochet Christmas gnome amigurumi special is its complete customization. The same pattern can yield very different results depending on the yarn and colors you choose. Soft neutral colors create a modern, minimalist look, while classic Christmas tones bring a traditional holiday charm. Small details, such as textured yarn for the beard or subtle embellishments, can add character without altering the main pattern.
The step-by-step instructions included in this free amigurumi pattern are written to guide you through the process calmly and clearly. Instead of rushing to the finished piece, the pattern encourages you to enjoy the rhythm of the crochet and the satisfaction of watching the gnome take shape. Whether you display it as part of your holiday decor or gift it to a special someone, this crochet Christmas gnome amigurumi becomes a meaningful handmade item created with care and intention.
Free Crochet Christmas Gnome Pattern
One of the strengths of this crochet Christmas gnome pattern is how easily it’s adjustable. Changing the crochet hook size or yarn thickness allows you to control the final dimensions without altering the structure of the instructions. This makes the pattern suitable for a variety of purposes, from small decorative pieces to larger display items. It’s already mentioned in the free pattern that you can make a smaller gnome with different yarn and hooks.
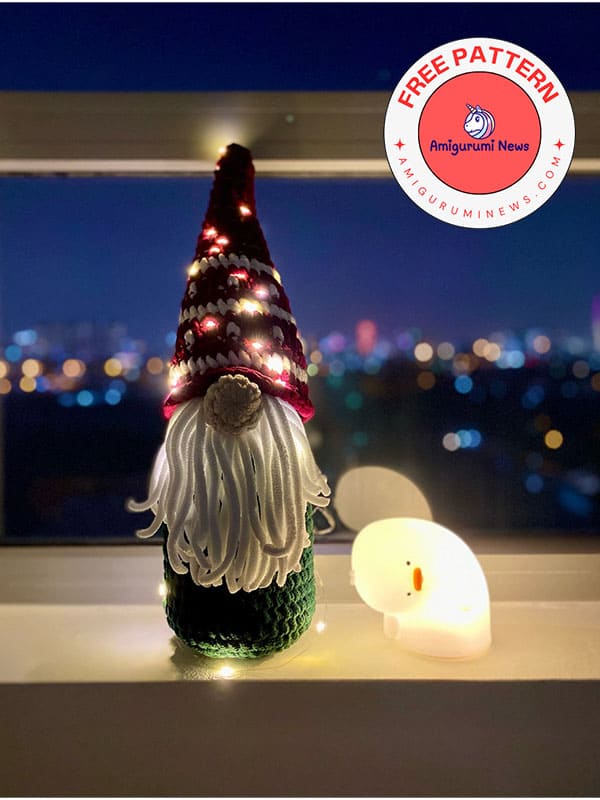
Assembly is also carefully considered within the pattern. The instructions for joining the pieces focus on placement and alignment, helping the finished gnome look neat and proportionate. This attention to detail reduces the need for guesswork and provides a more professional look. After completing your Christmas gnome, you can decorate it with these tiny fairy lights to make it even more enchanting during the Christmas season.
Materials and Yarn Needed for Crochet Christmas Gnome
1. Yarn: I used chunky yarn for the big gnome, cotton yarn for the small one.
2. Hook: 6.0mm for the big gnome, 2.5mm for the small one.
3. Stitch markers.
4. Yarn needle.
5. Scissors.
6. pins (optional)
Color: Feel free to combine colors as you prefer.
Crochet Abbreviations and Terms
R: round
MR: magic ring
st: stitch
ch: chain
sc: single crochet
inc: increase
dec: decrease
slst: slip stitch
Size: If you use the same yarn as me, the big gnome will be 45cm in long; the small one will be 14cm in tall (including the hat).
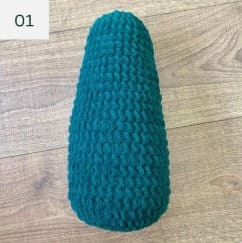
Body
Use green yarn, working in continuous rounds.
R1: MR, 8sc (8)
R2: 8inc (16)
R3: (sc, inc) x 8 (24)
R4: (2sc, inc) x 8 (32)
R5: (3sc, inc) x 8 (40)
R6-17 (12 rounds): 40sc (40)
R18: (6sc, dec) x 5 (35)
R19-21 (3 rounds): 35sc (35)
R22: (5sc, dec) x 5 (30)
R23-26 (4 rounds): 30sc (30)
R27: (3sc, dec) x 6 (24)
Stuff the body and continue to stuff as you go.
R28: (sc, dec) x 8 (16)
R29: 8dec (8)
Fasten off, cut the yarn, close the remaining gap and weave the yarn in (pic 1).
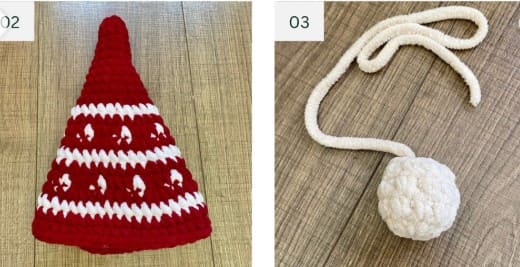
Hat
Start with red yarn, working in continuous rounds.
R1: MR, 6sc (6)
R2: inc, 5sc (7)
R3: inc, 6sc (8)
R4: inc, 7sc (9)
R5: inc, 8sc (10)
R6: inc, 9sc (11)
R7: inc, 10sc (12)
R8: (2sc, inc) x 4 (16)
R9: 16sc (16)
R10: (3sc, inc) x 4 (20)
R11: 20sc (20)
R12: (4sc, inc) x 4 (24)
From R13 R13 to R23, alternate red and white yarn to create the colorwork for the hat.
R13 (all in white): 24sc (24)
R14 (all in red): (5sc, inc) x 4 (28)
R15: (3sc in red, 1sc in white) x 7 (28)
R16 (all in red): (6sc, inc) x 4 (32)
R17 (all in white): 32sc (32)
R18 (all in red): (7sc, inc) x 4 (36)
R19: (3sc in red, 1sc in white) x 9 (36)
R20 (all in red): (8sc, inc) x 4 (40)
R21 (all in white): 40sc (40)
R22 and R23: all in red
R22: (9sc, inc) x 4 (44)
R23: 44sc (44)
Fasten off, cut the yarn and weave it in (pic 2).
We’ve finished the dwarf’s hat; now all that’s left is to make his big nose. Let’s get started!
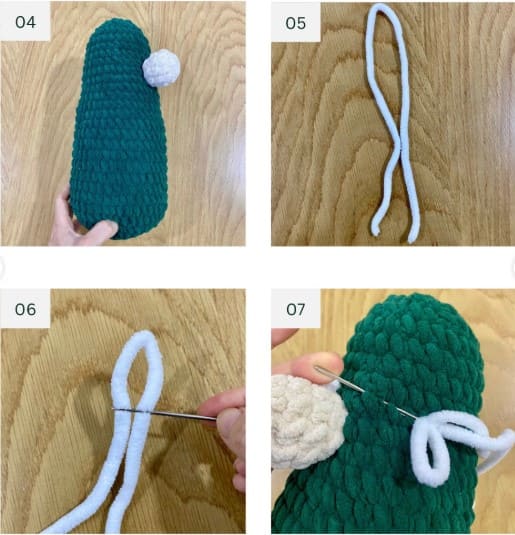
Nose
Use skin tone yarn, working in continious rounds.
R1: MR, 10 sc (10)
R2-3: (2 rounds): 10 sc (10)
R4: (3sc,dec)x2 (8)
Stuff the nose firmly.
Fasten off, cut the yarn, and leave a long tail for sewing. (pic 3).
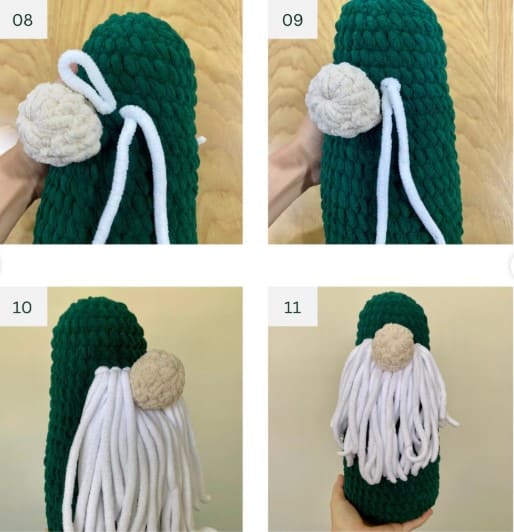
Assembly
Sew the nose onto the body, between R20 & R23 of the body (pic 4).
Making the beard
1. Cut the white yarn into sections so that when folded in half, it matches the desired beard length (pic 5).
2. Insert the needle into the Gnome’s body around the nose area, then pull the needle and the folded yarn through (pic 6).
3. Remove the needle, pass the two yarn tails through the folded loop, and pull tight to secure (pic 7, 8).
4. Repeat around the nose area to create the beard as desired (pic 9, 10).
5. Adjust and trim the beard to your preferred shape and length (pic 11).
Notes:
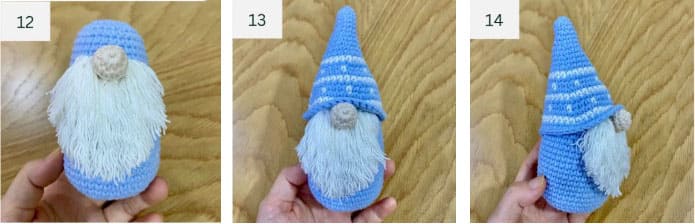
• If you are using cotton yarn, you can brush the beard to make it look more realistic. (pic 12).
• I didn’t sew the hat onto the Gnome’s body; you may sew it on or leave it removable, depending on your preference. When placing the hat on the Gnome, gently fold the brim up slightly around the nose area (pic 13, 14).
You can save or reuse this crochet Christmas gnome pattern anytime, so it will come in handy when you’re ready to create another crochet Christmas piece.
To provide the best experiences, we use technologies like cookies to store and/or access device information. Consenting to these technologies will allow us to process data such as browsing behavior or unique IDs on this site. Not consenting or withdrawing consent, may adversely affect certain features and functions.
Functional
Always active
The technical storage or access is strictly necessary for the legitimate purpose of enabling the use of a specific service explicitly requested by the subscriber or user, or for the sole purpose of carrying out the transmission of a communication over an electronic communications network.
Preferences
The technical storage or access is necessary for the legitimate purpose of storing preferences that are not requested by the subscriber or user.
Statistics
The technical storage or access that is used exclusively for statistical purposes.The technical storage or access that is used exclusively for anonymous statistical purposes. Without a subpoena, voluntary compliance on the part of your Internet Service Provider, or additional records from a third party, information stored or retrieved for this purpose alone cannot usually be used to identify you.
Marketing
The technical storage or access is required to create user profiles to send advertising, or to track the user on a website or across several websites for similar marketing purposes.