Hello everyone who loves amigurumi,
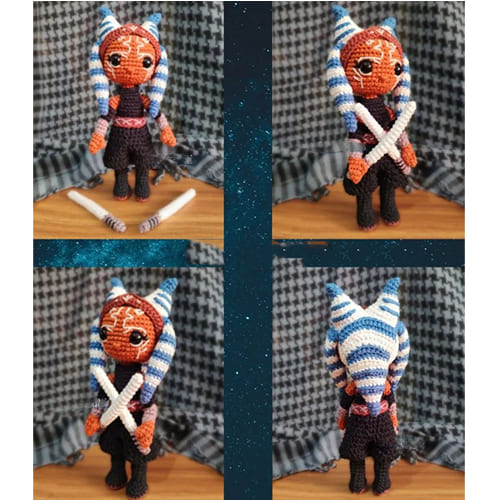
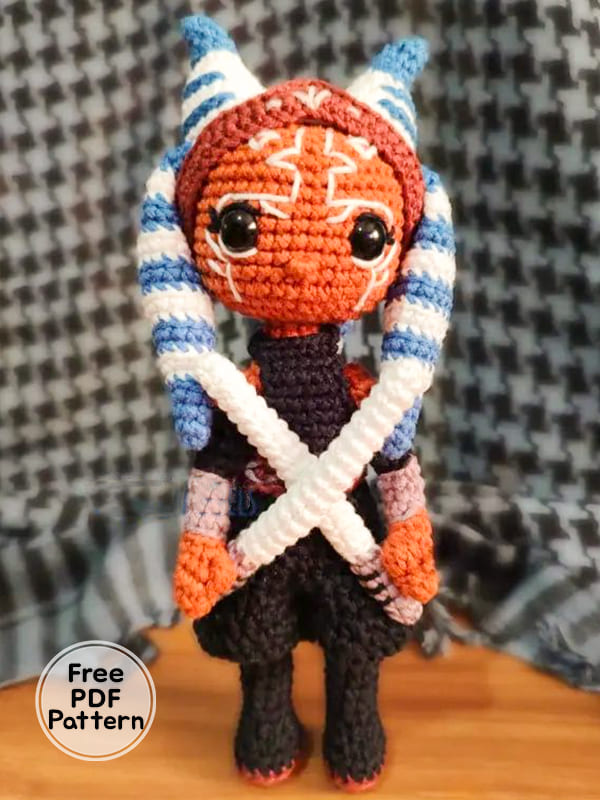
For those who love Star Wars movies, I shared today’s surprise character Ahsoka Tano pattern with you. I wrote in detail in the explanation section how to make an doll amigurumi patterns. You can see what the pieces look like by looking at the thumbnails. Check the material list to crochet a medium difficulty free amigurumi patterns crochet doll step by step. You can change the thread colors as you wish. I recommend that the crochet thicknesses and yarn thicknesses be the same.
Thank you to the creator of the free amigurumi crochet doll. Follow me to see the latest amigurumi patterns.
Crochet Doll Ahsoka Tano Free Amigurumi Patterns PDF
Designer: yosvelin.dolls
Materials
• Yarn of your choice in colors: tobacco, brown mink, gray, black, ash blue, white
• Crochet size according to your yarn
• 10mm safety eyes
• Black and white embroidery thread
• Points and laps marker
• Synthetic stuffing, pipe cleaner or wire, yarn needle, scissors and pins
Terminology
MR – magic ring
hdc – half double crochet
PP- puff stitch (4 dc closed together)
incT- three single crochet together
decT- Decrease of three low points
FLO- Front loop only
sc – single crochet
dc – double crochet
slst- Slip Stitch
inc- increase
dec- decrease
BLO- Back loop only
x – number of times to repeat
(..)- points to repeat
= – total stitch
Rnd- round
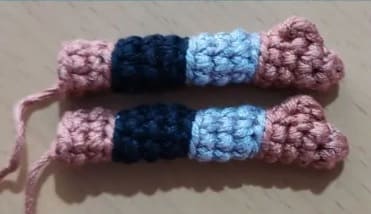
Arms (x2)
In tobacco color
Rnd 1. MR of 5sc
Rnd 2. 1 inc, 4sc = 6
Rnd 3. (2sc, 1 inc) x 2 = 8
Rnd 4. 1 PP, 7sc = 8
Rnd 5. 8sc
change to gray color
Rnd 6. BLO 8 slst
Rnd 7. BLO 8 sc
Rnd 8-9. 8 sc
change to black color
Rnd 10. BLO 8 slst
Rnd 11. BLO 8 sc
Rnd 12-13. 8 sc
Change to tobacco color
Rnd 14. BLO 8 slst
Rnd 15. BLO 8sc
Rnd 16. 8 sc
Cut the thread
place pipe cleaners
Legs (x2)
In mink brown color
Crochet 5 ch and from the 2nd ch
Rnd 1. 1 inc, 2sc, 1 incT, 3sc = 10
Rnd 2. 2 inc, 2sc, 3 inc, 2sc, 1 inc = 16
Change to black color
Rnd 3. BLO 16sc
Rnd 4. 16sc
Rnd 5. 6sc, 3 dec, 4sc =13
Rnd 6. 6sc, 1 decT, 4sc =11
Rnd 7. 6sc, 1 dec, 3sc =10
Rnd 8-12. 10sc (5 rnds)
Rnd 13. BLO 10sc
Rnd 14-17. 10sc (4 rnds)
Cut thread only on the first leg
Fill firmly
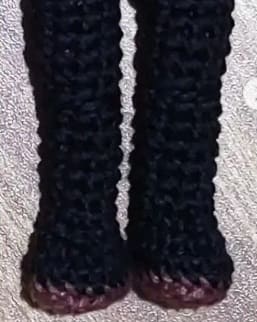
Continue Legs
Rnd 18. On the 2nd leg ch 2, join to the 1st leg with sc making sure it is in the correct position, 9 sc in the 1st leg, 2 sc over the ch, 10 sc in the 2nd leg, 2 sc over the ch = 24
Knit 12 sc and place the marker in the latter, since it will be the new beginning of the rounds
Fill firmly as you go
Rnd 19-22. 24sc (4 rnds)
Rnd 23. 4sc, 2 dec, 8sc, 2 dec, 4sc = 20
Rnd 24. 4sc, 1 dec, 8sc, 1 dec, 4sc =18
Rnd 25. BLO 18sc
Rnd 26. 18sc
Rnd 27. 4sc, 1 inc, 8sc, 1inc, 4sc = 20
Change to tobacco color
Rnd 28- 30. 20sc (3 rnds)
Arms Continue
Rnd 31. 5sc, 2 sc also taking the 1st arm making sure that the thumb is in the correct position, 7 sc, 2 sc also taking the 2nd arm making sure that the thumb is in the correct position, 4 sc = 20
Rnd 32. 5sc, (in the arm 1 dec, 1 sc, 1 dec), 7sc, (in the arm 1 dec, 1 sc, 1 dec), 4sc = 22
Rnd 33. 4sc, 1 dec, 1 sc, 1 dec, 5 sc, 1 dec, 1sc, 1 dec, 3sc =18
Rnd 34. (1sc, 1 dec) x 6 =12
Rnd 35. (2sc, 1 dec) x 3 = 9
Rnd 36- 37. 9sc
Fill firmly as you go
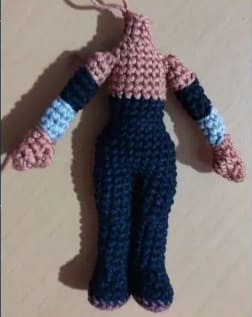
Head
Rnd 38. FLO 9 inc =18
Rnd 39. (1sc, 1 inc) x 9 =27
Rnd 40. (1 inc, 2sc) x 9 =36
Rnd 41. (5sc, 1 inc) x 6 =42
Rnd 42-50. 42sc (9 rnds)
Place 10mm safety eyes between rounds 45 and 46 with 6 visible points of separation
Fill in as you go
Rnd 51. (5sc, 1 dec) x 6 =36
Rnd 52. (2sc, 1 dec, 2sc) x 6= 30
Rnd 53. (3sc, 1 dec) x 6 = 24
Rnd 54. (1 dec, 2 sc) x 6=18
Rnd 55. (1sc, 1 dec) x 6 =12
Rnd 56. 6 dec
Close with a knitting needle
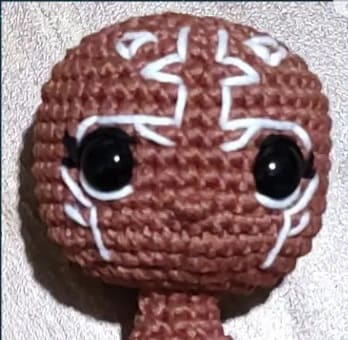
Embroider face details
Pants
In black color
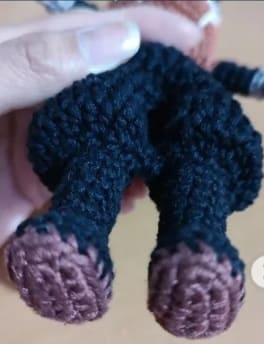
Work in the free loops of the 25th round of the body
Close with slst each round and go up with 1 ch
Rnd 1. 18sc
Rnd 2. BLO 18hdc
Rnd 3. (2hdc, 1 inc hdc) x 6 =24
Rnd 4. 24hdc
Rnd 5. (3hdc, 1 inc hdc) x 6 =30
Rnd 6. 30hdc
Rnd 7. (4hdc, 1 inc hdc) x 6 =36
Rnd 8. 36hdc
Rnd 9. (5hdc, 1 inc hdc) x 6= 42
Rnd 10. (6hdc, 1 inc hdc) x 6 =48
Rnd 11. 48hdc
Rnd 12. 24 dec of sc
Fasten off and leave a long tail to sew
Sew the outline of the “skirt” to the free threads that remained on round 13 of each leg (10 on each leg).
Be careful, there are 4 stitches left over which will be joined in the center, between the legs (two in front and two in the back)
Flatten the center part to give a bulky effect on each leg
Top/ Blouse
In black color
Work in the free loops of lap 2 of the pants
Start at the right side, under the arm
Close with slst each round and go up with 1 ch
Rnd 1-4. 18sc (4 rnds)
Now work back rows
Rows 1. 8sc, 1 ch and turn
Rows 2. 8sc, 1 ch and turn
Rows 3. 1 dec, 4sc, 1 dec, 1 ch and turn
Rows 4-6. 6sc, 1 ch and turn (3 rows)
Cut the thread
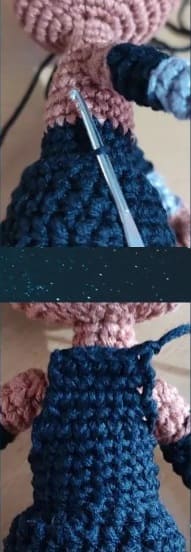
Now work the front in rows
Skip a base stitch (round 4) and in the next one hook a new yarn over and knit
Rows 1. 8sc, 1 ch and turn
Rows 2. 8sc, 1 ch and turn
Rows 3. 1 dec, 4 sc, 1 dec, 1 ch and turn
Rows 4-6. 6sc, 1 ch and turn (3 rows)
Rows 7. 6sc, 4 ch, 6 sc taking the back part, ch 4, and close with 1 slst
Rows 8. (6sc, 4sc over the ch, 6sc, 4sc over the ch) =20
Close with 1slst, cut and hide yarn
Hat Details
Upper Spikes x 2
In ash blue color
Rnd 1. MR of 4sc
Rnd 2. (1sc, 1 inc) x 2 =6
Rnd 3. (1sc, 1 inc) x 3 =9
Rnd 4. 9sc
Change to white color
Rnd 5. BLO (1 inc, 2sc) x 3 =12
Rnd 6. 12sc
Rnd 7. (1sc, 1 inc) x 6 =18
Rnd 8. 18sc
Rnd 9. 6sc, 6 inc, 6sc =24
Rnd 10. 24sc
Fasten off and leave a long tail to sew
With ash blue knit 10 slst on round 6 and 13 slst on round 9 on the opposite side of the inc on round 9
Fill firmly
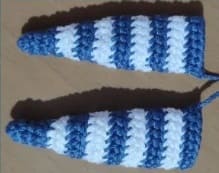
Side Spikes x 2
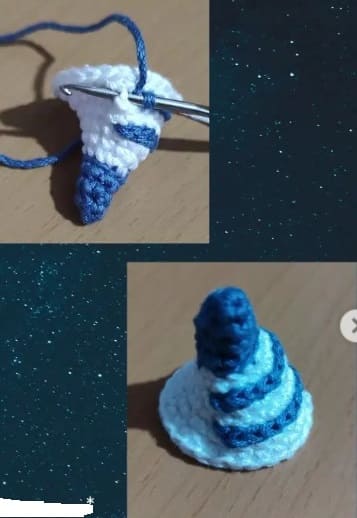
In ash blue color
Rnd 1. MR of 4sc
Rnd 2. (1sc, 1 inc) x 2 =6
Rnd 3. 6sc
Rnd 4. (1sc, 1 inc) x 3 =9
Change to white color
Rnd 5. BLO 9sc
Rnd 6. (1 inc, 2sc) x 3 =12
Change to ash blue color
Rnd 7. BLO 12sc
Rnd 8. 12sc
Change to white color
Rnd 9. BLO (3sc, 1 inc) x 3 =15
Rnd 10. 15sc
Change to ash blue color
Rnd 11. BLO 15sc
Rnd 12. 15sc
Change to white color
Rnd 13. BLO 15sc
Rnd 14. 15sc
Change to ash blue color
Rnd 15. BLO 15sc
Rnd 16. 15sc
Change to white color
Rnd 17. BLO 15sc
Rnd 18. 15sc
Change to ash blue color
Rnd 19. BLO 15sc
Rnd 20. 15sc
Fasten off and leave a long tail to sew
Fill very lightly
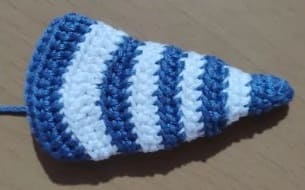
Back Spikes
In ash blue color
Rnd 1. MR of 4sc
Rnd 2. (1sc, 1 inc) x 2 =6
Rnd 3. (1sc, 1 inc) x 3 =9
Rnd 4. 9sc
Change to white color
Rnd 5. BLO (1 inc, 2sc) x 3 =12
Rnd 6. 12sc
Change to ash blue color
Rnd 7. BLO (1sc, 1 inc) x 6 =18
Rnd 8. 18sc
Change to white color
Rnd 9. BLO 18sc
Rnd 10. 18sc
Change to ash blue color
Rnd 11. BLO (2sc, 1 inc) x 6 =24
Rnd 12. 24sc
Change to white color
Rnd 13. BLO 24sc
Rnd 14. 8sc, 8hdc, 8sc =24
Change to ash blue color
Rnd 15. BLO 8sc, 8hdc, 8sc =24
Rnd 16. 8sc, 8hdc, 8sc =24
Change to white color
Rnd 17. BLO 5sc, 5 hdc, 4 inc hdc, 5 hdc, 5sc = 28
Rnd 18. 5sc, 7 hdc, 4 inc hdc, 7hdc, 5sc = 32
Change to ash blue color
Rnd 19. BLO 7sc, 18 hdc, 7sc = 32
Rnd 20. 7sc, 18hdc, 7sc =32
Rnd 21. 7sc, (BLO 18hdc), 7sc =32
Fasten off and leave a long tail to sew
Fill very lightly
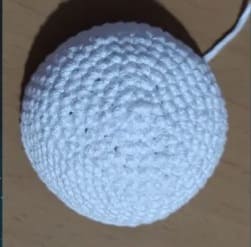
Hull / Base
In white
Rnd 1. MR of 6sc
Rnd 2. 6 inc =12
Rnd 3. (1sc, 1 inc) x 6 =18
Rnd 4. (1 inc, 2sc) x 6 =24
Rnd 5. (3sc, 1 inc) x 6 =30
Rnd 6. (2sc, 1 inc, 2sc) x 6 =36
Rnd 7. (5sc, 1 inc) x 6 =42
Rnd 8. 42sc
Rnd 9. (3sc, 1 inc, 3sc) =48
Rnd 10-13. 48sc (4 rnds)
Fasten off and leave a long tail to sew
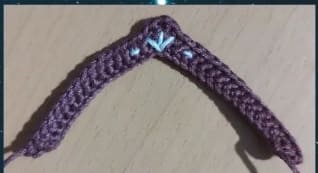
Crown
In mink brown color
work in lines
Crochet 32 ch and from the 2nd ch from the hook knit
Rows 1. 1 inc hdc, 29sc, 1 inc hdc, 1 ch and turn
Rows 2. 16 sc, in the same point (1hdc, 1dc, 1ch, 1dc, 1hdc), 16sc
Fasten off and leave a long tail to sew
Embroider details with gray thread.
Belt
In mink brown color
work in lines
Knit 25 ch and from the 2nd from the crochet hook knit
Rows 1. 24sc, 1 ch and turn
Rows 2. 24sc
Fasten off and leave a long tail to sew
With gray thread embroider details
Sew at the waist

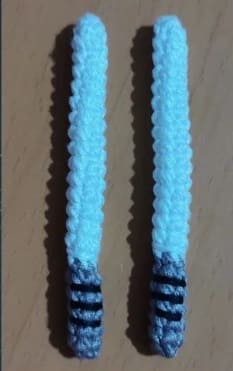
Sabers (x2)
In white
Rnd 1. MR of 4sc
Rnd 2. (1sc, 1 inc) x 2 =6
Rnd 3-16. 6sc (14 rnds)
Change to gray color
Rnd 17. BLO 6sc
Rnd 18-22. 6sc (5 rnds)
Introduce pipe cleaners to give rigidity
Close with a knitting needle
Embroider details with black thread
Final Details And Assembly
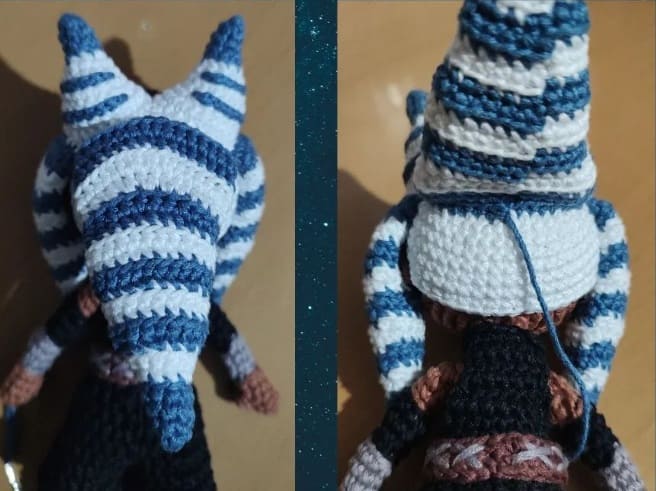
• Sew the helmet / base on the head at the height of the details of the face
• Sew the upper spikes on the head as shown in the images.
• Sew the tiara to the front
• Sew the side peaks one on each side under the top peaks
• Sew the back peak in the middle, back of the head, centered under the top peaks, flatten it a little so that it is wide and completely covers the back.
• If you want you can sew the sabers to the hands or leave them.
