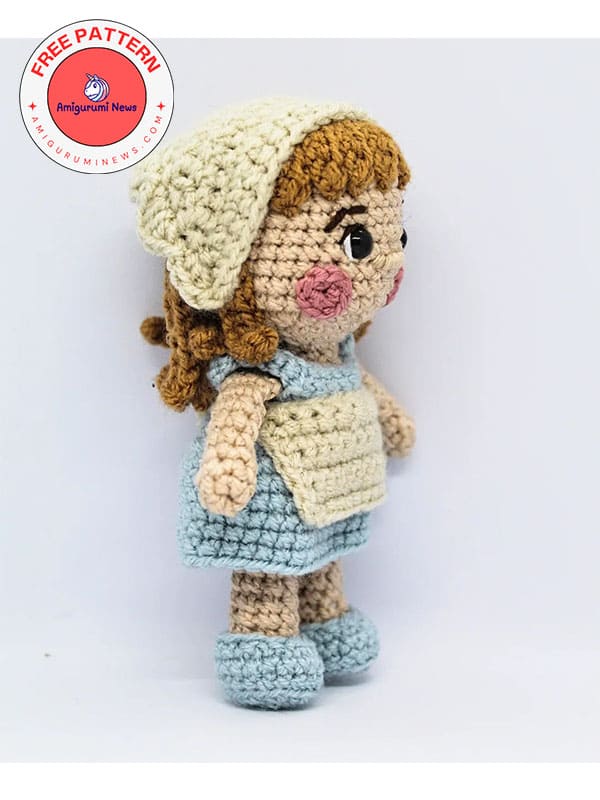
Emily doll crochet pattern is with you for free, friends. The cute crochet doll pattern we’ve been waiting for a long time is finally with us. Emily looks like she came from a fairy tale land with her apron and vintage clothing style. You can make her outfit and hair bonnet in the colors you want, and you can customize Emily for yourself. The crochet doll pattern from the most popular amigurumi is now below, step by step.
Crochet doll emily pattern
Via: tobbys_handcraft
Size: Doll tall 5.5 inches when made with the indicated yarn and hook.
Materials:
DK weight yarn in:
Beige
Brown
Pink
White
Light blue
4mm hook
Tapestry needle
Scissors
Fiberfill
Stitch marker
Skill needed:
MR- magic ring
sc- single crochet
dc- double crochet
hdc- half double crochet
inc- increase
dec- decrease
ch- chain
BLO- back loop only
FLO- front loop only
Legs (make 2)
First leg:
Using beige yarn.
R1. Start 6 sc in a MR (6)
Tug tail to tighten ring.
Mark the last stitch.
Move marker each round.
R2. 6 inc (12)
R3. BLO: 12 sc (12)
R4. 2sc, 4dec, 2sc (8)
R5-11. (7 rounds): 8 sc (8)
At the end of round 11, fasten off.
Second leg:
Using beige yarn.
R1-11. Repeat rounds 1-11 of first leg.
At the end of round 11, don’t fasten off and continue joining the legs.
Joining legs:
R12. ch 2, working on first legs, sc in the first st made, sc in each of next 7 sts.
Working in ch2, sc in each of next 2 ch.
Working on second legs, sc in each of next 8 sts.
Working in unused loops on other side of ch 2, sc in each of next ch (20)
Mark the last st made.
Body
R13-18. (6 rounds): 20 sc (20)
Start stuffing legs and body, continue stuffing as you go.
R19. 2sc, 1dec (15)
R20. 15 sc (15)
R21. 1sc, 1dec (10)
Neck
R22. 1sc, 1dec (5)
R23. 5 sc (5)
Head
R24. 5 inc (10)
R25. (2sc,1inc)x3, 1sc (13)
R26. 1sc, 1 inc (21)
R27. 2sc, 1 inc (28)
R28. 3sc, 1 inc (35)
R29-38. (10 rounds): 35 sc (35)
R39. 3sc, 1dec (28)
R40. 2sc, 1dec (21)
Stuffing the head.
R41. 1sc, 1dec (14)
R42. 7 sc (7)
Close the head sewing.
Arms (make 2)
Using beige color.
R1. Start 6 sc in a magic ring (6)
R2-9. (8 rounds): 6 sc (6)
Don’t stuff arms.
Fasten off leaving a long tail for sewing.
Cheeks (make 2)
Using pink color.
R1. 8 sc in a magic ring (8)
Tug tail to tighten ring.
Knot the ends and secure.
Fasten off and leave a long tail for sewing.
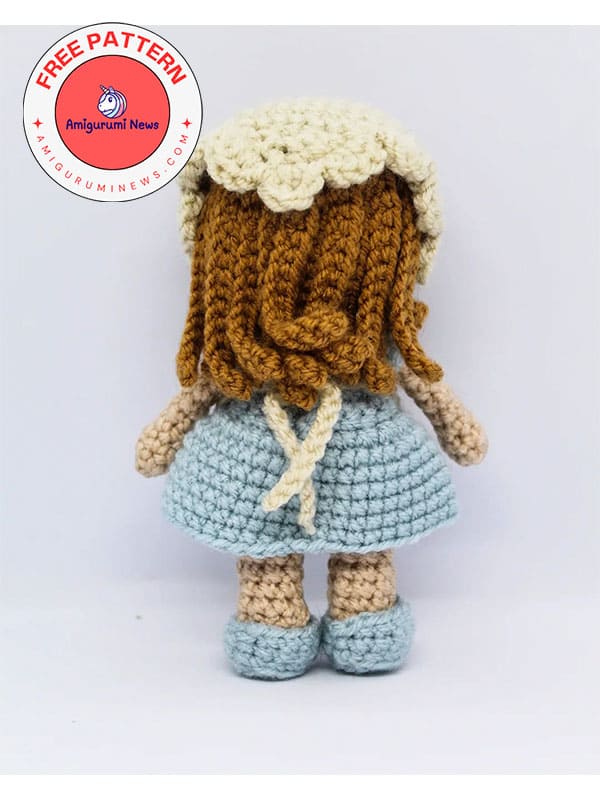
Hair
Using brown color.
R1. Start 6 sc in a MR (6)
R2. 6 inc (12)
R3. 1sc, 1 inc (18)
R4. 2sc, 1 inc (24)
R5. 24 sc (24)
Now the strands of hair begin (5)
S 1-3. 6 ch, 5sc, 1 slst (5st)
S 4-20. 16 ch, 15 sc, 1 slst (15 sc)
S 21-23. 6 ch, 5 sc, 1 slst (5 st)
Fasten off leaving a long tail for sewing.
Secure the hair to the head with a marker needle (the short strands in the front and the long ones in the back).
Sewing the hair to the head.
Assembly
Arms: sew the arms to both sides between rounds 19 and 20.
Cheeks: sew the cheeks to both sides between 1st apart from the eyes.
Eyes: sew the eyes using a black embroidery thread between rounds 31 and 32, leaving 4st between one eye and the other.
Nose: sew the nose with beige yarn between round 29 and 30, leaving 1st between the nose and the eyes.