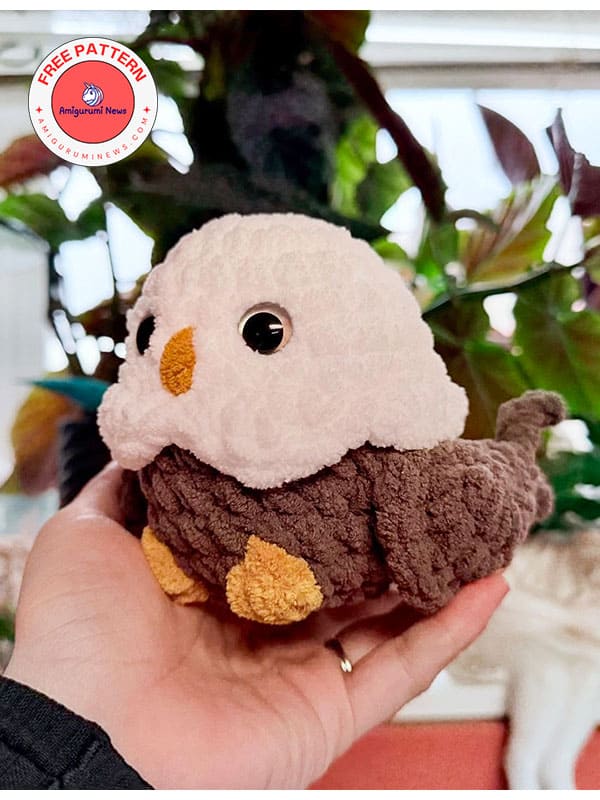
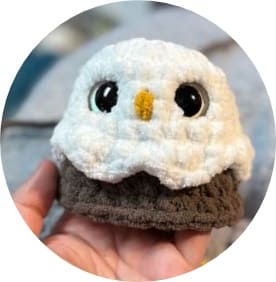
How about making a small crochet eagle? I think it will be a very fun amigurumi project. A wonderful crochet eagle pattern that is both easy to make and honorable is coming together with you, our valued readers. The Eagle, the symbol of America, will be a guest in our homes as a crochet amigurumi. It is made with plush yarn and its small size makes it a wonderful amigurumi toy. This special crochet eagle amigurumi that you can prepare for your children is now with you step by step. You can browse our categories for more such different and special crochet animals.
Amigurumi crochet eagle ellie pattern
Via: fixintostitch
Materials
Yarn of choice in 3 colors (I used bernat)
Colour A: body (brown)
Colour B: head (white)
Colour C: feet and beak (yellow)
Crochet hooks (I used 7mm and 6.5mm)
Safety eyes- unless you choose to embroider them (I used 20mm eyes)
Yarn needle
Stuffing
Scissors
Stitch markers
Abbreviations
R- round
ch- chain
st- stitch
sc- single crochet
hdc- half double crochet
dc- double crochet
dec- decrease
inc- increase
cc- colour change
BLO- back loop only
FLO- front loop only
BO- bobble (made with 4 dc’s)
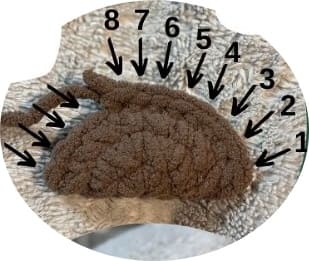
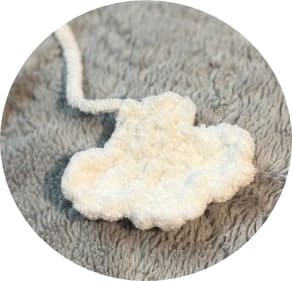
Wings (make 2)
Wings are made in colour A using 7mm hook.
R1. 8 sc in MR (8)
R2. inc x8 (16)
R3. (sc,inc)x8 (24)
Fold the piece half and sc 8 to close, there will be 4 stitches remaining.
From your last sc, (ch3, slst 2 down the ch, sc into next st)x3, ch4, slst3 down the ch, sc in last space and FO.
Leave a long enough yarn tail to thread through the wing to the tip and to sew to the body.
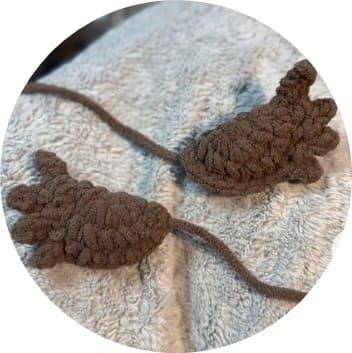
The remaining 4 stitches you will use to finish closing and make the feathers.
The 8 stitches used to close the wing.
Tail
Tail is worked in rows, use a hook that is 5-1 size smaller than you used for the rest of the eagle.
Make the tail in colour B using a 6.5mm hook.
R1. ch4, working in the 2nd stitch from the hook sc 3, ch 1, turn (3)
R2. inc, sc, inc, ch 1, turn (5)
R3. sc 5, ch 1, turn (5)
R4. (3 dc in the same st, slst in the next st)x2, 3 dc in the same st, ch 2, slst back into last st FO.
Leave a long enough yarn tail to weave in. The starting yarn tail can be hidden when we crochet the tail to the body.
You may also choose to sew the tail on if you prefer.
Head and body
Start in colour B, using a 7mm hook.
R1. 8 sc in MR (8)
R2. inc x8 (16)
R3. (sc,inc)x8 (24)
R4-7. sc around (24) *4 rounds*
Be sure to mark the first back loop in the round 7 so you can go back to it.
Neck feathers:
Working in the FLO: (slst, hdc, 2 dc in the same st, hdc)x6, slst into the first slst you made in this row, FO. Leave long enough tail to sew down the neck feathers later on.
R8. Working in the BLO: attach colour A to first back loop that you marked, sc in each stitch around (24)
R9-11. sc around (24) *3 rounds*
Use the yarn tail you left from the neck feathers to sew them down to the body. Add eyes and beak.
We will add the feet and one stitch of the tail in the next round. The feet are made with BO stitches and with colour C.
You may have to adjust your stitch count to accommodate for different tension etc. Use the 3 stitches between the eyes as a guide of where to put your 3 stitches between the feet.
In round 12 we will only attach one stitch of the tail, we will continue attaching the tail in round 13.
R12. 9sc, BO, 3 sc, BO, 9 sc, 1 sc (though tail and body) (24)
R13. Finish adding tail with 2 sc, dec, (2sc,dec)x5 (18)
Stuff your eagle now, leave a bit of space to finish your last round.
R14. dec x9 (9)
Finish stuffing. You will want your eagle to be quite firm.
FO and weave in yarn tail.
Sew the wings to the body. Place them approximately 2 stitches back from the feet and right along the neck feathers.