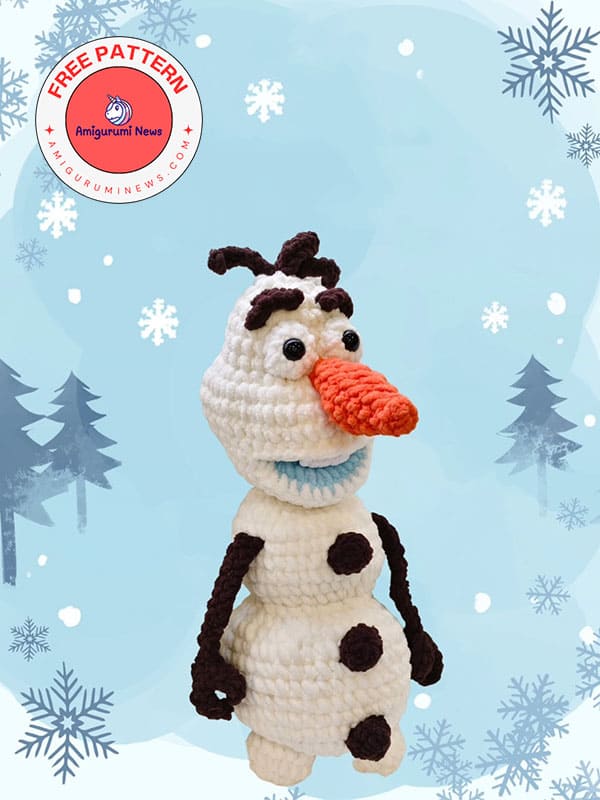
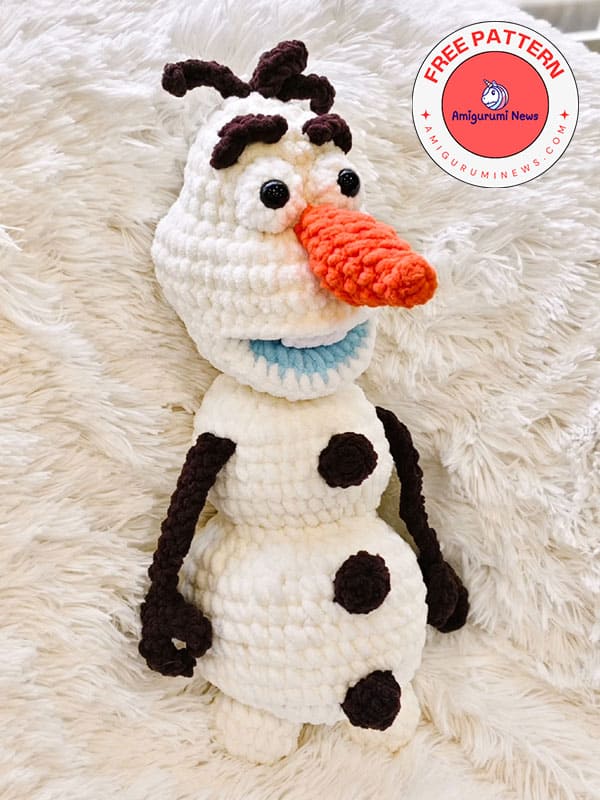
Winter-themed crochet projects are always a favorite, and this crochet snowman amigurumi inspired by Olaf is a perfect example of why. With its friendly smile, carrot-shaped nose, and soft textured body, this amigurumi snowman brings warmth and joy to any handmade collection. Whether you are decorating your home for winter or creating a heartfelt handmade gift, this crochet Olaf-inspired design is both charming and timeless.
This project is especially appealing for crocheters who love character-inspired creations but still want a cozy, handmade feel. Thanks to its simple shapes and clear details, it works beautifully as a decorative piece, a toy, or even a festive shelf accent during the winter season.
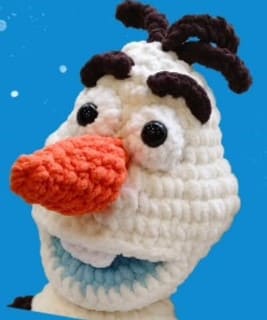
Crochet snowman olaf amigurumi
One reason this design stands out is its instantly recognizable snowman look. The rounded body, twig-like arms, and expressive face make this crochet snowman amigurumi feel lively and full of personality. Using plush or velvet yarn enhances the softness, giving the finished piece a cuddly and high-quality appearance.
Many crafters search for a crochet olaf free pattern because it combines nostalgia with creativity. This type of pattern allows you to recreate a beloved winter character while still adding your own handmade touch through color choices and small custom details.
Another advantage of this crochet olaf free pattern style is its versatility. You can adjust the size by changing yarn weight or hook size, making it suitable for beginners who want a manageable project as well as experienced crocheters looking for a quick seasonal make.
• 5.5 mm crochet hook
• Blanket yarn
– White for body
– Slightly different shade of white for eyes (optional)
– Orange for nose
– Dark brown for hair, arms, eyebrows, and buttons.
• Safety eyes (16mm)
• Polyester stuffing
• Stitch markers
• Yarn needle for sewing
Abbreviations:
MC: magic circle
ch: chain
sc: single crochet
inc: increase
dec: decrease
slst: slip stitch
FLO: front loop only
BLO: back loop only
CC: change color
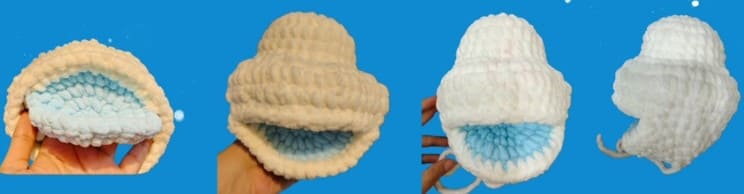
Olaf the mouth
Start with light blue yarn:
R1: MC, 8 sc (8)
R2: inc x8 (16)
R3: (sc,inc)x8 (24)
R4: (scx2,inc)x8 (32)
FO. No need to leave a tail because it will be crocheted directly into the head.
Olaf head
Start with white yarn.
R1: MC 8 sc [8]
R2: inc x 8 [16]
R3: (sc, inc) x 8 [24]
R4: (sc x 5, inc) x 4 [28]
R5-R7: sc x 28 [28] for 3 rounds
R8: (FLO) sc x 4, inc x 4, (sc, inc) x 6, sc, inc x 4, sc x 3 [42]
R9: (sc x 2, inc) x 14 [56]
R10: sc x 56 [56]
R11: (sc x 2, dec) x 5, (sc x 3, dec) x 3, (sc x 2, dec) x 5, sc [43]
Attach mouth in the next two rounds.
Fold the mouth and hold it against the head.
In R12, insert hook into the next stitch of the head, then the next stitch of the mouth, yarn over and pull through both to complete a sc. Attach 14 mouth stitches.
R12: (sc x 2, dec) x 3, sc, sc x 14 with mouth, sc, (dec, sc x 2) x 3, dec, sc [36] In R13, attach the remaining 18 mouth stitches by inserting the hook into the next stitch of the mouth and completing a sc.
R13: sc x 10, sc x 18 around the remaining stitches of mouth, sc x 11 [39] Note: In the next round, work BLO only in the mouth stitches, including decreases. All other stitches are worked normally.
R14: sc x 4, dec, sc x 4, BLO over next 16 stitches (including decreases), dec, (sc x 4, dec) x 4, sc x 3 [33]
R15: sc x 6, (dec, sc x 2) x 4, dec, sc x 9 [28]
R16: (sc x 2, dec) x 7 [21]
Stuff the head moderately, keeping the mouth open.
R17: (sc, dec) x 7 [14]
R18: dec x 7 [7]
FO, leaving a long tail. Weave through remaining stitches, pull tight, and close invisibly.
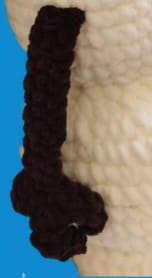
Olaf arms
Make 2. Use brown yarn.
Leave a tail at the start for sewing.
Ch 18 (main color)
Start from the 2nd chain and do 4 sc (finger 1)
Ch 5.
Start from the 2nd chain and do 4 sc (finger 2)
Ch 5.
Start from the 2nd chain and do 4 sc (finger 3)
Make a slst in the next chain of the main chain.
Make 13 sc along the main chain. This completes the arm.
FO and leave a long tail for sewing.
Olaf legs
Make 2. Use white yarn.
R1: MC, 8 sc (8)
R2: inc x8 (16)
R3-4: sc x 16 (16) (2 rounds)
R5: sc x7
FO and leave the remaining 9 stitches unworked. Leave a long tail for sewing.
While sewing in the body, sew in a way that the side with more rows faces the outer side of the body.
Stuff the leg while attaching it to the body.
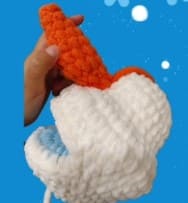
Nose
Start with orange yarn.
R1: MC, 4 sc (4)
R2: (sc,inc)x2 (6)
R3: (scx2,inc)x2 (8)
R4: (scx3,inc)x2 (10)
R5: (scx4,inc)x2 (12)
R6-7: sc x 12 (12) (2 rounds)
R8: sc x 2, dec x4, sc x2 (8)
Stuff the nose.
R9: sc x2, dec x2, sc x2 (6)
FO and leave a long tail for sewing.
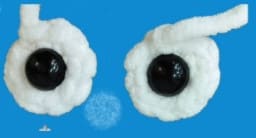
Eyes
Make 2, use a slightly different shade of white.
R1: MC, 8 sc (8)
FO and leave a long tail for sewing.
Insert a safety eye in the center of the magic circle, or embroider the eye using black yarn.
Tooth
Make only one.
Use slightly different color of white yarn if possible.
Ch 4,
R1: Start from the 2nd chain and work along the opposite side of chain, inc, sc, inc (5)
FO and keep a long tail for sewing.
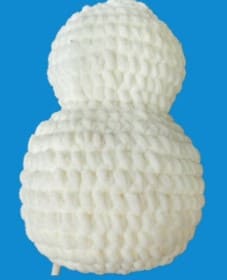
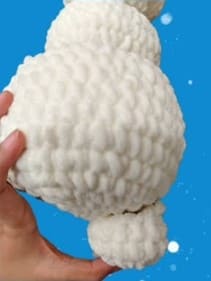
Olaf body
Start from the bottom. Use white yarn.
Keep stuffing after every few rounds.
R1: MC, 8 sc [8]
R2: inc x 8 [16]
R3: (sc, inc) x 8 [24]
R4: (sc x 2, inc) x 8 [32]
R5: (sc, inc, sc x 2) x 8 [40]
R6: (sc x 7, inc) x 5 [45]
R7-R12: sc x 45 [45] (6 rounds)
R13: (sc x 7, dec) x 5 [40]
R14: (sc x 3, dec) x 8 [32]
R15: (sc, dec, sc) x 8 [24]
Second Part of Body.
R16: (BLO in the entire round) (sc x 2, inc) x 8 [32]
R17: (sc, inc, sc x 2) x 8 [40]
R18-R22: sc x 40 [40] (5 rounds)
R23: (sc x 3, dec) x 8 [32]
R24: (sc, dec, sc) x 8 [24]
R25: (sc, dec) x 8 [16]
FO and leave a long tail for sewing.
Buttons
Make 3. Use brown yarn.
R1: MC, 6 sc (6)
R2: (sc,inc)x3 (9)
FO and leave a long tail for sewing.
Hair
Make 3 strands. Use brown yarn.
Leave a tail at the start for sewing.
Ch 9.
Start from the 2nd chain and make 8 slst.
FO and leave a tail for sewing.
Assembly the olaf
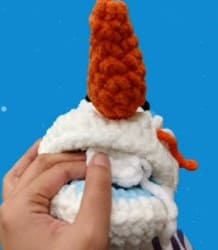
Nose:
Sew the nose so that the inward curve lies directly on top of the mouth area. Make sure the nose is centered.
Teeth:
Sew the teeth inside the mouth slightly sticking out.
Eyes:
Sew the eyes on both sides of the nose, close together, so they touch the nose and bulge outward.
Legs:
Sew the legs to the bottom of the body.
Attach them so the side with 5 rounds faces outward and the side with 4 rounds faces inwards.
Hair:
Sew the hair to the top of the head at R1, placing strands close together.
Eyebrows:
Make the eyebrows using dark brown yarn by working sc over one round above the eyes. Around 4-5 sc per eyebrow is sufficient.
Head:
Sew the head to the body, facing forward securely.
Arms:
Sew the arms to each side of the body between R19-R20, aligning them with the head.
Buttons:
Sew two buttons on the lower part of the body and one button on the upper part, evenly spaced and centered.