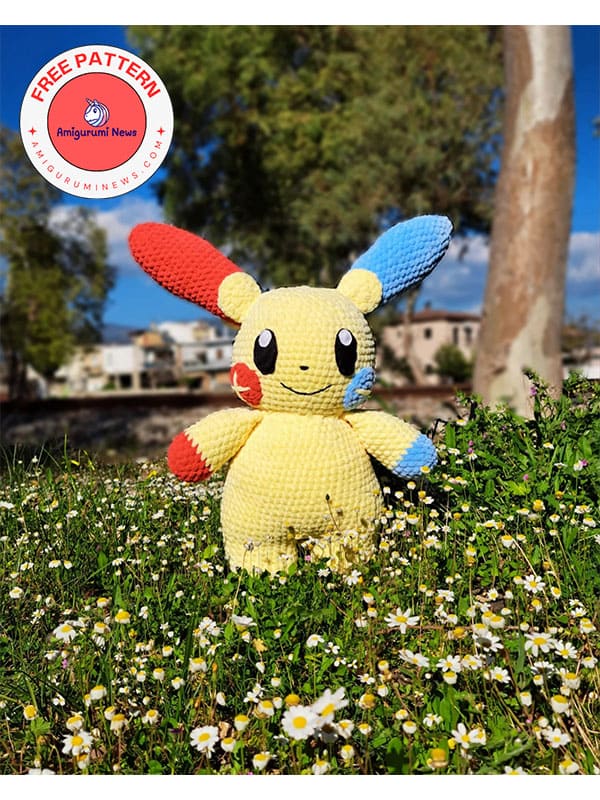
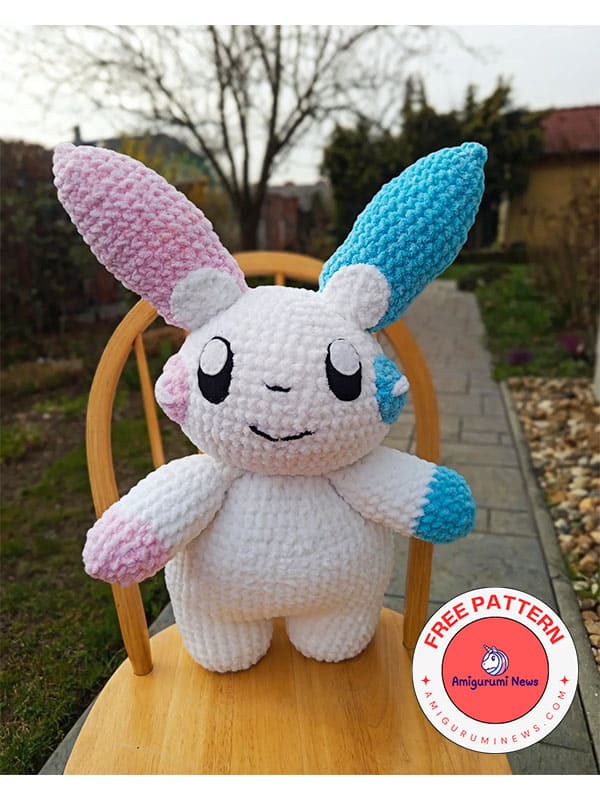
I came to you in the middle of the week with pokemon crochet patterns that you have not seen before. This wonderful crochet pokemon Plusle and Minun is with you for free. It will get its name according to the color change. If you want, you can complete the Plusle and Minun pokemon characters by making it in two colors. Those who like to make crochet pokemon amigurumi series will love this. These pokemon characters, which resemble a pikachu, cheer like cheerleaders. Although they act as cheerleaders, they can use their electricity like a pikachu. Here is this cute crochet pokemon Plusle and Minun with you. Stay tuned for more free pokemon crochet patterns like this.
Loops and thread skinny chenille in pink, blue and white (feel free to pick and yarn and colour of your choice).
Andy medium acrylic yarn in white and black (for embroidery)
3.75mm hook (feel free to use any hook size)
Stitch marker
Sewing needle
Fiberfill
Scissors.
Abbreviations:
MR- magic ring
sc- single crochet
inc- increase
dec- decrease
slst- slip stitch
ch- chain
FO- fasten off
Head
R1. 8 sc in MR (8)
R2. inc x8 (16)
R3. (sc,inc)x8 (24)
R4. (2sc,inc)x8 (32)
R5. (3sc,inc)x8 (40)
R6-7. (2 rounds): 40 sc around (40)
R8. (4sc,inc)x8 (48)
R9. (5sc,inc)x8 (56)
R10-11. (2 rounds): 56 sc around (56)
R12. (6sc,inc)x8 (64)
R13-18. (6 rounds): 4 sc around (64)
R19. (6sc,dec)x8 (56)
R20-21. (2 rounds): 56 sc around (56)
R22. (5sc,dec)x8 (48)
R23. (4sc,dec)x8 (40)
R24-25. (2 rounds): 40 sc around (40)
Start stuffing, stuff as you go.
R26. (3sc,dec)x8 (32)
R27. (2sc,dec)x8 (24)
R28. (sc,dec)x8 (16)
R29. dec x8 (8)
FO, hide the tail.
Feet (make 2)
R1. 6 sc in MR (6)
R2. inc x6 (12)
R3. (1sc,inc)x6 (18)
R4. (2sc,inc)x6 (24)
R5-9. (5 rounds): 24 sc around (24)
FO the first leg, no need to leave a tail.
Repeat these steps but do not fasten off the 2nd leg.
We will be working on continuous rounds.
Body starts here:
Ch 2 (this is to bridge to the other legs).
R10. sc across to the first stitch of the other leg to attach both legs (this will be first stitch of this round) 23 sc, slst on the first stitch “where your marker is” (this is to prevent a hole, this does not count), 2sc in the ch, 24 sc, 2 sc in the ch (52).
Body
R11. 52 sc around (52)
R12. (9sc,inc)x5, 2 sc (57)
R13. (10sc,inc)x5, 2 sc (62)
R14. 60 sc around, dec (61)
R15-18. (4 rounds): 61 sc around (61)
R19. 59sc, dec (60)
R20-24. (5 rounds): 60 sc around (60)
R25. (10sc,dec)x5 (55)
R26. (9sc,dec)x5 (50)
R27-28. (2 rounds): 50 sc around (50)
R29. (8sc,dec)x5 (45)
R30. (7sc,dec)x5 (40)
R31. (6sc,dec)x5 (35)
R32. 35 sc around (35)
R33. (5sc,dec)x5 (30)
R34. (4sc,dec)x5 (25)
FO, leave a tail for sewing.
After round 11, it should look like this.
At the end or the rounds, your body should look like this.
Arms: (make 2)
You can start with either pink or blue.
R1. 6 sc in MR
R2. inc x6 (12)
R3. (sc,inc)x6 (18)
R4-6. (3 rounds): 18 sc around (18)
Colour change to white.
R7-13. (7 rounds): 18 sc around (18)
Start stuffing. Do not over stuff.
R14. (sc,dec)x6 (12)
R15-16. (2 rounds): 12 sc around (12)
Fold it in half and 6 sc across to close.
Leave a tail for sewing.
Fold in half, sc across.
Should look like this at the end of round.
Both arms.
Ears: (make 2-1 blue, 1 pink)
You can start with either pink or blue.
R1. 4 sc in MR (4)
R2. inc x4 (8)
R3. (sc,inc)x4 (12)
R4. (2sc,inc)x4 (16)
R5. 16 sc around (16)
R6. (3sc,inc)x4 (20)
R7-8. (2 rounds): 20 sc around (20)
R9. (4sc,inc)x4 (24)
R10-14. (5 rounds): 24 sc around (24)
R15. (4sc,dec)x4 (20)
R16-20. (5 rounds): 20 sc around (20)
R21. (3sc,dec)x4 (16)
R22-23. (2 rounds): 16 sc around (16)
Stuff lightly.
R24. (2sc,dec)x4 (12)
R25. 12 sc around (12)
FO, leave a tail for sewing.
At the end, both ears should look like this.
Cheeks: (make 2-1 blue, 1 pink)
You can start with either pink or blue.
R1. 6 sc in MR (6)
R2. inc x6 (12)
R3. (sc,inc)x6, slst on the first stitch (18)
FO, leave a long tail for sewing.
Embroider A (+) and (-) on the cheek.
At the end, both cheeks should look like this.
Ball tail
In white.
R1. 6 sc in MR (6)
R2. inc x6 (12)
R3. (sc,inc)x6 (18)
R4-6. (3 rounds): 18 sc around (18)
R7. (sc,dec)x6 (12)
Lightly stuff.
FO, and leave a tail.
Tail plus minus sign:
Tail: (pink yarn):
Start by making 11 chains
R1. Starting on the 2nd chain away from the hook, 10 dc
R2. ch 1 then flip, 10 sc
FO, weave the tails.
At the end, it should look like this.
Tail: (blue yarn):
R1. Start on the middle, 4 sc (there should be 3 stitches on both sides)
R2-4. (3 rounds): ch 1 then flip, 4 sc
FO, use a pink yarn for sewing.
White ear rounds (make 4)
In white yarn.
R1. 6 sc in MR (6)
R2. inc x6 (12)
R3. 2sc, 8 inc, 2 sc (20)
FO, leave a long tail for sewing.
Assemble:
1. Sew the back loops of the white ear parts on the bottom of the ears, aligning the flat side of the white ear on rounds 19-25, front and back. (photo 1).
2. Sew ears to the head between rounds 4-9. (pink on the left, blue on right) (photo 2).
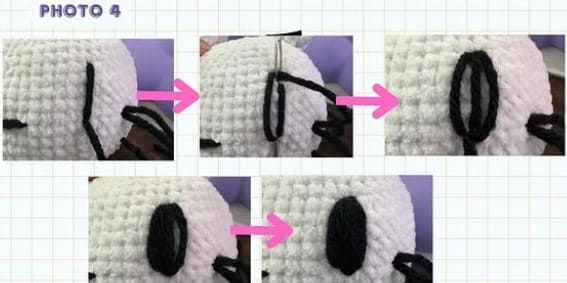
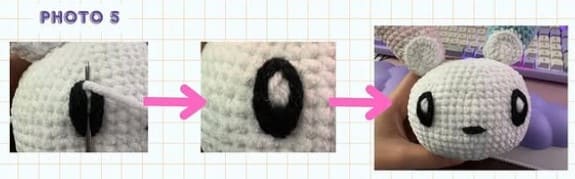
3. Embroider pupils aligning the ears on rounds 15-20 using black yarn. (photo 4).
4. Embroider iris in between the pupils on rounds 17-19. Use the same steps as the pupil. (photo 5).
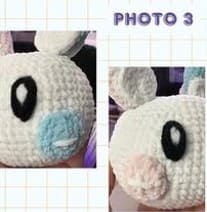
5. Sew cheeks on both sides between rounds 9-15 just beside the eyes, 1 stitch apart. (photo 3).
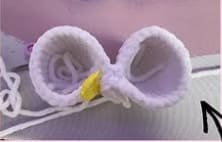
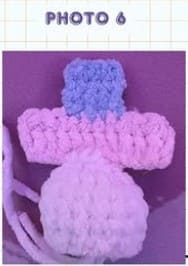
6. Sew the + tail to the top of the tail ball. Use white yarn, make sure to sew the middle part of the tail. (photo 6).
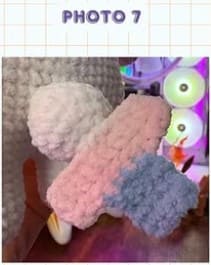
7. Sew the tail at the back between rounds 14-16 of the body. (photo 7).
8. Sew arms on both sides between rounds 31-32, 13 stitches apart. (photo 8).
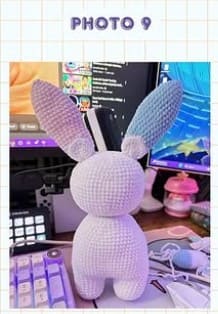
9. Sew the head (round 4-5) to the body. (photo 9).
To provide the best experiences, we use technologies like cookies to store and/or access device information. Consenting to these technologies will allow us to process data such as browsing behavior or unique IDs on this site. Not consenting or withdrawing consent, may adversely affect certain features and functions.
Functional
Always active
The technical storage or access is strictly necessary for the legitimate purpose of enabling the use of a specific service explicitly requested by the subscriber or user, or for the sole purpose of carrying out the transmission of a communication over an electronic communications network.
Preferences
The technical storage or access is necessary for the legitimate purpose of storing preferences that are not requested by the subscriber or user.
Statistics
The technical storage or access that is used exclusively for statistical purposes.The technical storage or access that is used exclusively for anonymous statistical purposes. Without a subpoena, voluntary compliance on the part of your Internet Service Provider, or additional records from a third party, information stored or retrieved for this purpose alone cannot usually be used to identify you.
Marketing
The technical storage or access is required to create user profiles to send advertising, or to track the user on a website or across several websites for similar marketing purposes.