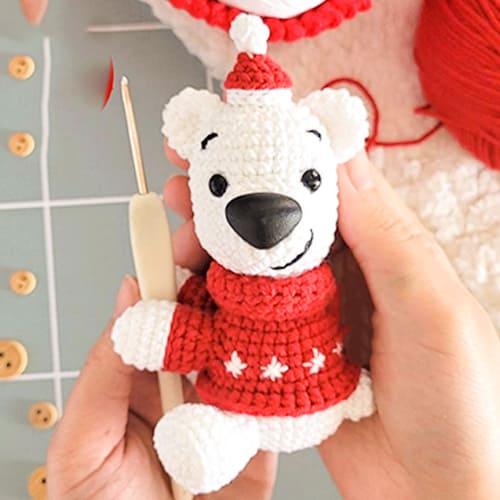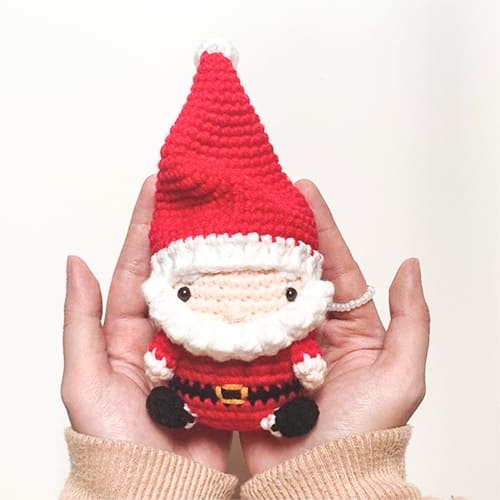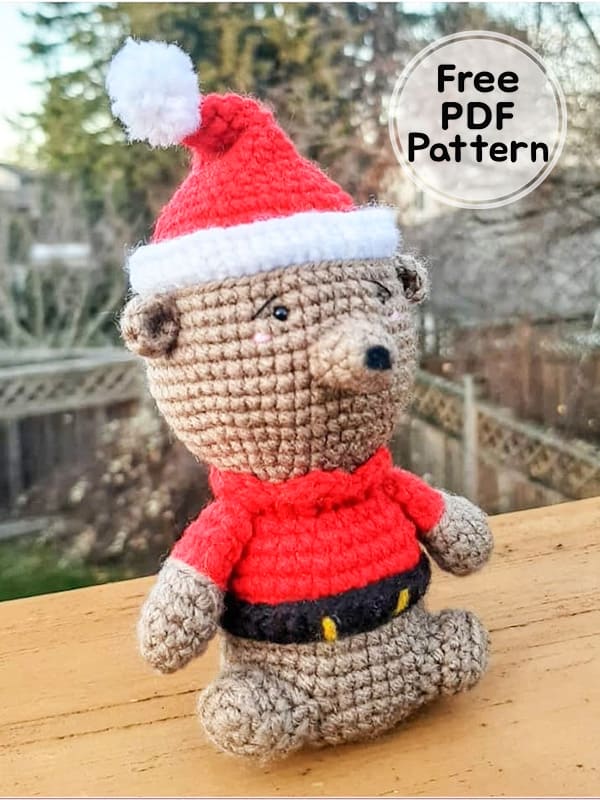
Greetings my friends, today I will share with you the santa crochet teddy bear amigurumi pattern. If you like to use amigurumi toys while decorating your Christmas tree or any place in your home at Christmas time, this is the pattern for you. Follow the step by step amigurumi pattern instruction and complete the cute teddy bear. It is an easy amigurumi pattern for beginners. Now I invite you to the free amigurumi teddy bear pattern instruction. Merry Christmas in advance!
Crochet Santa Bear Amigurumi Free PDF Pattern
Designer: highmigurumi
Materials
• 1 hook of 2.5 mm
• 1 embroidery needle
• 1 sewing needle
• Fiberfill for stuffing
• 2 safety eyes (3 mm)
– Yarn:
• Brown, red, black, white and 10 cm of yellow and pink 100% acrylic (patons astra)
• Black sewing thread
Abbreviations
MR: Magic ring
Sc: Single crochet
Dc: Double crochet
Slst: Slip stitch
Ch: Chain
Inc: Increase
Dec: Decrease
BLO: Back loop only
FLO: Front loop only
Size: 14 cm hat included.
Arms (Make 2)
With brown yarn:
Rnd 0 : In a MR, crochet 6 sc (6)
Rnd 1 : One inc in each stitch (12)
Rnd 2 : (5sc, inc) x2 (14)
Rnd 3 : 1 sc in each stitch (14)
Rnd 4 : (5sc, dec) x2 (12)
With red yarn:
Rnd 5 : 1 sc in each stitch (12)
Rnd 6 : (4sc, dec) x2 (10)
Rnd 7 : (3sc, dec) x2 (8)
Close and leave a piece of yarn about 15 cm while cutting.
Feet (Make 2)
With brown yarn:
Rnd 0 : In a MR, crochet 6 sc (6)
Rnd 1 : One inc in each stitch (12)
Rnd 2 : In BLO, crochet 12 sc (12)
Rnd 3 : 1 sc in each stitch (12)
Close and leave a piece of yarn about 15 cm while cutting. Stuff feet.
Body
With brown yarn:
Rnd 0 : In a MR, crochet 6 sc (6)
Rnd 1: One inc in each stitch (12)
Rnd 2 : In BLO, (1sc, inc) x6 (18)
Rnd 3 : (2sc, inc) x6 (24)
Rnd 4 : (3sc, inc) x6 (30)
Rnd 5 : (4sc, inc) x6 (36)
Rnd 6 : (5sc, inc) x6 (42)
Rnd 7: (5sc, dec) x6 (36)
Rnd 8 : 1 sc in each stitch (36)
Rnd 9 is divided into two rows, one on the back loop and another on the front loop to form the black belt.
With black yarn:
Rnd 9a : In FLO, crochet 36 dc (36)
Place 2 small branches of yellow yarn to form the buckle of the belt.
With red yarn:
Rnd 9b : In BLO, crochet 36 sc (36)
Rnd 10 -Rnd 11 : 1 sc in each stitch (36)
Rnd 12 : (4sc, dec) x6 (30)
Rnd 13 : (3sc, dec) x6 (24)
Rnd 14 : (2sc, dec) x6 (18)
Start to stuff the body.
Rnd 15 is divided into two rows, one on the back loop and another on the front loop to form a high collar.
Head
With red and brown yarn:
Rnd 15a In FLO, crochet with red yarn : (3dc in the same stitch + 2sc in the next 2 stitches) x6 (30)
Rnd 15b : In BLO, crochet with brown yarn 24 sc, i.e. (2sc, inc) x6 (24)
Leave a 15 cm piece of red yarn to adjust the collar.
Continue with brown yarn.
Rnd 16 : (3sc, inc) x6 (30)
Assemble with the help of an embroidery needle the groups of dc on row 16.
Rnd 17 : (4sc, inc) x6 (36)
Rnd 18 : (5sc, inc) x6 (42)
Rnd 19 : (6sc, inc) x6 (48)
Rnd 20 : (7sc, inc) x6 (54)
Head/ Hat
Rnd 21 to Rnd 28 : 1 sc in each stitch (54)
Place the 2 safety eyes on Rnd 27, separated by 7sc, eyebrows and checkbones.
Rnd 29 is divided into two rows, one on the back loop and another on the front loop to form the white border of the hat.
With white yarn:
Rnd 29a : In FLO, crochet 54 dc (54)
Rnd 29b : In BLO, crochet 54 sc (54)
With red yarn:
Rnd 30 : (7sc, dec) x6 (48)
Rnd 31 : (6sc, dec) x6 (42)
Rnd 32 (5sc, dec) x6 (36)
Start to stuff head and hat as things progress.
Rnd 33 : (4sc, dec) x6 (30)
Rnd 34 : (3sc, dec) x6 (24)
Rnd 35 : (2sc, dec) x6 (18)
Rnd 36 : 1 sc in each stitch (18)
Rnd 37: (7sc, dec) x2 (16)
Rnd 38 : (6sc, dec) x2 (14)
Rnd 39 : (5sc, dec) x2 (12)
Rnd 40 1 sc in each stitch (12)
Rnd 41 : (dec) x6 (6)
No stuffing in the hat.
Close with a slst, leave a piece of yarn about 10cm and close the hat.
Add a cute white mini pompom at the end of the hat.
Muzzle
With brown yarn:
Rnd 0 : In a MR, crochet 6 sc (6)
Rnd 1 : One inc in each stitch (12)
Rnd 2 : (4sc, dec) x2 (10)
Leave a piece of yarn about 10cm, assembly to the head between Rnd 23 and Rnd 25. You can add a small black piece of felt on the muzzle.
Ears (Make 2)
With brown yarn:
Rnd 0 : In a MR, crochet 6 sc (6)
Rnd 1 : Turn your work, 1 sc in each stitch. Leave a piece of yarn about 10 cm, assembly to the head on Rnd 27.
Merry Christmas!


