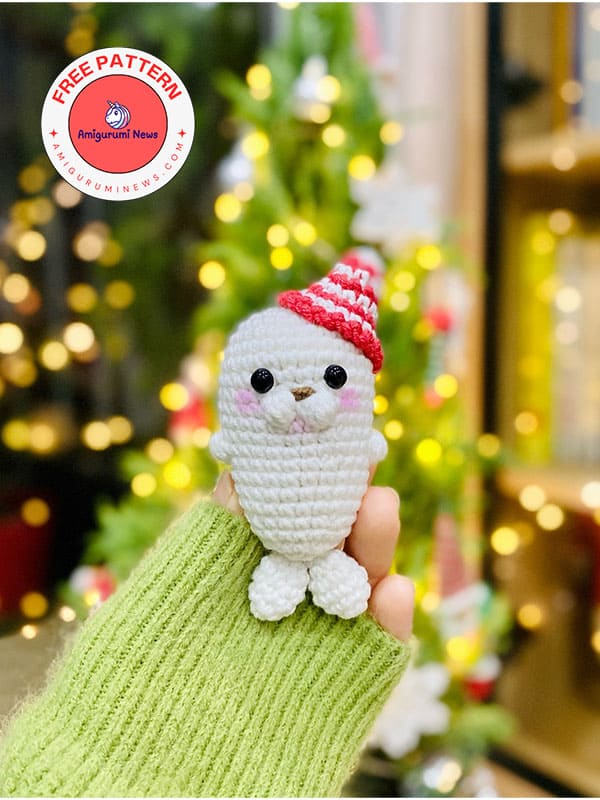
Here’s a cute crochet seal amigurumi wearing a Christmas hat. As we wrap up our preparations just days before Christmas, I think you could make this adorable crochet seal pattern. It’s a lovely amigurumi pattern that you can complete quickly. You can gift this crochet seal amigurumi to your children for Christmas. I think it would make a great gift for children’s rooms and newborns. Here’s the step-by-step crochet seal pattern below.
Christmas crochet seal pattern
Those wondering how to make a crochet seal amigurumi can check out this free amigurumi pattern. Here’s a cute little crochet seal amigurumi for Christmas. It’s very easy to make, as the head and body are all one piece. Finally, we’ll make the tail and hat. That’s how easy it is.
R- round
MR- magic ring
st- stitch
ch- chain
sc- single crochet
inc- increase
dec- decrease
slst- slip stitch
BO- bobble stitch= 5 dc together
Size: If you use the same yarn as me, the finished seal will be around 7.6 cm/ 3.0 in long (not including hat).
HEAD and BODY
Use white yarn, working in continuous rounds.
R1: MR, 8sc (8)
R2: 8inc (16)
R3: (sc, inc) x 8 (24)
R4: (3sc, inc) x 6 (30)
R5-8 (4 rounds): 30sc (30)
R9: 14sc, BO, 1sc, BO, 13sc (30)
R10: 30sc (30)
R11: (8sc, dec) x 3 (27)
R12: 8sc, BO, 12sc, BO, 5sc (27)
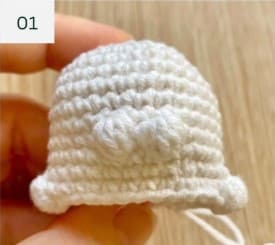
Note:
• The BOs in R9 will act as the Seal’s snout, and the BOS in R12 will act as the Seal’s arms.
Depending on the tension of your stitches, you can adjust the placement of the BOs in R12 to ensure the arms are aligned on both sides of the body, with the snout placed in the middle (pic 1).
Use white yarn, working in continuous rounds.
R13: (7sc, dec) x 3 (24)
R14 – 17 (4 rounds): 24sc (24)
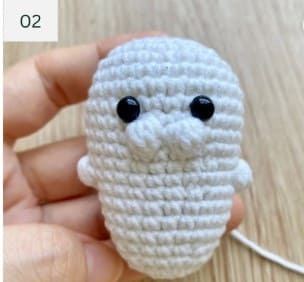
• Insert the eyes between R7 & R8, right above the snout, 3-4 stitches apart.
• Stuff the head and the body, and continue to stuff as you go.
R18: (4sc, dec) x 4 (20)
R19: 20sc (20)
R20: (3sc, dec) x 4 (16)
R21: 8dec (8)
Stuff the body firmly.
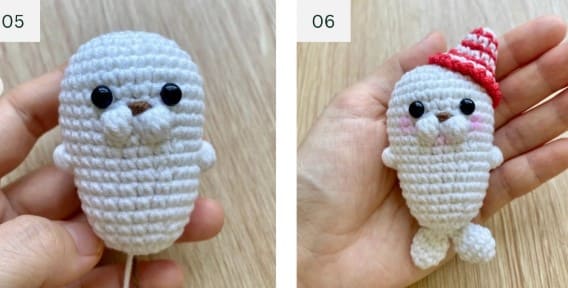
Fasten off, cut the yarn, close the remaining gap and weave the yarn in (pic 2).
TAIL
Make 2, using white yarn, working in continuous rounds.
R1. MR, 6 sc (6)
R2. (2sc,inc)x2 (8)
R3-4. (2 rounds): 8 sc (8)
R5. (2sc,dec)x2 (6)
Do not stuff the tail. Fasten off, cut the yarn, close the remaining gap and leave a long tail for sewing (pic 3).
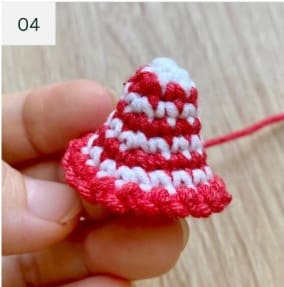
HAT
Working in continuous rounds.
Work the hat in alternating rounds of white and red (R1,3,5,7: white, R2,4,6,8:red).
R1: MR, 6sc (6)
R2: (2sc, inc) x 2 (8)
R3: (3sc, inc) x 2 (10)
R4: (4sc, inc) x 2 (12)
R5: (5sc, inc) x 2 (14)
R6: (6sc, inc) x 2 (16)
R7: (7sc, inc) x 2 (18)
R8:
• Slst into the first st,
• Ch2, slst in the next st.
• Repeat (ch2, slst in the next st) till the end of the round.
Fasten off, cut the yarn and leave a long tail for sewing (pic 4).
ASSEMBLY
• Use black or dakr brown yarn to embroider the nose between R8 & R9, 1 stitch wide, between the 2BO’s of R9 (pic5).
• Sew the tails to the bottom of the body (pic 6).
• Sew the hat on the head (pic 6).
To provide the best experiences, we use technologies like cookies to store and/or access device information. Consenting to these technologies will allow us to process data such as browsing behavior or unique IDs on this site. Not consenting or withdrawing consent, may adversely affect certain features and functions.
Functional
Always active
The technical storage or access is strictly necessary for the legitimate purpose of enabling the use of a specific service explicitly requested by the subscriber or user, or for the sole purpose of carrying out the transmission of a communication over an electronic communications network.
Preferences
The technical storage or access is necessary for the legitimate purpose of storing preferences that are not requested by the subscriber or user.
Statistics
The technical storage or access that is used exclusively for statistical purposes.The technical storage or access that is used exclusively for anonymous statistical purposes. Without a subpoena, voluntary compliance on the part of your Internet Service Provider, or additional records from a third party, information stored or retrieved for this purpose alone cannot usually be used to identify you.
Marketing
The technical storage or access is required to create user profiles to send advertising, or to track the user on a website or across several websites for similar marketing purposes.