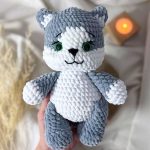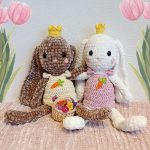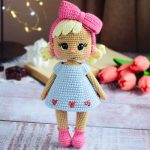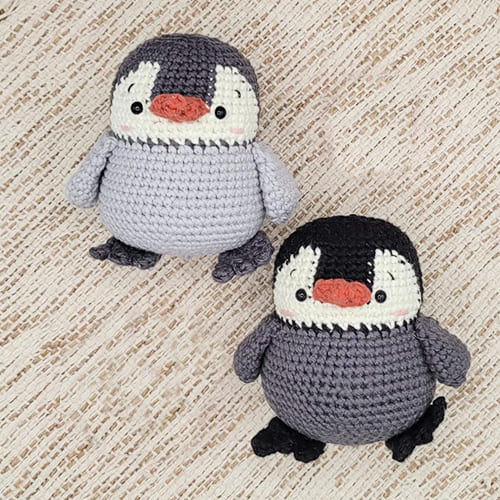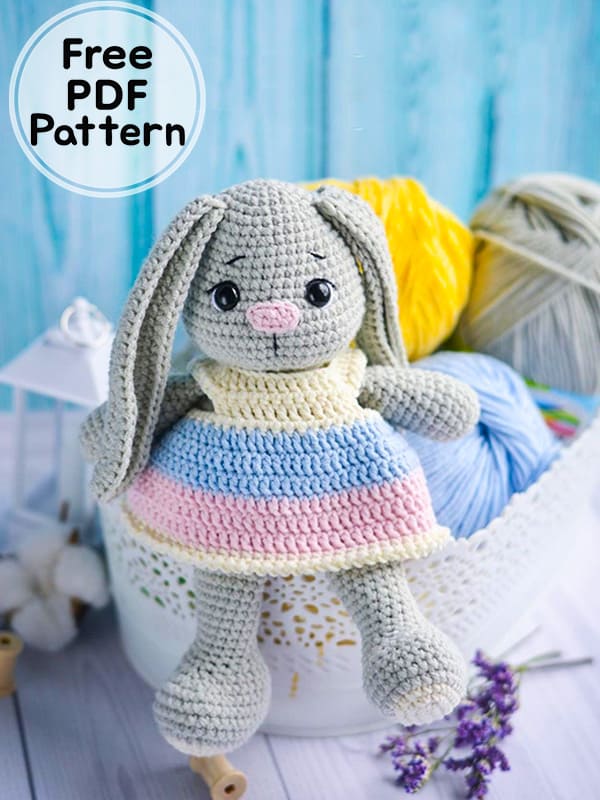
We are with you with the cute crochet amigurumi bunny. Thank you very much to the owner of the pattern. Complete the cute bunny with detailed step by step amigurumi pattern instructions and make a nice playmate for your child. It is the ideal amigurumi pattern for beginners, with detailed construction pictures. The cute bunny also has a beautiful crochet dress. Check out the free pattern instructions to learn how to make an amigurumi bunny right now.
Crochet Spring Bunny Amigurumi Free PDF Pattern
Designer: my_crochet.world
Used materials and tools
1) Yarn cotton/acrylic:
-Alpina Vera No. 22 (gray) – main color
-Yarnart jeans No. 03 (milky) – for legs and dresses
-Yarnart jeans No. 18 (light pink) – for nose and dress
-Alize Cotton Gold №60 (black) – for eyelashes
-Alize Cotton Gold No. 55 (white) – for the whites of the eyes
-Yarnart jeans No. 75 (light blue) – for a dress
2) eyes for toys on a 10 mm safety mount
3) holofiber or other suitable material for stuffings
4) hook number 2
5) scissors
6) sewing needle, pins
7) dress button
8) Iris Gamma No. 0420 (black) – for tightening
Abbreviations
MR: Magic ring
Sc: Single crochet
Slst: Slip stitch
Ch: Chain
Inc: Increase
Dec: Decrease
Dc: Double crochet
Hdc: Half double crochet
• The height of the toy without ears is 22 cm.
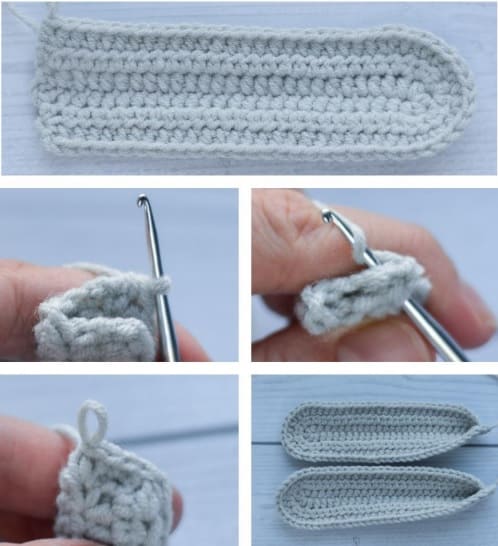
Ears (Make 2)
We start crochet with gray yarn. We crochet in turning rows.
We make 28 ch and crochet from the third loop from the hook:
Rnd 1. 25 hdc, 5 hdc in 1 st, 25 dc on reverse side, 2 ch, turn (55)
Rnd 2. 25 hdc, 5 inc from hdc, 25 hdc on the reverse side, 2 ch, turn (60)
Rnd 3. 25 hdc, (1 hdc, inc from hdc) * 5, 25 hdc on the reverse side(65).
At the base, fold the part in half and crochet 3 sc, slst, for both sides of the part. Fasten and cut the thread, leaving a long end for sewing.
We crochet the second ear in the same way.
Head
We start crochet with gray yarn. The part is filled in the process of crochet.
Rnd 1: 6 sc in MR
Rnd 2: 6 inc (12)
Rnd 3: (1 sc,inc)*6 (18)
Rnd 4: 1 sc, inc, (2 sc,inc)*5, 1 sc (24)
Rnd 5: (3 sc,inc)*6 (30)
Rnd 6: 2 sc, inc, (4 sc,inc)*5, 2 sc (36)
Rnd 7: 36 sc
Rnd 8: (5 sc,inc)*6 (42)
Rnd 9-10: 42 sc (2 rows)
Rnd 11: 3 sc, inc, (6 sc,inc)*5, 3 sc (48)
Rnd 12-13: 48 sc (2 rows)
Rnd 14: 18 sc, (inc, 1 sc)*6, 18 sc (54)
Rnd 15: 54 sc
Rnd 16: 4 sc, inc, (8 sc, inc)*5, 4 sc (60)
Rnd 17-19: 60 sc (3 rows)
Rnd 20: 2 sc, dec, (4 sc, dec)*9, 2 sc (50 sc)
Rnd 21: (3 sc, dec)*10 (40 sc)
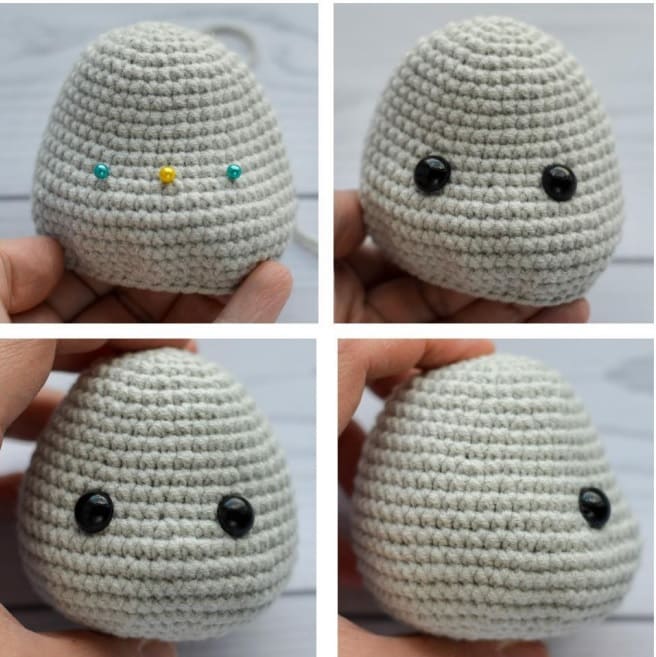
At this stage, we insert the eyes on a secure mount. They are are located between 13 and 14 side by side strictly symmetrically above increments in the 14th row at a distance of 8 sc from each other. For symmetry in the 13th row, I count 24 columns from the beginning of the row and I put a mark with a pin at this point. Then I count 4 columns to the right and 4 columns to the left from this point and also mark with pins (20th and 28th column of 13 rows). These are the points of location of the peephole.
We continue crochet.
Rnd 22: 1 sc, dec, (2 sc, dec)*9, 1 sc (30 sc)
Rnd 23: (3 sc, dec)*6 (24 sc)
Rnd 24: 1 sc, dec, (2 sc, dec)*5, 1 sc (18 sc)
Rnd 25: (1 sc, dec)*6 (12 sc)
Rnd 26: 6 dec
Fasten the thread, cut off, hide the end of the thread inside the part.
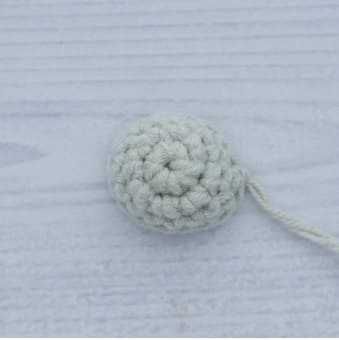
Nose
We start crochet with pink yarn.
We make a chain of 4 ch, from the second loop from the hook we crochet:
Rnd 1. Inc, 1 sc, 4 sc in 1 loop, 1 sc, inc (10)
Fasten the thread, cut off, leave a long tip for sewing.

Legs (Make 2)
We start crochet with milky yarn. We stuff tightly detail in the process of knitting about 2/3. We make a chain of 8 ch, from the second loop from the hook we crochet:
Rnd 1: 6 sc, 3 sc in 1 loop, 5 sc, inc (16)
Rnd 2: inc, 5 sc, 3 inc, 5 sc, 2 inc (22)
Rnd 3: 1 sc, inc, 5 sc, (1sc, inc)*3, 5 sc, (1 sc, inc)*2 (28)
We change the thread to gray, cut off the milky thread.
Rnd 4: 2 sc, inc, 5 sc, (2 sc, inc)*3, 5 sc, (2 sc, inc)*2 (34)
Rnd 5-8: 34 sc (4 rows)
The beginning of the row should be in the center of the heel.
Rnd 9: 11 sc, 6 dec, 11 sc (28)
Rnd 10: 10 sc, 4 dec, 10 sc (24)
Rnd 11: (dec, 2 sc)*6 (18)
Rnd 12: (4 sc, dec)*3 (15)
Rnd 13-22: 15 sc (10 rows)
We crochet an additional few sc so as to shift the end of the row exactly to the side of the leg. We fold the part in half and crochet 6 sc, sl st for both walls. Fasten the thread, cut off, hide the end of the thread inside the part. Tie the second leg in the same way.
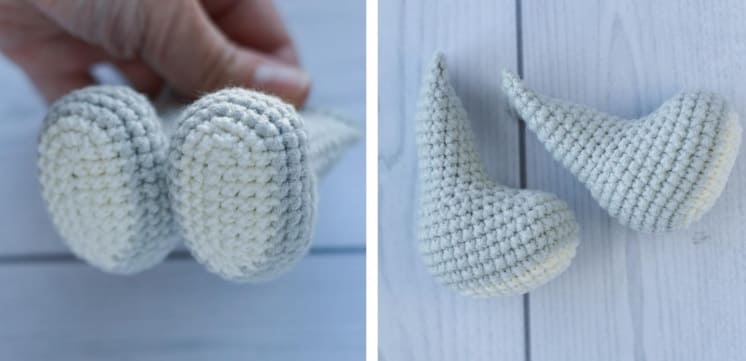
Body
We start crochet with gray yarn. We stuff the part tightly in the process of knitting. We make a chain of 16 ch. Starting from crochet the second loop from the hook:
Rnd 1: 14 sc, 3 sc in 1 loop, on the reverse side 13 sc, inc (32)
Rnd 2: inc, 13 sc, 3 inc, 15 sc, 2 inc (38)
Rnd 3: 1 sc, inc, 13 sc, (1 sc, inc)*3, 13 sc, (1 sc, inc)*2 (44)
Rnd 4: 2 sc, inc, 15 sc, (2 sc, inc)*3, 15 sc, (2 sc, inc)*2 (50)
At this stage, we crochet the legs. The marker is located side details. You may need to crochet another the number of sc before and after crochet the legs, so before crochet legs I recommend finding it yourself in front of the center of your crochet part so that the location legs were even and symmetrical. The distance between legs in front 4 sc.
Rnd 5: 2 sc on the body, 7 sc on the leg and body, 4 sc on the body, 7 sc for leg and body, 30 sc for body (50)
Rnd 6: (24 sc, inc)*2 (52)
Rnd 7: 6 sc, inc, (12 sc, inc)*3, 6 sc (56)
Rnd 8: (13 sc, inc)*4 (60)
Rnd 9-11: 60 sc (3 rows)
Rnd 12: 2 sc, dec, (4 sc, dec)*9, 2 sc (50 sc)
Rnd 13: 50 sc
Rnd 14: (3 sc, dec)*10 (40 sc)
Rnd 15-17: 40 sc (3 rows)
Rnd 18: 1 sc, dec, (2 sc, dec)*9, 1 sc (30 sc)
Rnd 19-21: 30 sc (3 rows)
Rnd 22: (3 sc, dec)*6 (24)
Fasten the thread, cut off, leaving a long end for sewing.
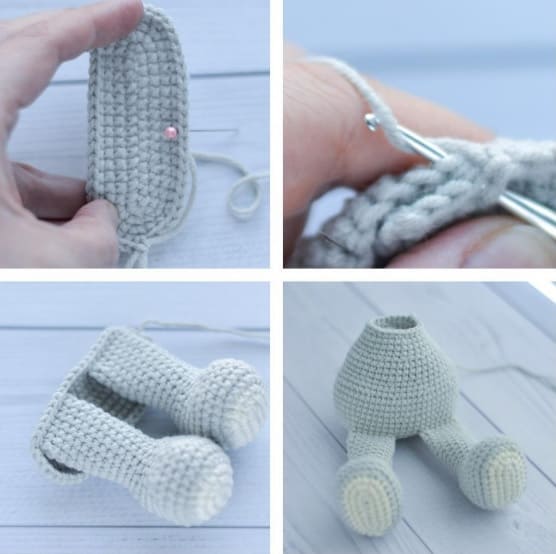
Arms (Make 2)
We crochet with gray yarn. We fill the part tightly approximately by 2/3.
Rnd 1: 6 sc in MR
Rnd 2: 6 inc (12)
Rnd 3: (1 sc ,inc)*6 (18)
Rnd 4-8: 18 sc (5 rows)
Rnd 9: (4 sc, dec)*3 (15)
Rnd 10-12: 15 sc (3 rows)
Rnd 13: (3 sc, dec)*3 (12)
Rnd 14-16: 12 sc (3 rows)
Fold the handle in half and knit for both walls details 5 sc, slst, fasten the thread, cut off, leaving a long tip for sewing.
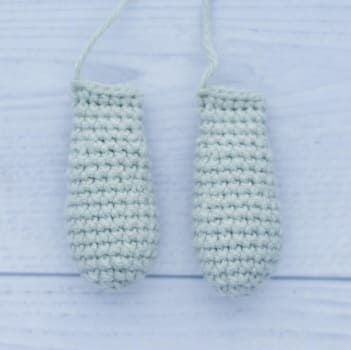
Tail
We crochet with gray yarn. The detail is stuffed when sewing.
Rnd 1: 8 sc in MR
Rnd 2: 8 inc (16)
Rnd 3-4: 16sc (2 rows)
Fasten the thread, cut off, leave a long tip for sewing.
Dress
We make a chain of 42 ch, from the third loop from the hook we crochet:
Rnd 1: 6 dc, raglan, 7 dc, raglan, 10 dc, raglan, 7 dc, raglan, 6 dc, 1 ch, turn (48)
Rnd 2: 48 sc
In the next row, crochet 9 ch, we skip 9 loops in row, there by forming the sleeves.
Rnd 3: 8 dc, 9 ch, 14 dc, 9 ch, 8 dc (48)
Rnd 4: 48 sc
We change the thread to blue, cut off the milky thread and we continue:
Rnd 5: (dc, inc from dc)*24 (72)
We make sl st in the first dc of the fifth row, and crochet in a circle. Now at the end of each row we make sl st in the first dc of the row and make 2 ch, at the end of row 10, 1 ch.
Rnd 6-7: 72 dc (2 rows)
We change the thread to pink, cut the blue thread.
Rnd 8-10: 72 dc (3 rows)
We change the thread to milk, cut off the pink thread
Rnd 11: 72 sc
Rnd 12: (1ch, slst)*72
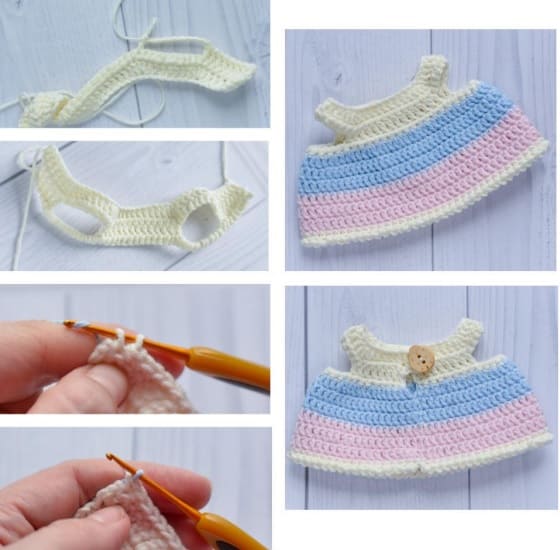
We sew on a button and, focusing on its size, we crochet clasp from ch.
We carefully hide the ends of the threads from the wrong side of the dress.
Assembly and decoration
We start with the design of the muzzle.
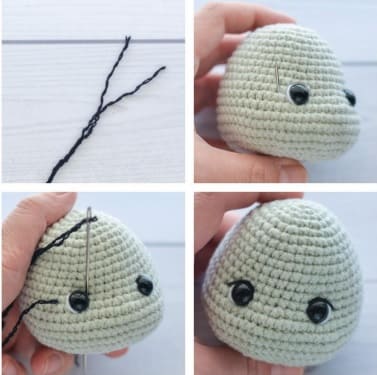
With a thin thread we make a tightening of the eyes, first for one eye, then for the second. We bring the needle out in the middle of the eye from below and work the stitch up, we bring the needle into the same hole into which it was originally inserted. We pull the ends of the thread to achieve the desired effect of deepening the eye. We tie the ends of the thread into a knot and hide inside the part.
Repeat the same for the second eye.
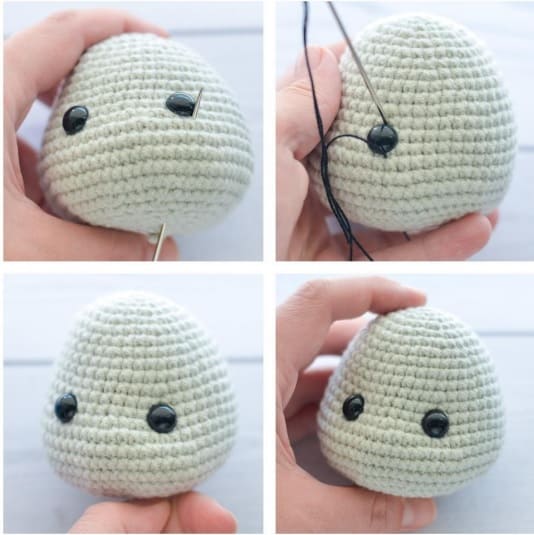
We embroider the whites of the eyes with white thread.
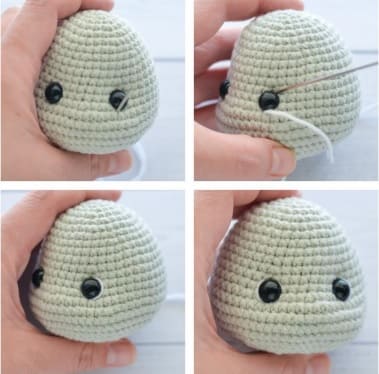
We embroider the eyelashes with a black thread (I used a regular thread, but divided it into two parts). We embroider eyebrows with the same black thread: I embroidered a stitch 2 sc long and 1 sc high between 9 and 11 next
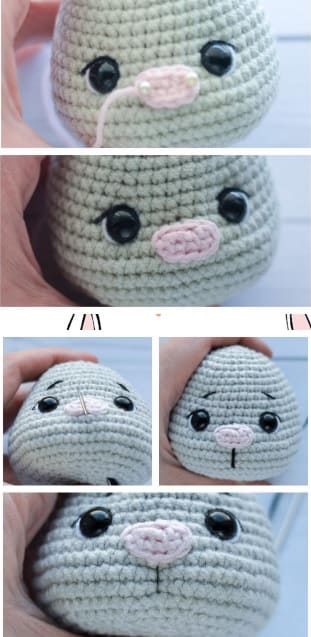
We sew the nose between 13 and 16 side by side.
Under the nose, we make a stitch 3 sc down and pull it a little to form the cheeks.
Ears are sewn between 5 and 6 side by side.
We sew the head to the body, add a little filler to the body in the process of sewing.
We sew handles between 19 and 20 side by side.
The tail is sewn between 3 and 8 next, add a little filler in the process of sewing. From tail location It will depend on whether the bunny can sit on its own.
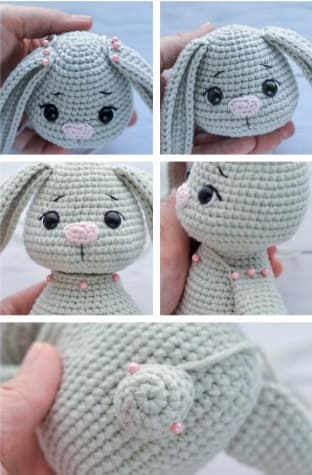
That’s all, your charming bunny is ready..


