
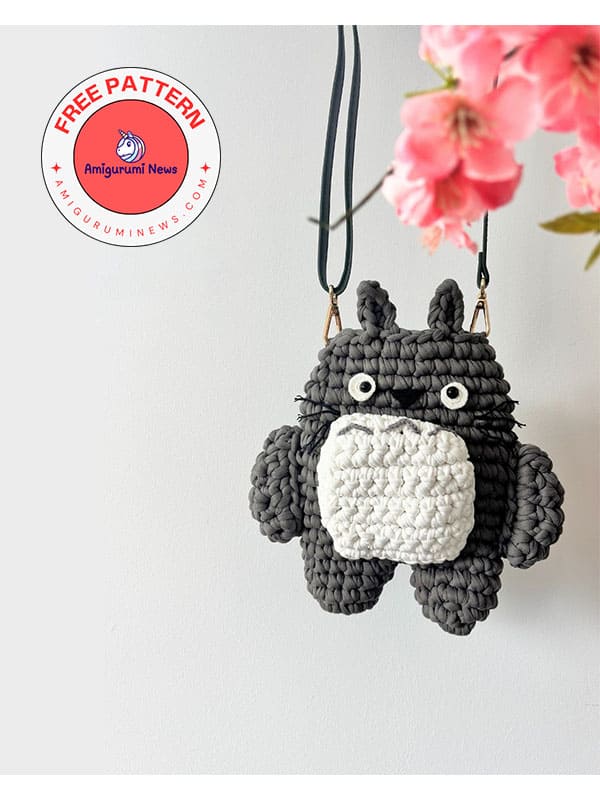
For fans of Ghibli’s beloved character Totoro, this handmade crochet bag is perfect for you. Combining functionality and style, this crochet bag not only showcases your love for these quirky characters but also adds a charming touch to your accessory collection. Whether you’re a beginner or a seasoned crocheter, this project is both fun and rewarding. Learn how to make this crochet totoro bag now, complete with detailed instructions and plenty of helpful photos.
Step-by-Step Totoro Bag Crochet Pattern
Via: craftsbyjojo_
What You Need to Crochet a Totoro Bag
• T-shirt yarn: grey, white.
– I used hoooked zpagetti T-shirt yarn.
• Cotton yarn: grey, white, black.
– I used rainbow cotton 8/4.
• Hook size 8.0 mm.
• Needle
Abbreviations:
ch: chain
dec: decrease
inc: increase
hdc: half double crochet
MR: magic ring
sc: single crochet
st: stitch
slst: slip stitch
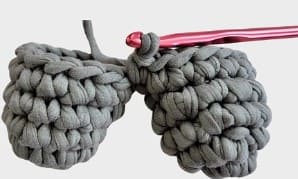
Legs
In grey T-shirt yarn:
R1. MR 6 sc (6)
R2. inc 6 (12)
R3. sc 12 (12)
R4. sc 12 (12)
Make another leg.

R5. Connect the two legs:
Ch 1 and then insert sc 1 into the other leg.

Sc 11 around the left leg.
Sc into the ch, sc 12 in the right leg, then sc 1 into the ch (26)
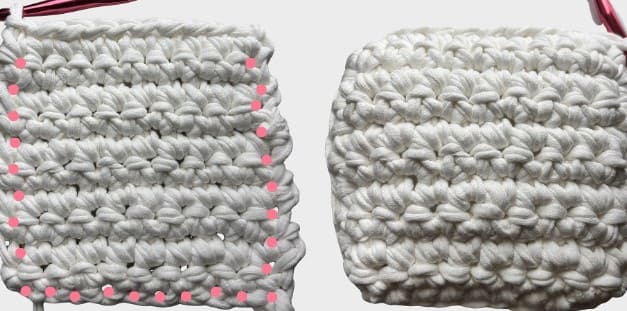
Body
R6-14. sc 26 (26)
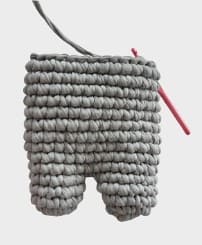
R15. sc 6 (or until you reach the edge), dec, sc 11 to the other side, dec, sc 5 (24)
R16. sc 5 until the edge, dec, sc 10 to the other side, dec, sc 5 (22)
R17. sc 5 until the edge, dec, sc 9 to the other side, dec, sc 4 (20)
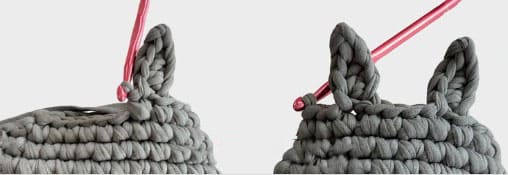
Ears
R18. Insert your hook in the outermost stitch on the right. Sc 2, ch 5, slst into the 2nd ch from the hook. Sc 1, hdc 1, slst.
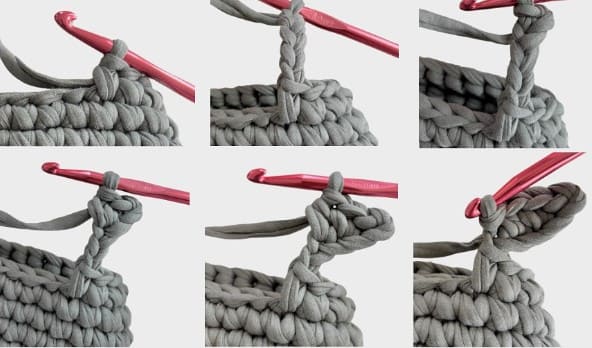
Now sc 1 into the head. Sc 3. Make another ear.
Sc 2 and slst.
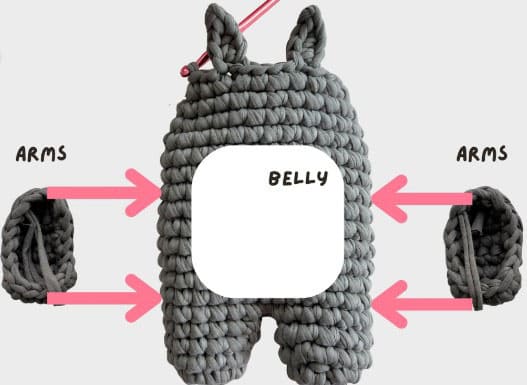
Arms
In grey T-shirt yarn:
Ch 5. start in 2nd ch from hook.
R1-4. sc 4, turn, ch 1(4)
R5. skip 1st, sc3. turn, ch 1 (3)
R6. skip 1st, sc2. turn, ch 1 (2)
R7. skip 1st, sc 1 (1)
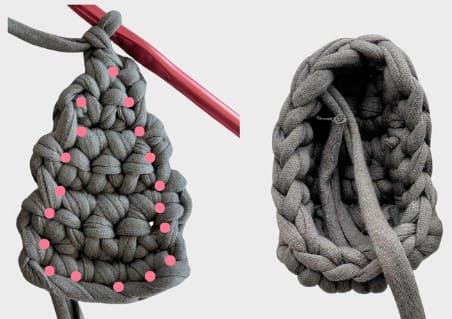
R8. Sc 18 around the arm to form a cup. See pink dots to place the stitches. Close the round (18)
Leave a long tail for sewing.
Make another arm.
Belly
In white T-shirt yarn:
Ch 11. Start in 2nd ch from hook.
R1-10. Sc 10, turn, ch 1 (10)
R11. Sc 27 around the belly to form a cup.
See pink dots to place the stitches. Close the round (27) Leave a long tail for sewing.
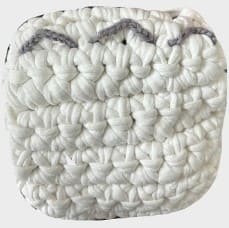
Grey lines
Attach grey cotton yarn to the belly for his signature chest markings.
Attach arms and belly
Arms: on the left and right side, attach the lowest part of the arm in R7 and the top of the arm in R13.
Sew the arms to the body.
Belly: sew the belly to the body but leave a little opening on the top so it’s a pouch. Attach the lowest part in R7, and the top in R15.
Eyes
In white cotton yarn.
R1. MR sc 6 (6)
R2. inc 6 (12)
R3. (sc1,inc)*6 (18)
Leave a long tail for sewing. Insert a 10mm safety eye, make sure it’s off center.
Make another eye.

Nose
In black cotton yarn.
Ch 3. Start in 2nd ch from hook.
R1. sc 2, turn, ch 1 (2)
R2. inc 2, turn, ch 1 (4)
R3. inc, sc 2, inc (6)
Leave a long tail for sewing.
Attach the eyes and nose
Attach the eyes between R16 and R17, with 4 stitches apart.
Attach the nose in between the two eyes, place it in between R16 and R17.
Whiskers
Attach black cotton yarn on each cheek and fasten it on the inside.
Finishing touches
Add a bag strap.
Optional: add lining and/or a magnet.


