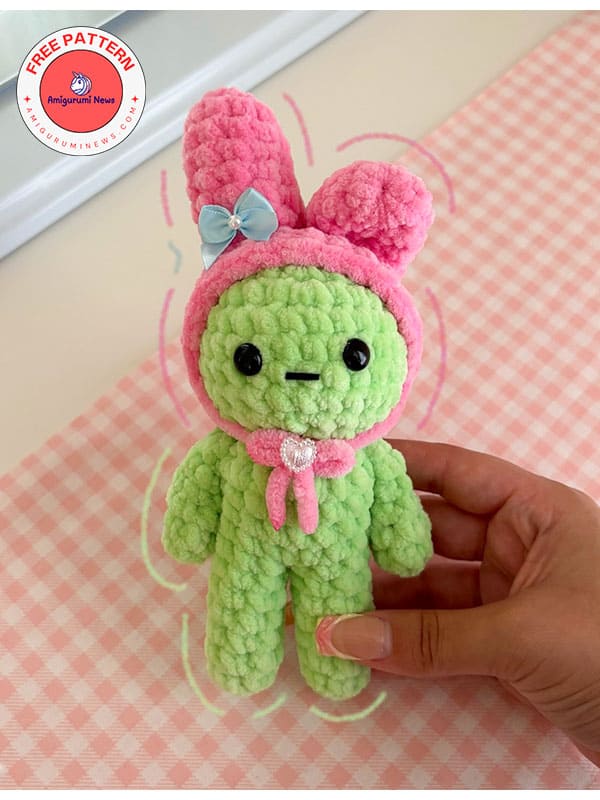
Here is the amigurumi crochet smiski character with you. The fun smiski hat crochet pattern will also be explained to you in this free amigurumi pattern. You will be able to make a hat from your favorite sanrio characters. A great pattern for those who want to make different amigurumi dolls. An amigurumi project that is both easy to make and very fun. Follow the free instructions right now and make your own smiski character.
Crochet amigurumi smiski
Via: nickimontesco & okcraftybakes
Materials:
4mm crochet hook.
Yarn of your choice (we used posh).
Polyfill stuffing.
Sewing needle.
Stitch marker.
Pipe cleaner/wire.
6mm safety eyes.
Felt/ acrylic yarn for nose.
Abbreviations:
MR- magic ring
sc- single crochet
slst- slip stitch
inc- increase
dec- decrease
ch- chain
FLO- front loop only
BLO- back loop only
dc- double crochet
hdc- half double crochet
hdc inc- half double crochet increase
FO- fasten off
p- picot (ch3, slip stitch obto the 1st ch).
Arms X2
Note: If you don’t plant to add wiring/pipe cleaner remove 2 rounds.
R1. 5 sc in MR (5)
R2-8. 5 sc (7 rounds) (5)
Stuff lightly and insert pipe cleaner/wire.
Fold arms and 2 sc across and slst the last stitch. FO and leave long tail and sew arms between body and head.
Legs X2
R1. 7 sc in MR (7)
R2-10. 7 sc (7) (9 rounds)
Lightly stuff legs.
Cut yarn and FO. Make second leg and ch 1, but do not FO.
R11. Insert hook in the first leg and connect it with a sc, then 7 sc, 1 sc in the ch, 7 sc, 1 sc in ch (16)
Body
R12-15. 16 sc *4 rounds* (16)
Stuff and insert your pipe cleaner/ wire inside the body / legs.
R16. (2sc,dec)x4 (12)
FO and hide tail.
Adding wire
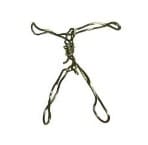
Cut a single piece wire long enough to from the legs, spine and arms.
Bend it into a rough stick figure shape with loops at the ends for feet and hands.
(loops prevent the wire from poking through the yarn). Twist the wire at the spine to secure everything.
You can always wrap the spine with yarn or masking tape to ensure the wire won’t poke through.
Insert the wire into the plushie.
Also, keep in mind to poke your arm wires into the R15/16 where we plan to sew the arms.
Adding pipe cleaner
Fold two pipe cleaners to match the length of your smiski’s arms or legs and place them inside the figure.
Using the pipe cleaner method eliminates the need for stuffing, but keep in mind that your smiski won’t stand on its own.
Head
R1. 6 sc in MR (6)
R2. 6 inc (12)
R3. (1sc,inc)x6 (18)
R4. (2sc,inc)x6 (24)
R5-8. 24 sc (24) *4 rounds*
Place eyes on R6-7, 4 stitches apart.
Stuff head.
R9. (2sc,dec)x6 (18)
R10. (1sc,dec)x6 (12)
FO and leave long tail to sew on the body.
Now add a mouth with black acrylic yarn on R7 two stitches away from each eye.
Now you are done with your smiski! You can leave him as is or add different accessories to him.
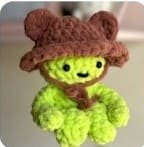
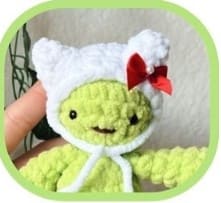
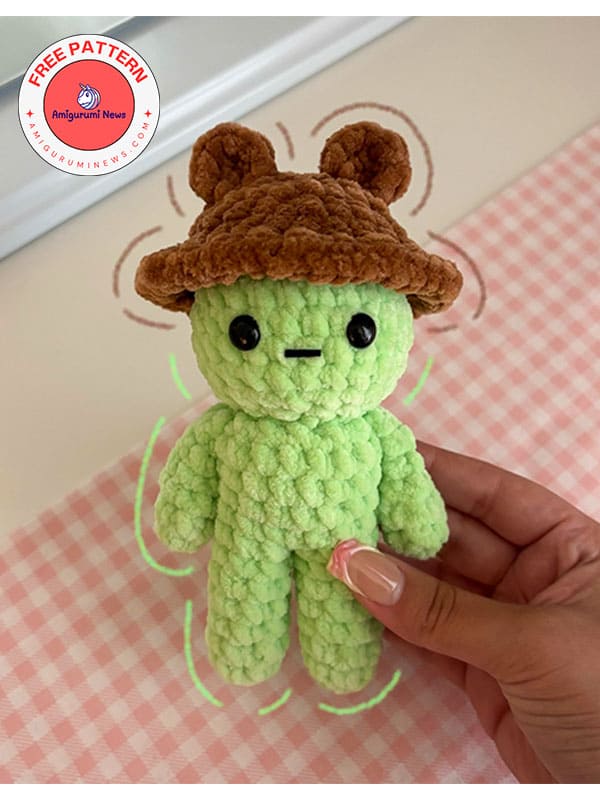
Bear hat
R1. 6 hdc in MR (6)
R2. slst, ch1, 6 hdc inc (12)
R3. slst, ch1, (1hdc, inc hdc)x6 (18)
R4. slst, ch1, (2hdc, inc hdc)x6 (24)
R5. slst, ch1, 24 hdc (24)
R6. FLO, 24 hdc inc (18)
FO and leave long tail. At the end of the hat, leave a long yarn tail.
Take that tail and bring it down to the opposite side of the hat’s brim by slst.
Cut the yarn at the center of this length so you now have two strands. Finally, tie them together under the chain into a small bow or knot to secure it.
Bear ears X2
R1. 6 hdc in MR (6)
FO and leave tail to sew on R2-R3, 5-6 stitches away from each other.
R1. 5 sc in MR (5)
R2-4. 5 sc (3 rounds) (5)
FO and leave tail to sew the ears around R2-3, 3 stitches apart.
Leaf
Chain 7 turn, skip 1 sc, 1 hdc, 1 dc, 1 hdc, 1 sc, slst
FO and glue in between the ears.
Eyes/nose
Now, with felt, cut two white circles, and then two smaller black felt for the pupils. Also, cut out a small black nose.
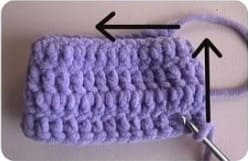
Cat beanie
Ch 28, 2 ch, turn work, skip 2,
R2. 28 dc, ch 2, turn work (29)
R3. 28 dc, ch 2, turn work (28)
R4. 28 dc, ch 2, turn work (29)
FO and leave long tail. Fold the hat and sew along side open edges.
Now sew the top of the open edge.
Headphones
R1. 5 sc in MR (5)
R2. 5 inc (10)
R3. in BLO, 10 sc (10)
FO and slst the first earbud, repeat R1-R3 for the second earbud but do not FO.
Ch 10 and slst into the first earbud we made. Hide any tails. Now with a hot glue gun attach the headphones to the head.
Sanrio hoodie base
Note: size up 1.5mm hook.
Example: If you’re using a 4.00mm for the head; use a 5.50mm for the hood.
R1. 6 sc in MR (6)
R2. 6 inc (12)
R3. (1sc,inc)x6 (18)
R4-8. 18 sc (5 rounds)
FO and leave a long tail.
This is the base to all of the sanrio characters.
Sanrio add-ons;
Hello kitty
Ears make 2:
R1. 4 in MR (4)
R2. 4 sc (4)
R3. 4 inc (8)
Place red bow on the left ear. Sew ears on R5-7, 2 stitches apart.
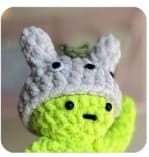
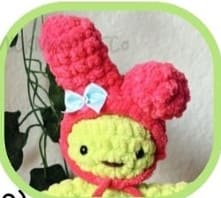
My melody
Ears make 2:
R1. 10 MR (10)
R2-7. 10 sc (6 rounds) (10)
Don’t stuff. Leave long tail to sew.
Fold left ear: place bow on the ear that isn’t bent. Sew ears on R4-7, leave no stitches between ears.
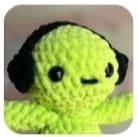
Pochacco
R1. 7 sc in MR (7)
R2-5. 7 sc (4 rounds) (7)
R3. 2 dec, 3 sc (5)
Fold and 2 sc across leave long tail to sew. Sew ears on 4-7, 4 stitches apart.
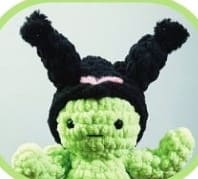
Kuromi
Make the hood as instructed. Once you get to R8, 10 sc picot stitch, 7 sc. FO.
(this is to get the little peak kuromi has on her hat).
Ears:
R1. 4 sc in MR (4)
R2-4. 4 sc (3 rounds)(4)
FO, leave tail to sew.
Sew ears on R6-7, 2 stitches apart.
Put pom pom balls on top of her ears & sew a hot pink heart on her hat.
To provide the best experiences, we use technologies like cookies to store and/or access device information. Consenting to these technologies will allow us to process data such as browsing behavior or unique IDs on this site. Not consenting or withdrawing consent, may adversely affect certain features and functions.
Functional
Always active
The technical storage or access is strictly necessary for the legitimate purpose of enabling the use of a specific service explicitly requested by the subscriber or user, or for the sole purpose of carrying out the transmission of a communication over an electronic communications network.
Preferences
The technical storage or access is necessary for the legitimate purpose of storing preferences that are not requested by the subscriber or user.
Statistics
The technical storage or access that is used exclusively for statistical purposes.The technical storage or access that is used exclusively for anonymous statistical purposes. Without a subpoena, voluntary compliance on the part of your Internet Service Provider, or additional records from a third party, information stored or retrieved for this purpose alone cannot usually be used to identify you.
Marketing
The technical storage or access is required to create user profiles to send advertising, or to track the user on a website or across several websites for similar marketing purposes.