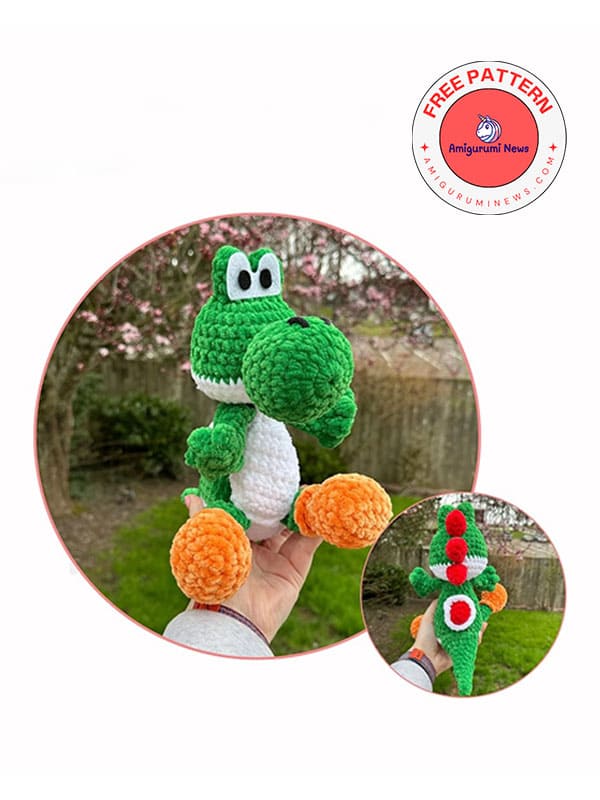
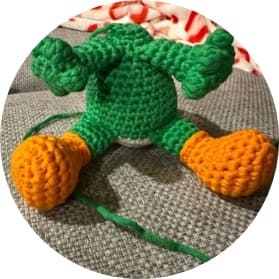
The Yoshi crochet pattern amigurumi that you know from video games is here. Those who want to make a crochet dinosaur should definitely try this cute yoshi crochet pattern. Below you will find the free yoshi crochet pattern instructions accompanied by detailed and step-by-step detail photos. I guarantee that you will get a cute dinosaur. Check out this great amigurumi yoshi pattern now and start crocheting it step by step.
Yoshi crochet pattern
Via: talentlys_crochet
Materials and tools:
Material estimations are based on a 4.5mm hook and size 6 plush yarn.
Size 6 plush yarn (green,white,orange & red).
4.5mm crochet hook.
Yarn needle.
Polyester stuffing.
Stitch marker.
Safety eyes/felt eyes.
Abbreviations:
MR- magic ring
ch- chain
sc- single crochet
st- stitch
slst- slip stitch
inc- increase
dec- decrease
FLO- front loop only
BLO- back loop only
FO- fasten off
CC- change color
BOB- 5 st bobble stitch
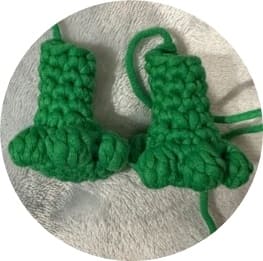
Arms (make 2)
Use green yarn.
R1. 6 sc into a magic ring (6)
R2. (inc)x6 (12)
R3. sc, (BOB,sc)x5, sc (12)
R4. sc around (12)
R5. 2sc, 4 dec, 2 sc (8)
R6-9. sc around (8) – 4 rnds
FO and leave a short tail. You will be crocheting them in later. Do not stuff the arms.
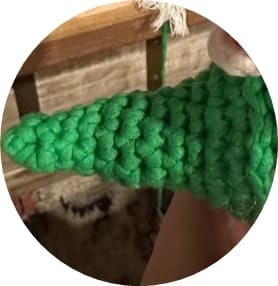
Feet & legs – make 2
Start with orange yarn.
R1. Ch 6, turn, starting from the second ch from the hook: 4 sc, 3 sc into the last st. Working on the other side of the ch: 3 sc, inc (12)
R2. inc, 3sc, 3 inc, 3 sc, 2 inc (18)
R3-5. sc around (18) – 3 rnds
R6. 4sc, (sc,dec)x3, 5 sc (15)
R7. 3sc, (dec)x5, 2sc (10)
R8-9. sc around (10) – 2 rnds
R10. FLO sc around (10)
FO orange, stuff foot, and attach green to the first marked loop of Rnd 10 and continue.
R11-15. sc around (10) – 5 rnds
FO and leave a short tail. The legs will be crocheted into the body.
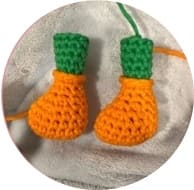
Note: place a st marker in the first and last front loops of R9.
Body
Start with white yarn.
R1. 8 sc into the MR (8)
R2. (inc)x8 (16)
R3. (sc,inc)x8 (24)
R4. (2sc,inc)x8 (32)
R5-6. sc around (32) – 2 rnds
CC to green.
R7. 10sc, 5 sc through leg and body, 3sc, 5 sc through leg and body, 9 sc (32)
R8-10. sc around (32) – 3 rnds
R11. (2sc,dec)x8 (24)
R12-14. sc around (24) – 3 rnds
R15. (sc,dec)x8 (16)
R16. sc around (16)
R17. 6 sc, 4 sc into an arm and body, 1 sc, 4 sc into an arm and body, 1 sc (16)
R18. (dec)x8 (8)
R19. sc around (8)
Finish stuffing and FO leaving a long tail for sewing.
Notes: Adjust the arms and legs 1-2 sc to align with the front of the body if needed.
Start stuffing at Rnd 16.
Eyes – make 2
You will be creating yoshi’s eyes, joining them together and then working striaght into the rest of his head.
R1. 8 sc into a MR (8)
R2-4. sc around (8) – 3 rnd
FO the first eye but do not FO the second eye. You will be joining the eyes together directly after finishing the second eye.
R5. sc into the first eye and make 7 more sc around the first eye.
sc back into the second eye and make 7 more sc around the second eye (16)
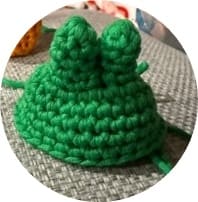
Starting the head
R7. (inc)x16 (32)
R8-11. sc around (32) – 4 rnds
R12. 8sc, 4 inc, 12 sc, 4 inc, 4 sc (40)
CC to white and continue the head.
R12. sc around (40)
R13. 8sc, 4 dec, 12 sc, 4 dec, 4 sc (32)
R14. sc around (32)
R15. (sc,dec)x10, 2 sc (22)
R16. (dec)x11 (11)
FO with a short tail. Stuff head and close hole. Weave in ends.

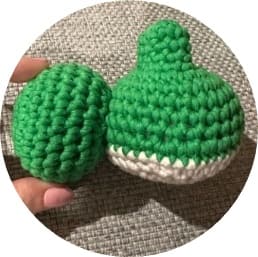
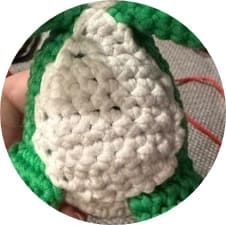
Nose
Use green yarn.
R1. 8 sc into a MR (8)
R2. (inc)x8 (16)
R3. (sc,inc)x8 (24)
R4-8. sc around (24) – 5 rnds
R9. (sc,dec)x8 (16)
Stuff nose very well to make it rounded.
R10. (dec)x8 (8)
FO and leave a long tail for sewing.
The tail
Use green yarn.
R1. 4 sc into a MR
R2. sc around (4)
R3. (sc,inc)x2 (6)
R4. sc around (6)
R5. (2sc,inc)x2 (8)
R6-7. sc around (8) – 2 rnds
R8. (3sc,inc)x2 (10)
R9. (4sc,inc)x2 (12)
R10. (5sc,inc)x2 (14)
R11. inc, 7sc (21)
R12. sc around (21)
FO and leave a long tail for sewing.
The belly
Use white yarn.
R1. Ch5, turn and starting from the second ch from the hook, sc 4 (4)
Ch 1 and turn at the end of every row from here forward.
R2. (inc)x4 (8)
R3-8. 8 sc across (8) – 6 rows
R9. dec, 4sc, dec (6)
R10. 3 dec (3)
R11-12. 3 sc across (3) – 2 rows
R13. dec all 3 of the remaining sts (1)
FO and leave a very long tail for sewing.
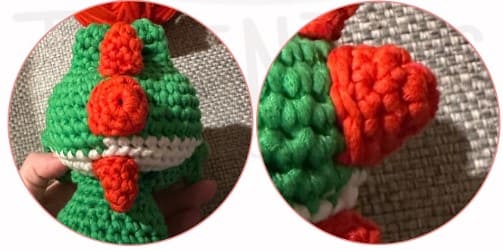
Spikes – make 3
Use red yarn.
R1. 6 sc into a MR (6)
R2. (sc,inc)x3 (9)
R3-4. sc around (9) – 2 rnds
FO and leave a long tail for sewing.
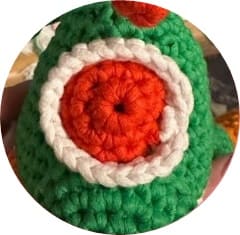
Shell
Start with red yarn.
R1. 8 sc into a MR (8)
R2. (sc,inc)x4 (12)
R3. sc around (12)
CC to white.
R4. FLO (inc)x12 (24)
FO white leaving a short tail.
FO red leaving a long tail for sewing.
You will be sewing the red down using the unused back loops.
Sewing
• Sew the Nose to the Head: Sew the nose between RNDS 9 & 12 on the head. Make sure the nose is centered below the eyes.
• Sew the Head to the Body: Make sure to use ami sticks or something similar to ensure the head is sewed on straight.
• Sew the Tail to the Body: You will sew the tail at the bottom of the body between RNDS 3 & 12. Make sure it’s in the aligned in the middle and the 7 INCs are at the top. Make sure to add stuffing to the tail before sewing closed.
• Sew the Belly onto the Body: The belly should be sewed on between RNDS 6 & 18 – it should go from the white on the bottom all the way up to the head
• Sew the Spikes onto the Head: The spikes should be centered on the back of the head and spaced out evely.
• Sew the Shell onto the Body/tail: The shell should go on the center of the back sitting half on the body and half on the tail. You should be using the red tail and the unused back loops to sew.
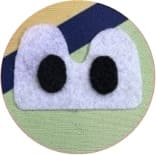
Yoshi’s eyes
Embroidery:
You will be embroidering the eyes. You will first make 5-6 vertical lines of white in the middle of the eye. Next, you will embroider two small black horizontal lines in the middle of the white.
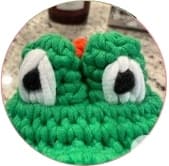
Felt:
You will need to make one large white piece. This piece should have a straight bottom and two even lumps at the top. You will then make two small black ovals. Sew/glue one oval on each white lump towards the middle. See picture for reference.
Yoshi’s nose
Add two slightly diagonal black lines to the nose.