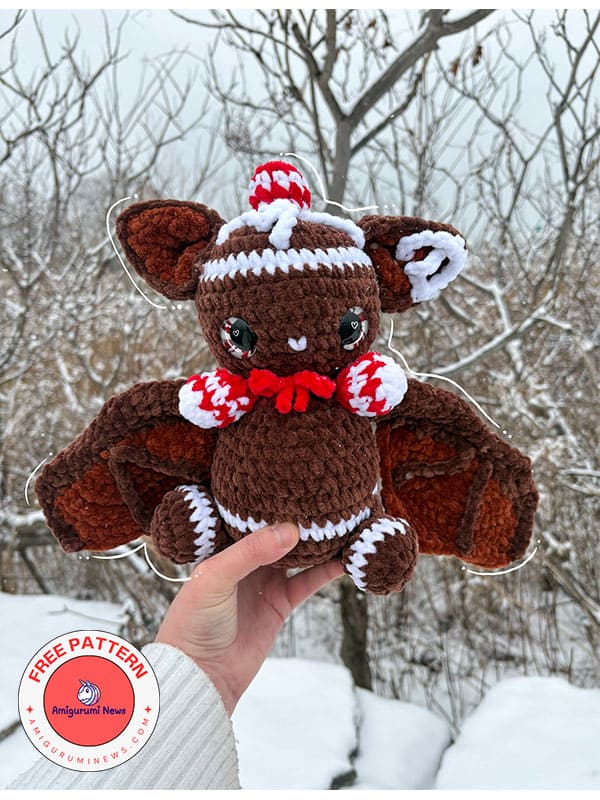
Here’s a gingerbread bat amigurumi pattern inspired by a crochet gingerbread man and a crochet bat. If you’re looking for a different and creative amigurumi pattern for Christmas, you’ll love this one. It’s the cutest version of a crocheted bat. It’s the most fun amigurumi pattern you can make to surprise kids at Christmas. I love sharing crocheted animals like this because they’re not easy to find. Here’s a completely free gingerbread bat crochet pattern below.
Crochet gingerbread bat pattern
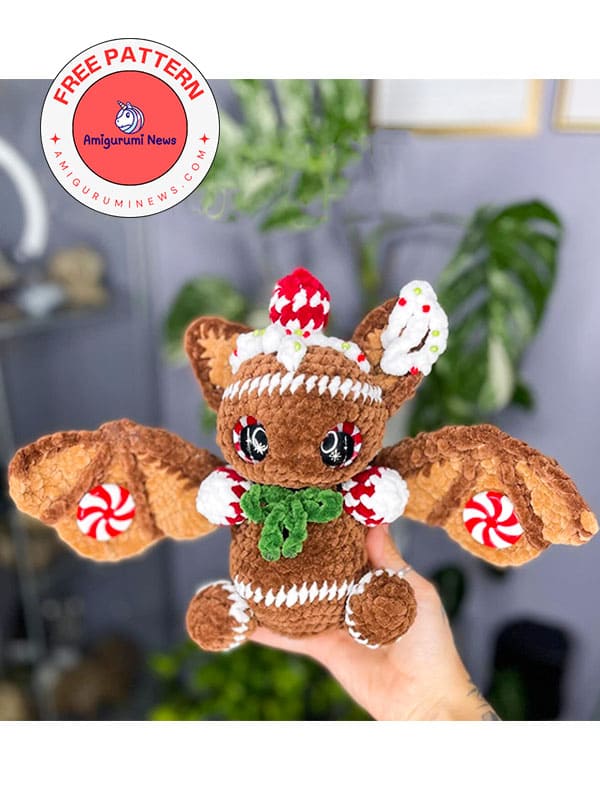
We’ll start with the head of this gingerbread crochet bat and continue with the body. After completing the other pieces, assembly is the next step. As you can see, each piece is assembled step-by-step. Once your crocheted bat is complete, you can decorate it with any Christmas accessories you like. It’s up to you.
Designer: littlelooplings
Terminology:
MR- magic ring
CC- color change
sc- single crochet
inc- increase
dec- decrease
hdc- half double crochet
dc- double crochet
tc- triple crochet
ch- chain
slst- slip stitch
FO- fasten off
What you’ll need:
Light brown yarn
Dark brown yarn
White yarn
Red yarn
Yarn for the bow (I used dark green)
5mm crochet hook
Stuffing
Stuffing needle
25mm safety eyes
Optional: Beads and all kind of extra decor you would like to use.
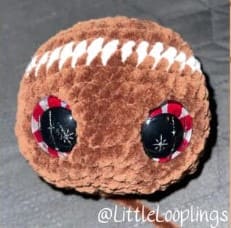
Head:
R1: 8 in MR (8)
R2: inc x8 (16)
R3: (sc, inc) x8 (24)
R4: (2sc, inc) x8 (32)
R5: (3sc, inc) x8 (40)
CC to white.
R6: 40 sc
CC to brown.
R7-11:40 SC (5 rows!)
R12: (3SC, dec) x8 (32)
R13: (2sc, dec) x8 (24)
R14: (sc, dec) x8 (16)
R15: dec x8 (8)
Sl st, fo, close the hole.
Stuff the head.
Add the eyes between R10-11; 4-5 visible stitches apart (if you’re working with 25mm eyes and want the eyes placed like mine)
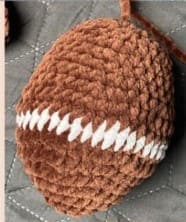
Body:
R1: 6 in MR (6)
R2: inc x6 (12)
R3: (sc, inc) x6 (18)
R4: (2sc, inc) x6 (24)
R5: (3sc, inc) x6 (30)
R6: (4sc, inc) x6 (36)
R7: (5sc, inc) x6 (42)
CC to white.
R8: 42sc (42)
CC to brown.
R9-10: 42sc (x2 rounds of 42)
R11: (5sc, dec) x6 (36)
R12: (4sc, dec) x6 (30)
R13-14 30sc (x2 rounds of 30)
R15: (3sc, dec) x6 (24) – start stuffing.
R16: (2sc, dec) x6 (18)
R17: (sc, dec) x6 (12) – finish stuffing firmly.
R18: dec x6 (6)
Fo, leave long tail for sewing the head.
Ears: (2x light, 2x dark)
R1. ch7
R2. (start in the 2nd chain): inc, 5sc, ch1, turn (7)
R3. 5sc, inc x2, ch1, turn (9)
R4. 7sc, dec, ch1, turn (8)
R5. dec, 2sc, dec x2, ch1, turn (5)
R6. dec, 3sc, ch1, turn (4)
R7. dec x2, ch1, turn (2)
R8. 2sc, ch1, turn (2)
R9. dec, fo+ weave in tails (1)*
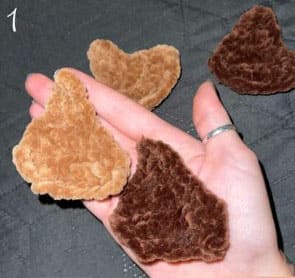
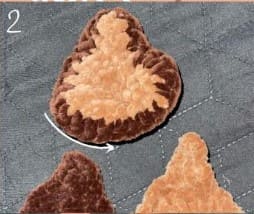
Lay the light part onto the dark part and sc around with dark brown yarn. You’ll need to turn one pair around, so that they turn out facing the opposite side.
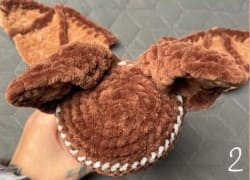
Afterwards you’ll need to fold the inside part (Picture 2) slightly towards the middle of the ear and secure it with the dark yarn.
If you prefer skip the fo and weave in part of 9. at the light part, so you can immediately web them together starting at the last insert.
Wings: (x2 in light brown)
(Ch1 and turn after every round. Start with ch2)
R1. 3sc in the first chain (3)
R2. inc x3 (6)
R3. (inc, sc) x3 (9)
R4. (inc, 2sc) x3 (12)
R5. (inc, sc) x6 (18)
R6. 18 sc (18)
R7. (inc, 5sc) x3 (21)
Important Note: Parts that are as follows written in parentheses are worked in the same stitch!
Remember the goal is to archive some kind of waveform during the last row.
R8. sc, (tc, dc), hdc, sc, sl st x2, sc, hdc, dc, (dc, tc, dc), dc, hdc, sc, sl st x2, sc, hdc, dc, (dc, tc, dc), sc, fo with sl st (21)
Weave in tails at the end.
Wing bones: (2x in dark brown)
(Work as tight as possible)
R1: ch6 and sc together at the end (6)
R2-R5: 6sc (x4 rounds of 6)
R6: dec, 2sc, dec (4)
R7: inc x2, 2sc (6)
R8: 4sc, dec (5)
R9-R11: 5sc (x3 rounds of 5)
R12: dec, dec, sc (3)
R13-R18: 3sc (x6 rounds of 3)
R19: dec, 1sc (2)
R20: dec (1)
R21: 1sc (1)
R22: sl st, fo, weave in tails
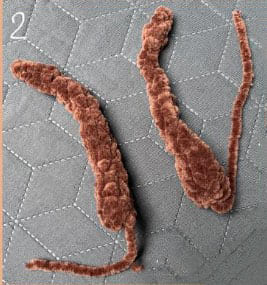
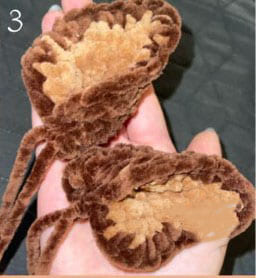
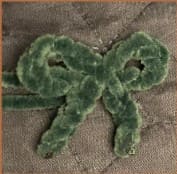
Sew the bone with dark brown yarn to the wing like on picture 3 and your wings are finished. Do it asymmetrical, so that you get a matching pair of wings.You can use some kind of filling or even a Q-tip inside the wing bone to stabilize it more! If you use a less chunky yarn you can also do 4 wings and web 2 of them together to make it more stable if you would like to.
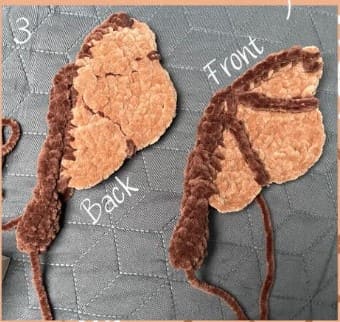
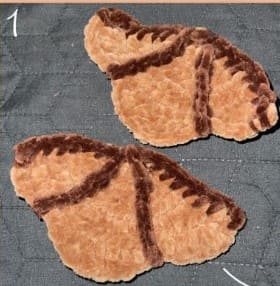
Continue to sc dark brown around the outer parts (not the side from R8).
And sc two lines about the surface like you see on picture 1.
Feet (make 2)
Start with dark brown.
R1. 6 in MR (6)
R2. inc x6 (12)
R3. (sc,inc)x6 (18)
CC to white.
R4. 18 sc (18)
CC to dark brown.
R5. (sc,dec)x6 (12)
R6. dec x6 (6) – stuff.
Fold together and close with:
R7. 3x inc, ch 1, turn (6)
R8. 6sc, ch 1, turn (6)
R9. inc, 4sc, inc, ch1, turn (8)
R10-11. 8sc, ch1, turn (2 rows of 8)
R12. dec, 4sc, dec, ch1, turn (6)
R13. dec, 2sc, dec (4)
FO, leave long tail for sewing.
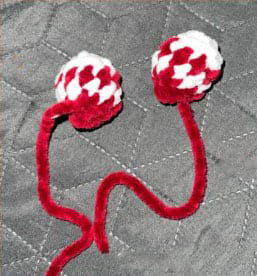
Sugar arms: (make 2)
Start in white:
R1. 6 in MR (6)
R2. (sc,inc)x3 (9)
CC to red:
R3. 9 sc (9)
CC to white:
R4. 9 sc (9)
CC to red:
R5. (sc,dec)x3 (6) – stuff.
R6. dec x3, FO, close hole and leave tail for sewing.
Please note that you’ll continue to work in rows after R6 at the feet.
Assemble
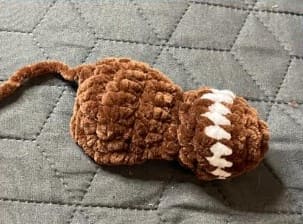
Head to the body: leave a chin in the front as seen on picture 1.
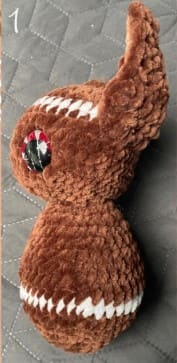
Ears to the head: apply them at R7 of the head. Between eyes and ears should be 4 visible stitches. You can see if very clear if you count the white sc.
At my back the ears are three stitches apart (picture 2) but it depends a bit on how much you folded them together earlier.
The following part (sewing of the wings and legs) can be a bit tricky so if you have any trouble following my instructions just sew them as it looks right without counting the rows.
Wings to the body: approximately between R9-14 and on the back 7-8 visible stitches apart (picture 3).

Arms to the body: just place them right unter the head, touching the wings.
Legs to the body: feet between R3-7. Upper part 20 visible stitches apart and lower part 7 visible stitches apart. Last part of the legs are touching each other like in the drawing below. You can also stuff lightly between legs and body before closing the last side.
Optional decor part 1
Sugar drop on the head:
Use the same pattern as for the arms but switch the colours.
Bow: (2 different options)
1. Ch14, fo, weave in tail ch7, fo, weave in tail It should look like:
Just tie it together in the middle with a litle piece of yarn in the same color.
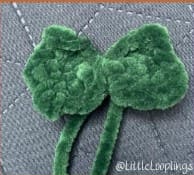
2. Ch7 and turn work do it 4 times (7×4)
It should look like:
Just tie it together in the middle with a little piece of yarn in the same color.
Optional decor part 2
1. This is just an example, you can get as creative as you would like to!
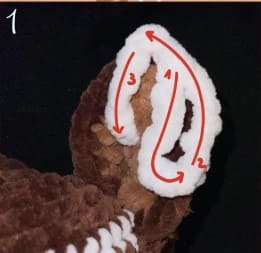
I did insert at point 1, secure with 1sc, ch7 to create a drop. At point 2 I started to sc along the ear until ı reached the top. For 3: ch2-3 and finished with another sc before fo and weaving in the tail.
2. Sew the sugar drop right next to the ear and start to surround it with some sugar glaze. I did the one drip you see on the second picture that’s completely inserted forth and back and afterwards I worked with 1 sc along the surface and ch3 in turns to create a dripping look.

3. Use white or transparent thread to apply some christmas themed beads as a finish.

That’s it! You finished your own the gingerbread bat!