
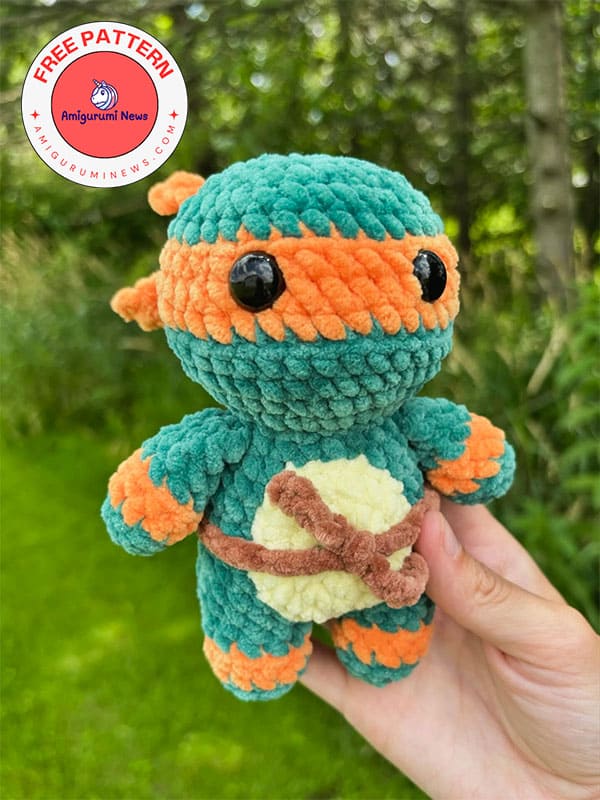
You can now make the iconic Teenage Mutant Ninja Turtles (TMNT) plush amigurumi from the 80s and 90s. Since it’s made using chenille yarn, you can create any ninja turtle and cuddle it. It’s a great crochet amigurumi pattern for beginners, as it uses simple crochet techniques like single crochet, increases, and decreases. You’ll need blue yarn for Leonardo, red yarn for Raphael, orange yarn for Michelangelo, and purple yarn for Donatello. Here are some free crochet Teenage Mutant Ninja Turtles that kids and adults will love.
Crochet teenage mutant ninja turtles
A quick crochet Ninja Turtle amigurumi for fans of nostalgic cartoon characters is now available. Check out the free pattern below and create your own crochet Ninja Turtle step by step.
Via: punyhuman.crafts
Materials and tools:
Parfait chunky (6 weight)
Key lime (main color)- body color
Tangerine, Iris, Cardinal or classic blue (contrast color)- bandana color
Sunshine- underbelly color
Teddy bear- hand shell & belt color
14mm safety eyes
4.5mm crochet hook
Poly-fill stuffing
Other: fabric glue- for added safety eye security, needle, scissors, and a lighter – for melting yarn ends.
Abbreviations:
MR: magic ring
mc: main color
R: round
cc: contrast color
ch: chain
sc: single crochet
inc: increase
dec: decrease
hdc: half double crochet
BLO: back loop only
FLO: front loop only
slst: slip stitch
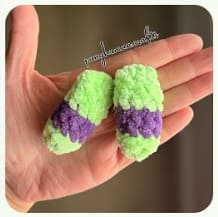
Arms (make 2)
The mc will be written in regular text.
The cc will be written in bold.
Note: make sure to make the arms first. They are crocheted onto the body.
R1. 6 sc in MR (6)
R2. (sc,inc)x3 (9)
R3. BLO 9 sc (9)
R4. 9 sc (9)
FO cc. Start lightly stuffing the arm. Keep stuffing as you go.
R5. BLO 9 sc (9)
R6. 7sc, dec (8)
R7. 3sc, dec, 3sc (7)
Finish stuffing the arm.
R8. Fold arm in half, work 3 sc across through both sides of the arm, leave one st unworked (3)
Cut a short yarn tail, FO, weave in your tail end. Set your arms aside for now. We will be crocheting it onto the body.
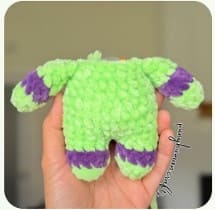
Legs (make 2)
Note: the legs, body, and head are worked as one piece.
R1. 7 sc in MR (7)
R2. inc, (sc,inc)x3 (11)
R3. BLO: 11 sc (11)
R4. 11 sc (11)
FO cc.
R5. BLO: 11 sc (11)
Leg 1: slst into the next st, cut a long yarn tail, FO.
Leg 2: continue to R6.
Joining the legs:
R6. 2ch, sc into leg 1 (move the st marker to this st), 10 sc, 2 sc (first side of the ch), 11 sc, 2 sc (other side of the ch) (26)
Use the yarn tail from leg 1 to sew any gaps between the legs.

Body
R7. 5 sc, inc, 12 sc, inc, 7 sc (28)
R8-11. 28 sc (28) – 4 rounds
R12. (5sc,dec)x4 (24)
Begin stuffing. Keep stuffing as you go.
R13. 24 sc (24)
R14. (dec,4sc)x4 (20)
The arms are crocheted in place in the next round. Place the arm against the body with the color change facing down.
Work through both pieces. Adjust the arm placement as needed so the arms are parallel to the body.
R15. sc, attach arm 1 using the next 3sts, 7 sc, attach arm 2 using the next 3 sts, 2 sc (20)
R16. (dec,3sc)x4 (16)
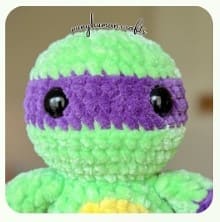
Head
R17. 16 inc (32)
R18. (7sc,inc)x4 (36)
R19-20. 36 sc (36) – 2 rounds
R21. BLO: 36 sc (36)
R22. 36 sc (36)
R23. (7sc,dec)x4 (32)
FO cc.
R24. BLO: 32 sc (32)
R25. 32 sc (32)
Place safety eyes 7 sts apart between R22 and R23.
R26. (2sc,dec)x8 (24)
R27. (sc,dec)x8 (16)
R28. 8 dec (8)
Finish stuffing, FO, cut the yarn and close the hole.
Underbelly
R1. 8 sc in MR (8)
R2. 8 inc (16)
R3. (sc,inc)x8 (24)
Slst, cut a long yarn tail for sewing, FO.

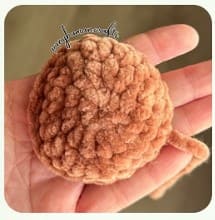
Shell
R1. 8 sc in MR (8)
R2. (inc,2 hdc-inc, inc)x2 (16)
R3. (sc, inc, hdc, 2 hdc-inc, hdc, inc, sc)x2 (24)
R4. 24 sc (24)
R25. FLO: 24 sc (24)
Slst, cut a long yarn tail for sewing, FO.
Assembly
Underbelly:
Sew the underbelly between the top of R7 & the bottom of R15. Make sure that it is centered.
Frequently check for alignment. Do not stuff the underbelly.
Shell:
When orienting the shell, the hdc’s should be vertically aligned and the shell is centered.
Sew the shell between the top of R6 & the bottom of R16 using the back loops of R4.
Stuff the shell as you go. Do not overstuff.

Belt
Using brown yarn, make a slip knot, ch 40, FO, weave in ends.
Adjust the amount of ch sts to how many you need to wrap around the plushie and make a box knot.
Tightly knot the belt around the plushie (over the shell and underbelly) so it stays in place.
Mask bow
Using bandana colored yarn, make a slip knot, ch 19, starting in the 2nd ch from the hook, slst, sc, hdc, 2 dc, 8 slst, 2 dc, hdc, sc, slst, cut a short yarn tail, FO, weave in ends.
Tie the piece into a knot and sew it over your color changes on the head between R21 & R23.
Here, Crochet Ninja Turtles are ready!!


