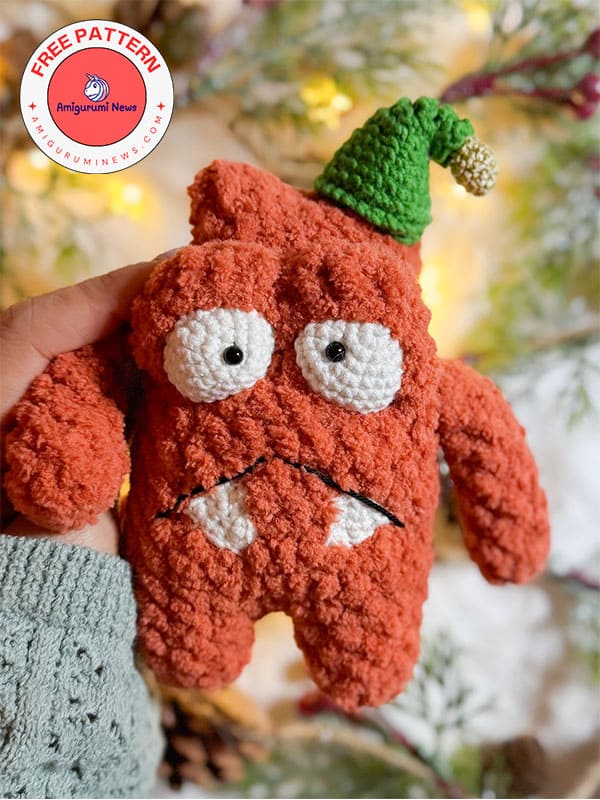
If you are looking for a fun and creative crochet project, a cute crochet monster amigurumi is the perfect choice. These playful little creatures are loved by both kids and adults, and they are a great way to turn simple yarn into something full of personality. With the right crochet monster pattern, you can easily create a handmade toy that feels unique and special.
One of the best things about making a monster amigurumi is that there are no strict rules. You can change colors, add funny eyes, or make long arms and tiny legs. This freedom makes every crochet monster different, even when you follow the same free amigurumi pattern. Whether you are new to crochet or already experienced, this type of project is relaxing, enjoyable, and very rewarding.
A crochet monster pattern is also an excellent way to practice shaping techniques. You will learn how to increase, decrease, and build smooth, rounded forms. These skills are useful not only for monsters but also for many other amigurumi animals and dolls. By finishing one monster, you improve your overall crochet confidence and creativity.
Funny crochet monster pattern
Don’t worry about finding a crochet monster pattern challenging. This free amigurumi pattern is written with clear steps that guide you from the first stitch to the final assembly. You start with a magic ring, build the body piece by piece, and watch your monster slowly come to life.
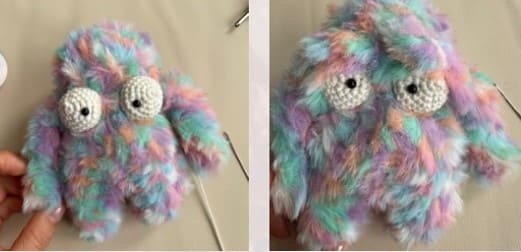
The crochet monster pattern below shows you how to shape the body, attach the limbs, and add small details like eyes and a mouth. These details give your amigurumi its personality. Even if two people use the same free amigurumi pattern, the final result will look different due to yarn choice, tension, and creative touches.
When choosing yarn, soft acrylic or cotton are best for amigurumi monsters. Bright or pastel colors make the toy more fun, while darker tones can create a more mysterious character. Match your yarn to a comfortable crochet hook size to keep your stitches tight and ensure the stuffing isn’t showing.
The beauty of the crochet monster pattern is its flexibility. You can make the monster larger using thicker yarn or smaller using thinner yarn. You can also add accessories like hats, scarves, or little hearts. This transforms a simple, free amigurumi pattern into a fully personalized project.
Ultimately, crocheting a monster isn’t just about following instructions. It’s about enjoying the process and letting your imagination guide you. With just one simple crochet monster pattern, you can create countless different characters, each with its own story and charm.
Designer: nika.r_
Supplies for little monster:
• Some fluffy or plush yarn 100g/55-68m- 50-60g;
• A pair of safety eyes, 6 mm;
• Some cotton yarn to crochet the eyes;
• Some cotton or plush yarn to crochet the hat;
• A hook for fluffy yarn – 4.5 mm, for cotton yarn – 2 mm;
• A lighter;
• Fiberfill;
• Markers;
• Scissors;
Abbreviations:
MR- magic ring
ch- chain
sc- single crochet
dc- double crochet
dec- decrease
inc- increase
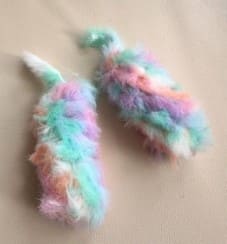
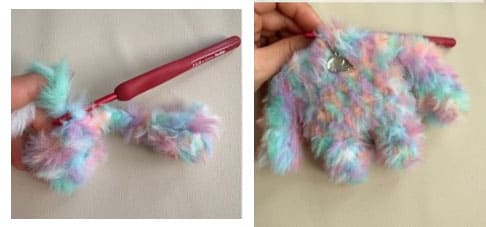
Let’s make the monster’s arms (2 pieces)
Rnd 1. sc 6 in MR (6)
Rnd 2-8. (7 rnds) sc6 (6)
Don’t stuff the arm with fiber or stuff only the hand a bit. Don’t stuff the top of the arm with fiber!
Fold in halves, sc3 in both sides. You’ll attach the arms later.
Making the Little Monster Legs (2 pieces)
Rnd 1. sc 6 in MR (6)
Rnd 2. inc1, sc5 (7)
Rnd 3. sc1, inc1, sc5 (8)
Crochet shifting sc2 along both legs.
Crochet 2 pieces. Fix and cut thread along one leg, don’t cut thread along the 2nd leg and go on crocheting the body.
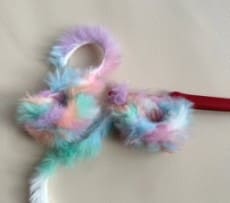
Monster’s body
Rnd 1. ch4, sc8 along 1 leg, sc4 along the chain, sc8 along the 2nd leg, sc4 along the chain (24)
Place the marker.
Rnd 2-8. (7 rnds) sc24 (24)
Attach he arms. Make sure they are at the sides.
If it’s necessary, shift the arms.
Rnd 9. sc3, sc3 together with the arm, sc10, sc3 together with the arm, sc5 (24)
Stuff the body with fiber.
Rnd 10. (sc2, dec1)*6 (18)
Rnd 11-13. (3 rnds) sc 18 (18)
There are 2 ways of crocheting the top of the head.
Variant 1. With ears
Crochet shifting sc to finish the work exactly at the side above the arm. Leave long tail thread. Fold the piece in halves and sew in both sides.
Fix and cut thread. Hide tail thread.
Variant 2. Round head.
Rnd 14. (sc1, dec 1)*6 (12)
Rnd 15. dec 6 (6)
Finish the work accurately. Fix and cut thread.

Eyelid details
ch13, turn the work, from the 2nd ch:
sc1, hdc1, dc3 in ch1, hdc1, sc1, sl st2, sc1, hdc1, dc3 in ch1, hdc1, sc1
Fix and cut thread.
Sew eyelids by some thin thread.

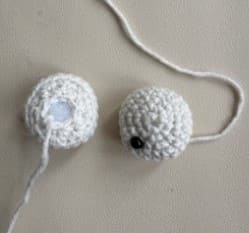
Big monster eyes (2 pieces)
Cotton thread, a hook 2 mm.
Rnd 1. sc6 in MR (6)
Rnd 2. inc6 (12)
Rnd 3. (sc1, inc1)*6 (18)
Rnd 4. (sc2, inc1)*6 (24)
Rnd 5-7. (3 rnds) sc24 (24)
Insert the eyes between 3 and 4 rnds. Fix the eye’s leg with a lighter.
Rnd 8. BLO (sc1, dec1)*8 (16)
Rnd 9. dec8 (8)
Leave long tail thread.
Stuff the eyes with fiber.
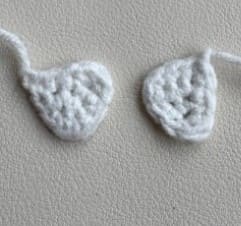
The monster’s cute teeth (2 pieces)
ch2, turn the work, fro mthe 2nd ch:
Rnd 1. sc2 (2) ch1, turn the work
Rnd 2. sc1, inc1 (3) ch1, turn the work
Rnd 3. sc3 (3)
Don’t turn the work.
Bind off (hide beginning tail thread in the process) sc3 along side edge, in the top sc (sc1, hdc1, sc1), sc3 along the 2nd side edge.
Fix thread, leave long tail thread.
Decoration details
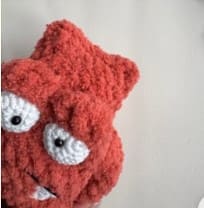
Sew the eyes along FLO between the arms in a short distance in between.
Sew the eyelids along the top of the eyes. Make additional stitches between the eyes.
Embroider the smile by black thread. Sew the teeth.
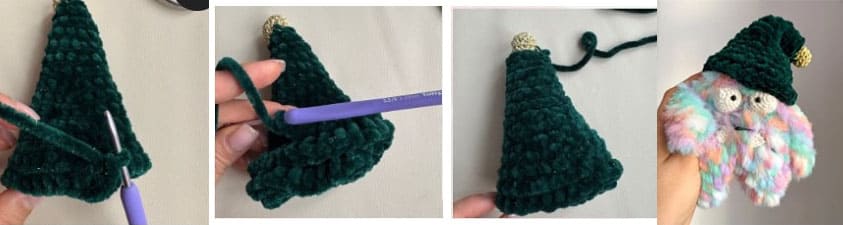
Christmas tree hat
You can take some cotton thread if you want to have a small hat.
If you take some plush yarn, the hat will be a bit bigger.
Top of the hat
Rnd 1. sc 6 in MR (6)
Rnd 2 inc6 (12)
Rnd 3-4. (2 rnds) sc12 (12)
Rnd 5. dec 6 (6)
Change thread color into green one.
Rnd 6. (sc1, inc1)*3 (9)
Stuff only the top of the Christmas tree with fiber. Then crochet in BLO.
Rnd 7. sc9 (9)
Rnd 8. (sc2, inc1)*3 (12)
Rnd 9. sc 12 (12)
Rnd 10. (sc3, inc1)*3 (15)
Rnd 11. sc15 (15)
Rnd 12. (sc4, inc1)*3 (18)
Rnd 13. sc18 (18)
Rnd 14. (sc5, inc1)*3 (21)
Rnd 15. sc21 (21)
Rnd 16. (sc6, inc1)*3 (24)
Rnd 17. sc 24 (24)
Try the hat on the head. In my case, I’ve crocheted extra rnds until required width of the hat. The biggest hat is of sc30.
Sl st 1 in next sc. Turn the work, sl st in FLO of previous rnd. Bind off the hat in spiral in FLO, crocheting (dc1,ch1) in each sc.
Leave long tail thread and fix the hat’s fold with it.