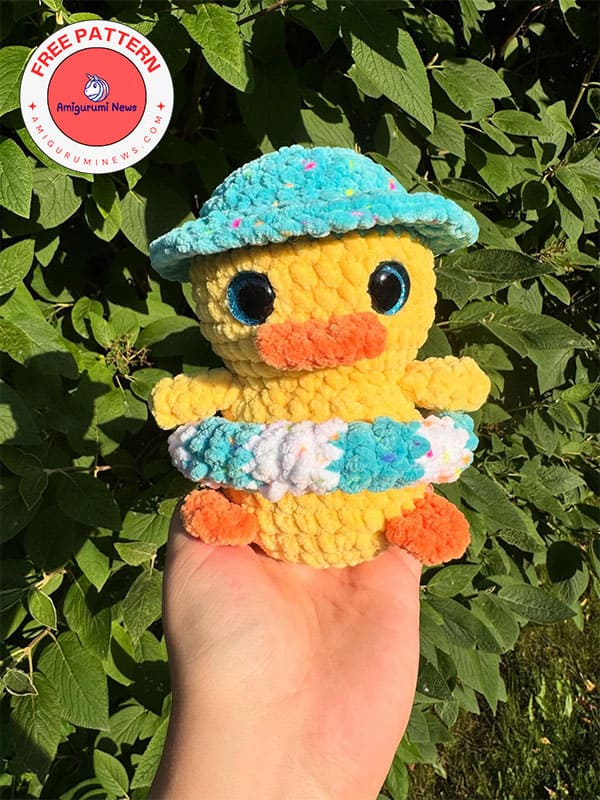
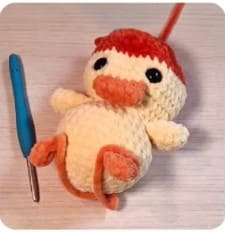
This tiny crochet duck is ready to go to the beach. A wonderfully cute summer crochet duck pattern that is perfect for Sunday is with us today. This crochet duck designed with a removable float is a wonderful summer amigurumi pattern. Those who are bored at home on Sunday can quickly prepare this cute crochet duck. Doesn’t it look very nice with its tiny float and hat? Here is this cute duck amigurumi pattern with a detailed step-by-step explanation waiting for you below.
Little summer splash crochet duck pattern
Via: avarycrochets
Abbreviations:
sc- single crochet
mr- magic ring
inc- increase
dec- decrease
hdc- half double crochet
dc- double crochet
scfh- second chain from hook
blo- back loop only
sm- stitch marker
slst- slip stitch
Materials:
Hook: 4.5mm
Yarn:
• Category 6 super bulky (hobbii honey bunny is used in photo)
• Yellow, light orange, dark orange, and white.
14mm safety eyes
Sewing needle
Stuffing
Scissors
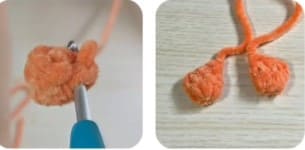
Feet (make 2)
Using orange yarn.
R1. 6 sc in mr (6)
R2. 6 sc (6)
R3. Fold and 3 sc both sides together (3)
Fasten off. Leaving a long tail we will use later.
Wings (make 2)
Using yellow yarn.
R1. 4 sc in mr (4)
R2. (inc,1sc)x2 (6)
R3. (inc,1sc)x3 (9)
R4. 9 sc (9)
R5. (1sc,dec)x3 (6)
Fasten off, you do not need to leave a long tail.
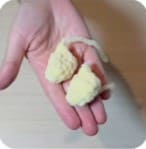
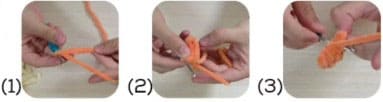
Beak
Using orange yarn.
1. ch 6.
2. Turn and scfh, 5 sc, turn and down the back of the chain, 5 sc.
3. Fold and 5 sc both sides together to close fasten off. Do not need to leave a long tail.
Duck
The duck is worked from the bottom up.
Using yellow yarn.
R1. 6 sc in mr (6)
R2. inc x6 (12)
R3. (1sc,inc)x6 (18)
R4. (2sc,inc)x6 (24)
R5. (3sc,inc)x6 (30)
Attach the feet.
Leave the long tail from the feet sticking out of the body.
R6. 9sc, (3sc, foot & body), 6sc, (3sc foot & body), 9 sc (30)
R7-10. 30 sc (30) (4 rounds)
R11. (3sc,dec)x6 (24)
Stuff the body.
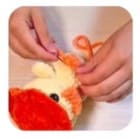
Attach the wings – fold & crochet the wings together as you work.
R12. 2sc, dec, 1 sc (wing & body, 1sc, dec, 1sc), 1 sc, dec, 2 sc, dec, 1 sc, (wing & body 1 sc, dec, 1sc), 1 sc, dec (18)
The increases in the next rounds begin the head.
R13. (2sc,inc)x6 (24)
R14. (3sc,inc)x6 (30)
R15. (4sc,inc)x6 (36)
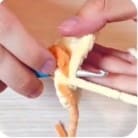
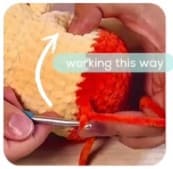
Attach the beak.
R16. 16 sc, (beak & body 5sc), 15 sc (36)
R17-R19. 36 sc (36) (3 rounds)
Colour change to hat (dark orange)
R20. 36 sc (36)
Place a sm in the front loop of the first stitch of R20. We will use it later to make the hat brim.
R21. BLO: 36 sc (36)
Insert safety eyes in between R17-R18, on either side of the beak.
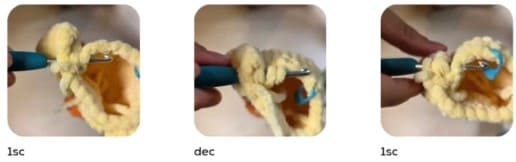
R22. (4sc,dec)x6 (30)
R23. (3sc,dec)x6 (24)
R24. (2sc,dec)x6 (18)
Stuff the head.
R25. (1sc,dec)x6 (12)
R26. decx6 (6)
Finish adding any stuffing.
Fasten off and pull through remaining 6 loops. Tie & hide ends.
Hat brim
The hat brim is worked into the front loops of R20.
Using the same color you used for the hat, pull up a loop in the stitch you left a stitch marker in.
Ch 2, dc in same stitch, dc, (dc,inc,dc)x17 (54)
Slst into the ch 2.
Fasten off, weaving tail back into the hat.
Tie both ends together and hide them.
Tail
In R6 at the back, center 3 stitches of the duck, pull up a loop & (1) ch 1, in the same stitch hdc, then continue with a (2) dc, and finish in the last stitch with (3) hdc, then a slst.
Fasten off, tie & hide ends.
Secure feet
Using the tail end we left from the feet, sew the feet flat against the body.
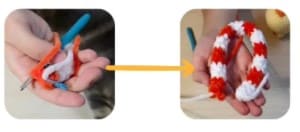
Floatie
Tips for colour changes:
Since the floatie is so small and involves a lot of colour changes, save time by not fastening off each time, instead, leave the tail end inside as you work, then pick it up when you’re ready to change colours.
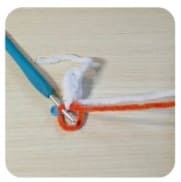
Using white yarn.
Chain 6 then begin in the starting chain:
R1-R3. 6 sc (6) (3 rounds)
Color change to orange:
R4-R6. 6 sc (6) (3 rounds)
Repeat R1-R6 for a total of 6 times.
Your tube size may need to be adjusted depending on your yarn, hook size, and tension. To do this add or remove an extra row.
Once it is the desired size, fasten off leaving a long tail.
Sew the end 6 stitches to the starting 6 stitches, no need to stuff.