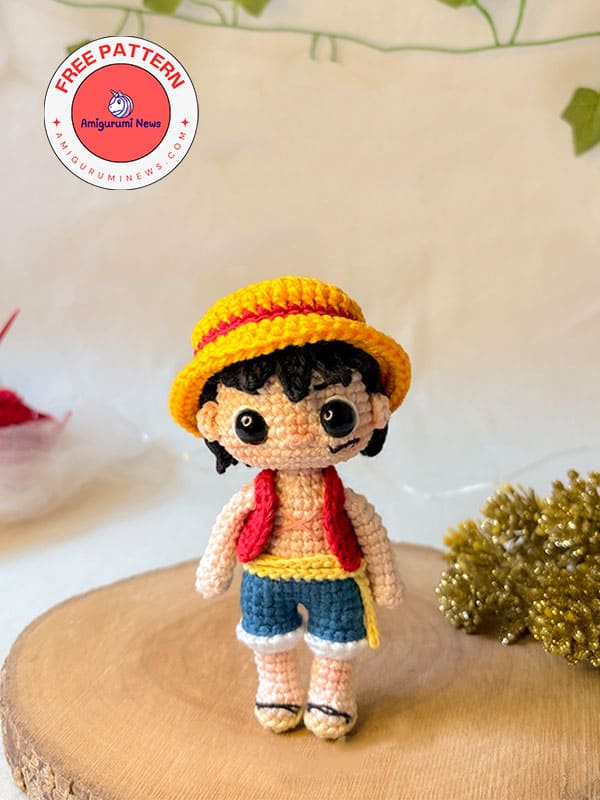
If you’re a One Piece fan and love crochet amigurumi, this Luffy One Piece amigurumi pattern is perfect for you! Inspired by the beloved anime and manga series, this adorable one piece Luffy crochet doll embodies Monkey D. Luffy’s adventurous spirit with his iconic straw hat, red vest, and cheerful smile. This free crochet doll pattern is a fun and rewarding way to bring your favorite pirate captain to life.
Luffy one piece amigurumi pattern
This Luffy One Piece crochet pattern is designed to be easy to follow, making it ideal for crafters of all levels. Using simple stitches, you can create your own soft and cuddly version of the Straw Hat Captain. The finished doll would make a wonderful handmade gift for One Piece fans or a collectible to proudly display on your shelf.
One of the best aspects of this pattern is the attention to detail: from Luffy’s bright yellow hat to his tiny sandals and the scar under his eye, every element reflects his iconic look. The use of colorful yarns makes the amigurumi project vibrant and fun to work with. You can even customize the size by adjusting your yarn weight or crochet hook size. Now, let’s take a look at the free amigurumi pattern below, which you can follow step by step.
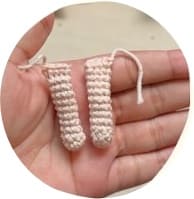
We start with the flesh color
Rnd 1. MR of 6sc
Rnd 2. (2sc, 1inc)x2 (8)
Rnd 3-11. 8sc (9 rounds)
Rnd 12. 3sc, we join the fabric and knit 4 sc to close the arm.
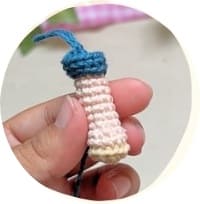
Legs (x2)
We start with the beige color
Rnd 1. 4 ch
Rnd 2. 2sc, inc of 4sc, 2sc (8)
Rnd 3. 1inc, 1sc, 3inc, 2sc, 1inc (13)
We changed to flesh color
Rnd 4. In BLO 13 slst
Rnd 5. FLO 13sc
Rnd 6. 4sc, 2 dec, 5 sc (1)
Rnd 7. 4sc, 1 dec, 5sc (10)
Rnd 8-12. 10sc (5 rounds)
We change to blue color
Rnd 13. In FLO (2sc, 1inc)x3, 1sc (13)
Rnd 14. In BLO 13sc
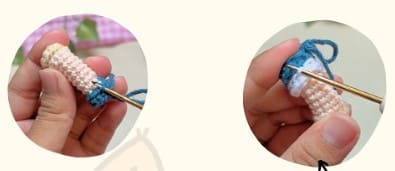
We are going to position ourselves in round 14 and we will knit in the BLO that is left
Rnd 1. 13sc
We change to white color
Rnd 2. In BLO 13slst (knit them loosely)
Rnd 3. In BLO we do 13 sc
We are going to position ourselves in round 2 and we will crochet in the BLO that is left.
We start with the white color.
Rnd 1. (1slst, 1 ch)x13
Union of Legs
(With Blue) On the second leg we will knit 3 sc, 1 ch in the air and join with 1 slst in point 11 of the first leg
Rnd 1. we continue with 12 sc, 1 sc in the ch, 13 sc, 1 sc in the ch (28)
Rnd 2-4. 28sc (3 rounds)
We changed to flesh color
Rnd 5. (4sc, 1dec)x4, 4sc (24)
Rnd 6. 24sc
Rnd 7. (3sc, 1dec)x4, 4sc (20)
Rnd 8-11. 20 sc (4 rounds)
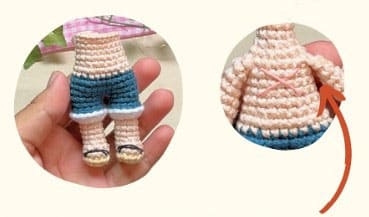
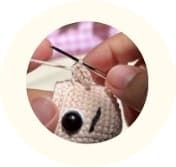
We add details to the body (as shown in image 1)
Union of Arms
Rnd 12. 3sc, 4sc taking the arm stitches together with those of the body, 6sc, 4sc taking the arm stitches together with those of the body, 3sc (20)
Rnd 13. (2sc, 1dec)x5 (15)
Rnd 14. (1sc, 1dec)x5 (10)
Rnd 15-19. 10sc (5 rounds)
Rnd 20. 5 dec (5)
We cut, close our fabric and hide the thread.
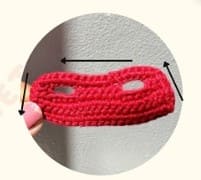
Waistcoat
We start with red
Rnd 1. 18 ch
We go up 1 chain in height, we start in the second chain
Rnd 2. 2sc 5 ch (We skip 4 ch), 1 sc in the 5th ch, 5 sc, 5 ch, (We skip 4 ch), 1 sc in the 5th ch, 1 sc (20)
Rnd 3-6. 20sc (4 rows)
Rnd 7. we go up 1 ch, sc all around the fabric.
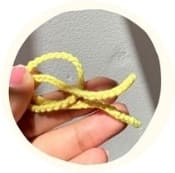
Belt
We start with yellow
Rnd 1. 70 ch
We cut the excess yarn from both ends.
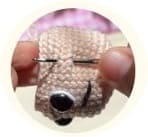
We’ll take 2 stitches, one from round 14 and one from round 15.
We’ll pass the yarn between the two stitches to make a MR and ch 2.
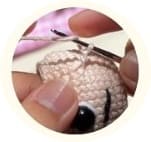
And within the resulting MR, we’ll make 5 hdc.
We hide strands, and we will do the same on the other side.
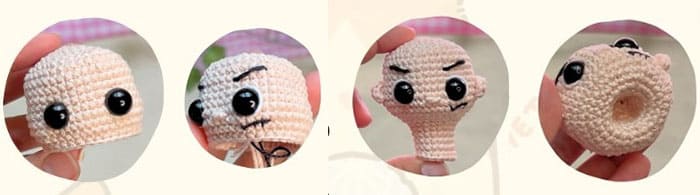
Safety eyes between round 12-13 with 5 sc of separation nose between round 13 and 14 scar under one eye
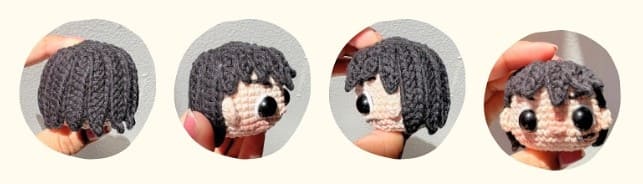
Hair
We start with black
Rnd 1. MR of 6 sc
Rnd 2. 6 inc (12)
Rnd 3. (1sc, 1inc)x6 (18)
We will work in blocks to make it easier to understand.
Block 1:
Rnd 1. (13 ch, 1 slst, 1 sc, 3 hdc) x 1 strand total, (1 dec at the base)
Pin 1:
Rnd 2. (6ch, 1slst, 1sc, 3hdc) x 1 strand in total, (1 dec at the base)
Block 3 fringe:
Rnd 1. (5ch, 1slst, 1sc, 2hdc)x2
Rnd 2. (6ch, 1slst, 1sc, 3hdc)x1
Rnd 3. (7ch, 1slst, 1sc, 4hdc)x1
Rnd 4. (6ch, 1slst, 1sc, 3hdc)x1
Rnd 5. (5ch, 1slst, 1sc, 3hdc)x1
Sideburns 2:
Rnd 1. (6ch, 1slst, 1sc, 3hdc) x 1 strand in total
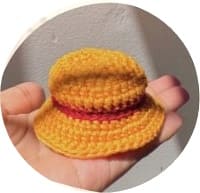
Hat
We start with a bright yellow color.
(We will close each row with a slst)
Rnd 1. MR of 6 hdc
Rnd 2. 6 inc hdc (12)
Rnd 3. (1hdc, 1inc hdc)x6 (18)
Rnd 4. (2hdc, 1 inc hdc)x6 (24)
Rnd 5. (3hdc, 1 inc hdc)x6 (30)
Rnd 6. 2hdc, 1 inc hdc, (4hdc, 1 inc hdc)x5, 2 hdc (36)
Rnd 7. 36hdc
We change to red color
Rnd 8-9. 36sc (2 rounds)
We change to strong yellow
Rnd 10. In BLO (2hdc, 1 inc hdc)x12 (48)
Rnd 11-12. 48hdc (rounds)
To provide the best experiences, we use technologies like cookies to store and/or access device information. Consenting to these technologies will allow us to process data such as browsing behavior or unique IDs on this site. Not consenting or withdrawing consent, may adversely affect certain features and functions.
Functional
Always active
The technical storage or access is strictly necessary for the legitimate purpose of enabling the use of a specific service explicitly requested by the subscriber or user, or for the sole purpose of carrying out the transmission of a communication over an electronic communications network.
Preferences
The technical storage or access is necessary for the legitimate purpose of storing preferences that are not requested by the subscriber or user.
Statistics
The technical storage or access that is used exclusively for statistical purposes.The technical storage or access that is used exclusively for anonymous statistical purposes. Without a subpoena, voluntary compliance on the part of your Internet Service Provider, or additional records from a third party, information stored or retrieved for this purpose alone cannot usually be used to identify you.
Marketing
The technical storage or access is required to create user profiles to send advertising, or to track the user on a website or across several websites for similar marketing purposes.