Greetings from a beautiful December day. Today we’ll be covering how to make a Christmas tree for beginners. We’ll be sharing a step-by-step crochet Christmas tree plush pattern. Whether you want to decorate your Christmas tree or use it as a Christmas decoration in your home, this crocheted Christmas tree is made using very simple crochet techniques. So, you don’t need to be very advanced. Three colors of yarn will do the trick, but you can create a tree in different colors to your liking.
How to crochet a christmas tree for beginners
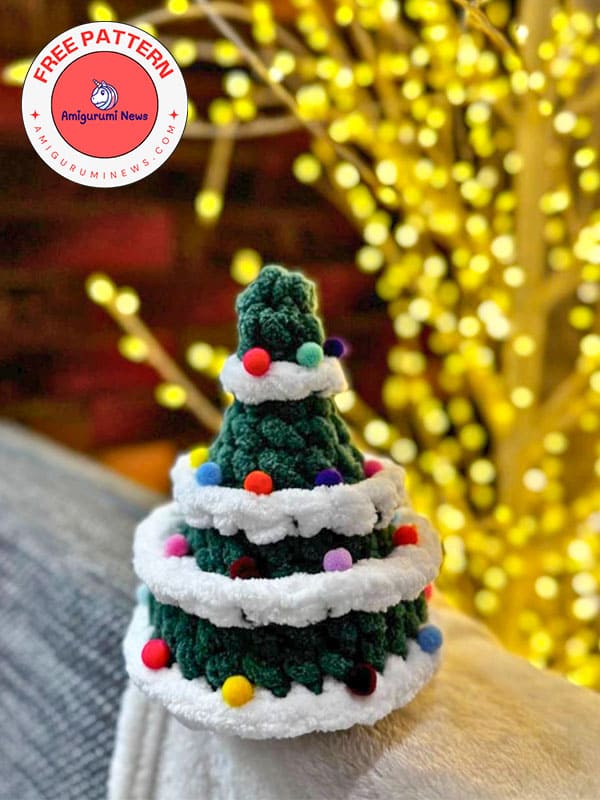
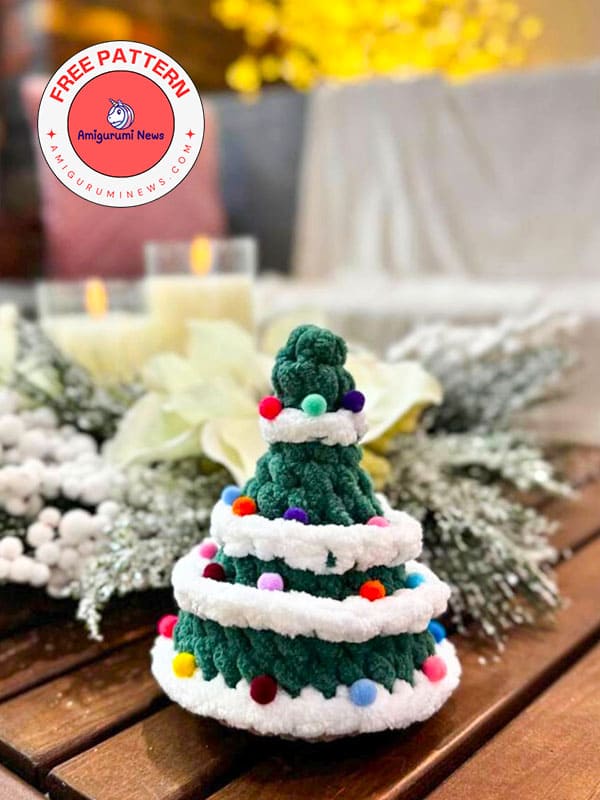
Those wondering how to make a crochet christmas tree should gather around this topic. Christmas is just a few weeks away, and preparations are now in order. Here’s the handmade plush crochet Christmas tree pattern. Create your own Christmas tree right now by following the free pattern instructions below. The finished crochet Christmas tree plush will measure 14 cm. Finally, you can decorate it using colorful beads of your choice.
Designer: rosalie_toys
Materials:
• Alize velluto (jumobo)
– Green
– Brown
– White
• 7.0 mm crochet hook
• Yarn needle
• Hollow fiber (polyfill)
• St. marker.
Abbreviations:
MR- magic ring
ch- chain
st- stitch
slst- slip stitch
sc- single crochet
dec- decrease
inc- increase (2 sc in one st)
hdc- half double crochet
R- round
btw- between
FO- fasten off
In R4, R8 and R10, place a marker on the last front loop; this will help you to easily find the rest of the front loops to create the tinsel.
Tree base
Start with brown.
R1. 8 sc in MR (8)
R2. 8 inc (12)
R3. (sc,inc)x8 (24)
R4. (11sc, 3sc in one st)x2 (28)
Cut the yarn, FO.
Assembly
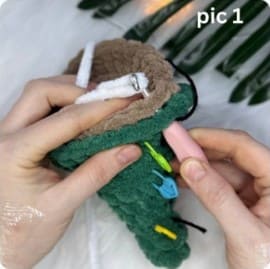
1. Place the base piece at the bottom of the tree.
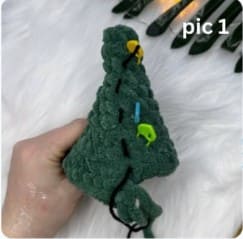
2. Using white yarn, join at the point where R11 ended, making a slst through both layers (pic1).
3. Continue crocheting around, working (sc,hdc) through both layers, alternating stitches until the hole is fully closed. You should have 28 stitches at the end of the round.
Note: Don’t forget to add stuffing if needed before closing. But keep the bottom of the tree nice and flat.
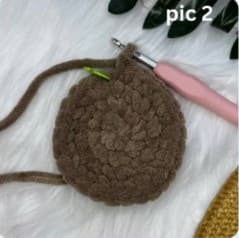
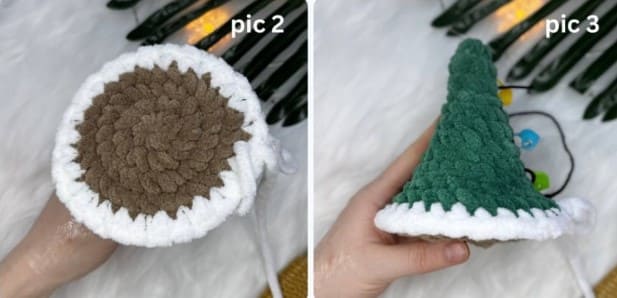
Cut the white yarn, FO. Tie off the ends with a secure knot, and tuck them inside the tree (pics 2-3).
Tinsel
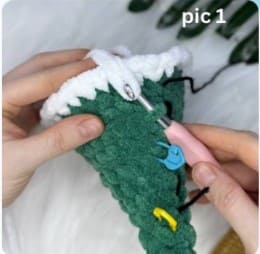
Take the white yarn and attach it with a slst to the first front loop of R10 (pic 1). Continue crocheting around, working (sc,hdc) to the end of the round.
You should end up with 11 repeats and one stitch left. Make sc in that last stitch.
Cut the yarn, tie the ends in a knot, and hide them inside the tree.
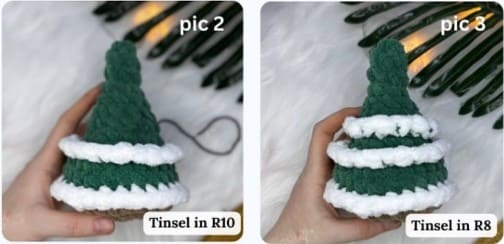
Repeat the same in R8 (pic 3).
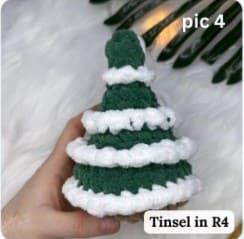
Take the white yarn and attach it with a slst to the first front loop of R4.
Continue crocheting sc around until the end of the round, (not too right)(pic 4).
Feel free to decorate the tree however you like.
Use any color for the tinsel and enjoy the process.