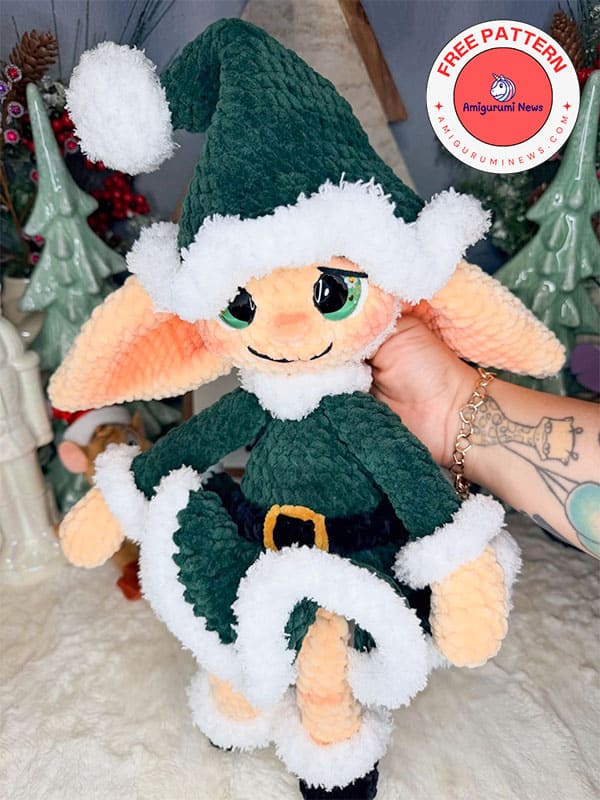
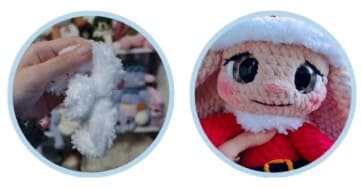
Crochet amigurumi fans know there’s something truly special about creating handmade amigurumi dolls, and this crochet elf doll is a perfect example of that magic. With its soft texture, festive Christmas Santa outfit, and sweet facial expression, this adorable crochet elf plush will add warmth and charm to any Christmas decoration or handmade gift collection. Whether you’re a long-time amigurumi maker or someone who enjoys seasonal projects, making and displaying such an elf doll will always be a great pleasure.
One of the most appealing features of crochet elf dolls is how versatile they are. This design, with its red outfit, fluffy white details, and cheerful elf style, captures the classic Christmas spirit, making it ideal for holiday decoration. At the same time, its soft body and plush appearance make it suitable as a cuddly crochet elf plush, especially for those who love amigurumi figures. Handmade crochet dolls always carry a sense of care and personality, and elf designs evoke a magical feeling, especially during the winter months.
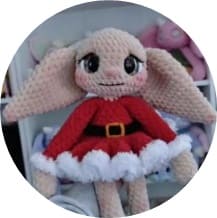
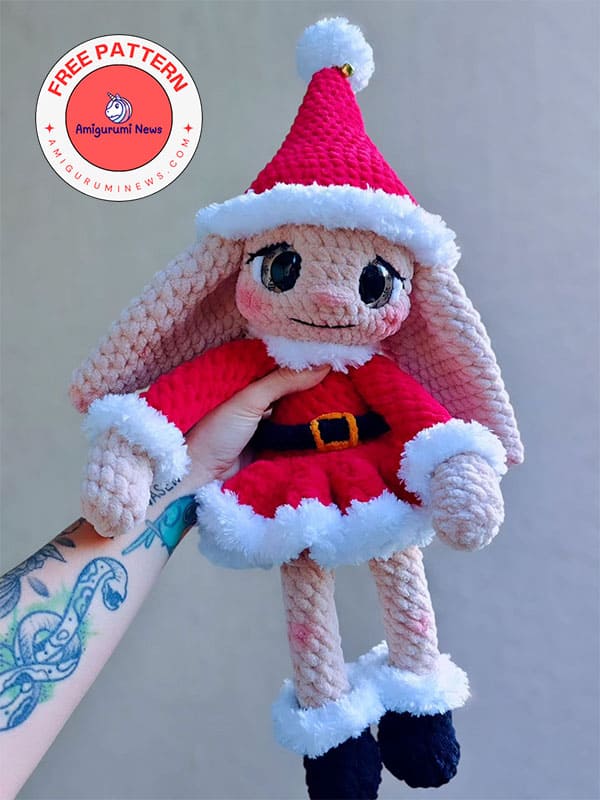
Miss santa crochet christmas elf doll pattern
From a crafting perspective, working on a crochet elf plushie is both relaxing and rewarding. The detailed clothing, long limbs, and expressive face offer enough of a challenge to keep the process interesting, yet remain accessible to most amigurumi enthusiasts. Using soft yarns and detailed accessories enhances the doll’s comfortable look and feel, giving it a professional, high-quality appearance. Small details like hats, belts, and fluffy embellishments add personality to the elf and make it feel alive. So feel free to decorate your own elf doll however you like. You can use all sorts of Christmas-themed accessories you can think of.
• Scissors
• Needle
• Stuffing
• Stitch marker
• Crochet hook:
(Marleena used a 5mm)
(Megan used a 4.5mm)
• Safety eyes:
(Marleena used 30mm)
(Megan used 25mm)
• Yarn:
(Marleena used Alize velluto and YarnArt Fable fur)
(Megan used chenillelove)
Abbreviations:
Ch- chain
Sc- single crochet
Inc- increase
Dec- decrease
FO- fasten off
St- stitch
Slst- slip stitch
MR- magic ring
CC- color change
Dc- double crochet
hdc- half double crochet
dcinc- double crochet increase
hdcinc- half double crochet increase
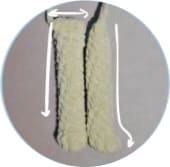
Arms (make x2)
• In skin color:
R1: Sc8 in MR [8]
R2: (Sc, Inc) x 4 [12]
R3: Sc around [12] * 1 round *
R4: Dec x 2, Sc3, Inc x 2, Sc3 [12]
R5: Dec x 2, Sc8 [10]
R6: Dec, Sc6, Dec [8]
Stuff the arms as you go.
• In red:
R7-20: Sc around [8] * 14 Rounds *
• Fold both sides together & Sc4, Fasten off, Weave in tail.
With red yarn, Slst around the colour change to clean up the arm, weave in the ends. [8]
Slst white fur yarn in the 1st st on the Slst round of the sleeves
R21: (Hdcinc) x8 [16]
FO & weave in tails.
Legs (make x2)
R1: Sc8 in MR [8]
R2: Sc, Hdc, Dcinc x 2, Hdc, Sc3 [10]
R3: Sc2, Dec x 2, Sc4 [8]
Stuff the feet as you go*
R4-18: Sc around [8] * 15 Rounds
• Fold both sides together & Sc4, Fasten off, Weave in tail.
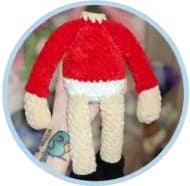
When adding the arm, please make sure the sc2 is centered between legs; this allows the arms to sit straight with the legs, the curve should be inwards.
Body
• In white:
R1: Sc 8 in MR [8]
R2: Inc x8 [16]
R3: (Sc, Inc) x 8 [24]
R4: (Sc2, Inc) x 8 [32]
R5: Sc7, Sc4 through leg & body, Sc3, Sc4 through leg & body, Sc14 [32]
Begin stuffing as you go.
R6-7: Sc around [32] * 2 Rounds
• Cc to red:
R8: Slst around [32] *Don’t tighten the slst*
R9: BLO: Sc around [32] * 1 Round *
R10-11: Sc around [32]* 2 Rounds *
R12: (Sc2, Dec) x 8 [24]
R13: Sc around [24] * 1 Round
R14: (Sc, Dec) x 8 [16]
R15: Sc around [16] * 1 Round *
R16: (Sc6, Dec) x 2 [14]
R17: (Sc5, Dec) x 2 [12]
R18: Sc1, Sc4 through arm & body, sc2, Sc4 through arm & body, Sc1 [12]
• Cc to body color:
R19: (Sc 4, Dec) x 2 [10]
FO & Leave a long tail for sewing.
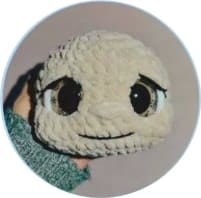
Head
R1: Sc7 in MR [7]
R2: Inc x 7 [14]
R3: (Sc, inc) x 7 [21]
R4: (Sc2, inc) x 7 [28]
R5: (Sc3, inc) x 7 [35]
R6-9: Sc around [35] * 4 rounds *
R10: Sc6, Hdcinc x 3, Sc8, Hdcinc x 3, Sc15 [41]
R11: Sc around [41] * 1 round *
R12: Sc6, Dec x 3, Sc8, Dec x 3, Sc15 [35]
R13: (Sc3, Dec) x 7 [28]
R14: (Sc2, Dec) x 7 [21]
• Insert safety eyes between rounds 8-9. Make sure they are centered between the cheeks (the hdc sts we made in R10), 4-6 visible sts apart. Stuff the head.
R15: (Sc, Dec) x 7 [14]
R16: Dec x 7 [7]
• Sew the hole closed, FO, hide the tail.
Facial Features:
Here is where you can get creative! Facial features give our little elfie some personality. You can give her a little nose between her eyes, you can give her little eyelids or eyeliner, you can even give her decorations!
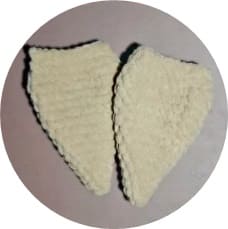
Ears (make x2)
R1: Sc6 in MR [6]
R2: (Sc2, Inc) x 2 [8]
R3: (Sc3, Inc) x 2 [10]
R4: (Sc4, Inc) x 2 [12]
R5: (Sc5, Inc) x 2 [14]
R6: (Sc6, Inc) x 2 [16]
R7: (Sc7, Inc) x 2 [18]
R8: (Sc8, Inc) x 2 [20]
R9: (Sc9, Inc) x 2 [22]
R10:(Sc10, Inc) x2 [24]
R11-12: Sc around [24] * 2 Rounds
R13: (Sc3, Inc) x 6 [30]
R14: Sc around [30] * 1 Round *
R15: (Sc3, Dec) x 6 [24]
R16: (Sc2, Dec) x 6 [18]
• Do not stuff!
• Fold in half and Sc9 through both sides, FO, and leave a tail for sewing.
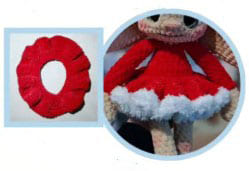
Neck Ruffle:
With white fur yarn:
R1: Chain 16, in 2nd chain from hook, Hdc x4 in each st x14 [56]
FO and leave a long tail, wrap it around the neck of Elfie, sew the back closed and shape the ruffles.
Sewing instructions:
Ears: sew the ears on rounds 7-13, 4 stitches away from the eyes. (You may need to adjust the position of the ears. Feel free to change it up). See pictures for sewing steps. You can also move the ears further down to achieve a floppy look.
Head: sew the head onto the body; I personelly like the head to be a little floppy, but if you’d prefer it to be more stable, stuff the neck more and sew the head a few times around to ensure it’s stable.
Make sure to check the “ch39” fits your elfie; you may need to add or remove a few chs.
Skirt
R1: Ch39, in 2nd chain from the hook, Sc38, Ch1, turn [38]
R2: (Sc1, Inc) x19, Ch2, turn [57]
R3: Dcinc x57, Ch2, turn [114] R4: Dc114 [114]
In white fur yarn:
R5: (Hdcinc) x114 [228]
• FO & Sew onto rounds 10-11 of the body.
You can sew the skirt on along the CC seam on the body.
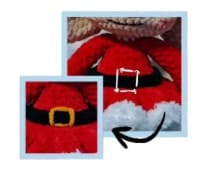
Belt
R1: Ch32, in 3rd chain from the hook, Hdc x30. [30]
FO, leave a long tail & sew the belt above the skirt seam.
Once the belt is attached, we will sew on the buckle detail!
• In yellow yarn:
Embroider a little square in the center of the belt.
Make sure the HDC & DEC are at the front of the shoe, you may need to add or remove some Sc.
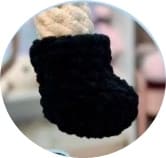
Boots
R1: Sc6 in MR [6]
R2: Inc x 6 [12]
R3: Sc, Hdc, Dcinc x 2, Hdc, Sc7 [14]
R4: Sc2, Hdc x 4, Sc8 [14]
R5: Sc2, Dec x 2, Sc8 [12]
R6-8: Sc around [12] * 3 Rounds *
FO, Weave in tail.
• In white fur yarn:
R9: (Hdcinc) x12 [24]
FO & weave in tails.
You can choose between the large hat or the smaller hat.
Large Hat:
R1: Sc6 in MR [6]
R2: (Sc2, Inc) x2 [8]
R3: (Sc3, Inc) x2 [10]
R4: (Sc4, Inc) x2 [12]
R5: (Sc5, Inc) x2 [14]
R6: (Sc6, Inc) x2 [16]
R7: (Sc7, Inc) x2 [18]
R8: (Sc8, Inc) x2 [20]
R9: (Sc9, Inc) x2 [22]
R10: (Sc10, Inc) x2 [24]
R11: (Sc11, Inc) x2 [26]
R12: (Sc12, Inc) x2 [28]
R13: (Sc13, Inc) x2 [30]
R14: (Sc14, Inc) x2 [32]
R15: (Sc7, Inc) x4 [36]
R16: (Sc8, Inc) x4 [40]
R17: (Sc9, Inc) x4 [44]
R18: (Sc10, Inc) x4 [48]
R19: (Sc23, Inc) x2 [50]
R20: Sc around [50]
R21: Slst around [50] *Don’t tighten the slst*
• In white fur yarn:
R22: (Hdcinc) x50 [100]
FO and weave in ends
• Stuff the hat 3/4 and sew on top of the head on R5 in the front, R13 in the back, it will be sewn on top of the ears, add stuffing if needed.
Large Hat top:
R1: Sc6 in MR [6]
R2: Inc x6 [12]
R3: (Sc, Inc) x6 [18]
R4-5: Sc around [18] * 2 Rounds *
R6: (Sc, Dec) x6 [12]
• Start stuffing
R7: Dec x6 [6]
•FO and sew hole closed, Leave a long tail to attach the ball on top of the hat.
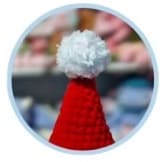
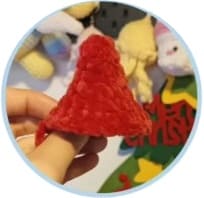
Small hat:
R1: Sc6 in MR [6]
R2: (Sc2, Inc) x2 [8]
R3: (Sc3, Inc) x2 [10]
R4: (Sc4, Inc) x2 [12]
R5: (Sc, Inc) x6 [18]
R6: (Sc2, Inc) x6 [24]
R7: Sc around [24]
• Stretch the hat a bit to help with shaping, FO, Weave in tail.
• In white fur yarn:
R8: (Hdcinc) x24 [48]
•FO and weave in ends, Bobble stitch at the top of the hat with the white yarn to create our little bobble!
That’s all!