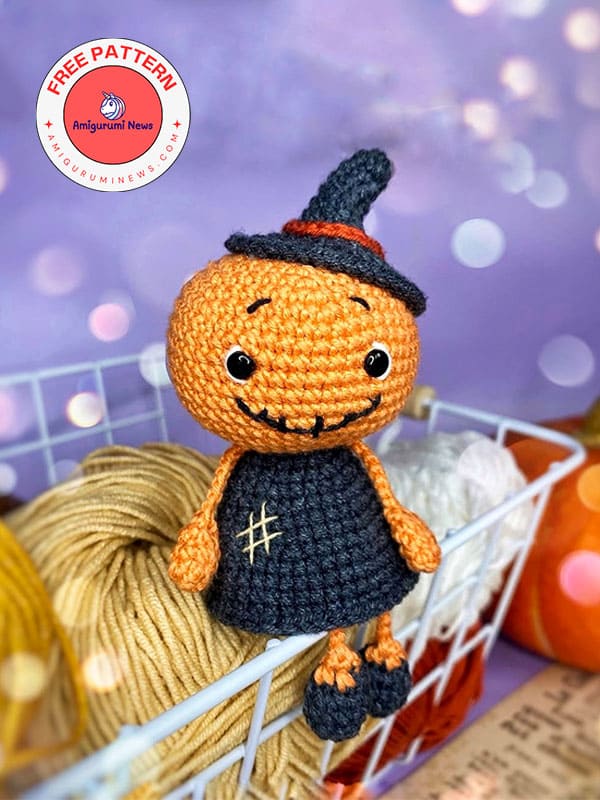
Want to make a crochet witch amigurumi doll that looks like a pumpkin? Here’s a great free crochet doll pattern. With Halloween approaching, I think you’ll want to make a beautiful witch doll like this. It would make a great Halloween gift or use it to decorate your children’s rooms. It would look great on any shelf. You can add some weights to the legs to help them hang down. Here’s the step-by-step process for this pumpkin witch crochet doll.
Pumpkin witch crochet doll pattern
Designer: vooot_takoi
Now, follow the step-by-step instructions below to create the dress using any color yarn you like. Our designer prefers black.
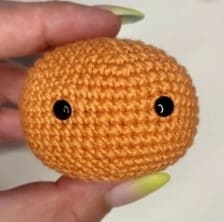
Head
Crochet with orange yarn:
Round 1: 6 sc in MR (6)
Round 2: 6 inc (12)
Round 3: (1 sc + inc)*6 (18)
Round 4: (2 sc + inc)*6 (24)
Round 5: (3 sc + inc)*6 (30)
Round 6: (4 sc + inc)*6 (36)
Round 7: (5 sc + inc)*6 (42)
Round 8: (6 sc + inc)*6 (48)
Rounds 9-15: 48 sc (7 rounds)
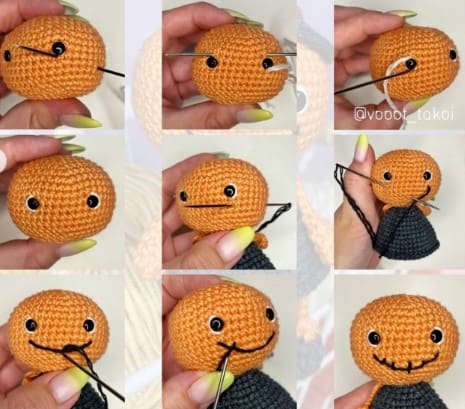
At this stage, insert safety eyes between rounds 11 and 12 at a distance of 8 sc between the eyes (measured between the inner edges of the safety eyes).
Round 16: (6 sc + dec) *6 (42)
Round 17: (5 sc + dec)*6 (36)
Round 18: (4 sc + dec)*6 (30)
Stuff the head firmly at this stage.
Round 19: (3 sc + dec)*6 (24)
Round 20: (2 sc + dec)*6 (18)
Round 21: crochet in back loops only (1 sc + dec)*6 (12)
Add more stuffing to shape a neat, round head.
Round 22: working in both loops again, 6 dec (6).
Fasten off with 1 sl st, cut the yarn, leaving a tail for closing the hole.
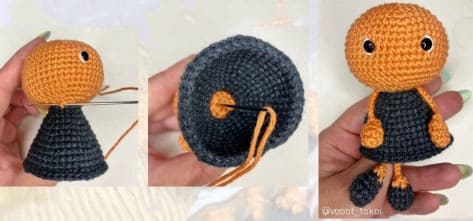
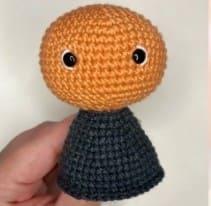
Dress
Attach graphite yarn to the front loops left on Round 20 of the head (see photo).
Round 1: 18 sc
Round 2: (5 sc + inc)*3 (21)
Round 3: (6 sc + inc)*3 (24)
Round 4: (3 sc + inc)*6 (30)
Round 5: 30 sc
Round 6: (4 sc+ inc)*6 (36)
Round 7: 36 sc
Round 8: (5 sc + inc)*6 (42)
Rounds 9-12: 42 sc (4 rounds)
Round 13: 42 sl st, fasten off, secure the tail and weave it in.
Arms (make 2 identical pieces)
Crochet with orange yarn:
Round 1: 6 sc in MR (6)
Round 2: (1 sc + inc)*3 (9)
Round 3: 9 sc
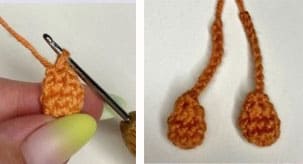
Round 4: 4 dec, 1 sc (5). Fasten off, leaving a long tail (about 20 cm).
Close the opening with the yarn tail and a needle. Insert the hook into the last round of the arm as shown in the photo. Grab the remaining yarn tail from the inside and pull it to the front, forming a loop. Crochet 10 ch. Pull the yarn out of the last chain to fasten off.
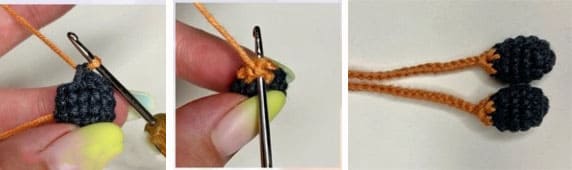
Legs (make 2 identical pieces)
Crochet with graphite yarn:
Round 1: 6 sc in MR (6)
Round 2: 6 inc (12)
Rounds 3-4: 12 sc (2 rounds)
Slightly stuff the foot to shape it.
Round 5: (2 sc + dec)*3 (9)
Change yarn to orange.
Round 6: 4 dec, 1 sc (5).
Fasten off, leaving a long tail (about 30 cm).
Finish the detail the same way as the arms, but make 20 ch instead of 10. Pull the yarn out of the last chain to fasten off.
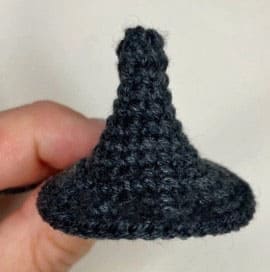
Hat
Crochet with graphite yarn:
Round 1: 6 sc in MR (6)
Round 2: 6 sc
Round 3: (1 sc + inc)*3 (9)
Round 4: 9 sc
Round 5: (2 sc + inc)*3 (12)
Round 6: (3 sc + inc)*3 (15)
Round 7: (4 sc + inc)*3 (18)
Round 8: (5 sc + inc)*3 (21)
Round 9: 21 sc
Round 10: in front loops only 21 inc (42)
Continue in both loops:
Rounds 11-12: 42 sc (2 rounds), sl st, fasten off leaving a long tail for sewing.
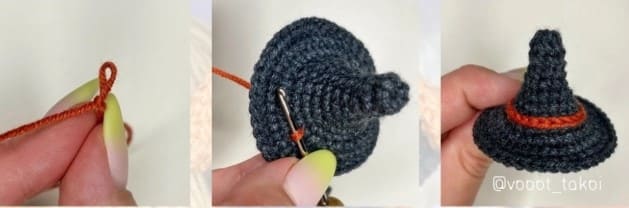
Edging between rounds 8 and 9 (with terracotta yarn):
Make 1 ch as the starting base. Remove the loop from the hook and pull it from the wrong side to the right side of the hat.
Insert the hook into the next stitch of the fabric, grab the working yarn from the wrong side, pull it to the front, and make 1 sl st.
Continue in this way around the hat. Fasten off and hide the yarn ends.
Face embroidery
With white yarn, embroider the whites of the eyes. With black yarn, embroider the mouth and eyebrows.
Body assembly
First, sew the arms and legs using the yarn tails left.
Legs: Insert the needle into the head under the dress (see photo), secure the yarn firmly. Bring the yarn out to the back of the head, secure it and hide the tail. Repeat for the second leg.
Arms: Sew to the “neck” symmetrically on both sides.
Sew the hat with its yarn tail, then secure and hide the yarn.