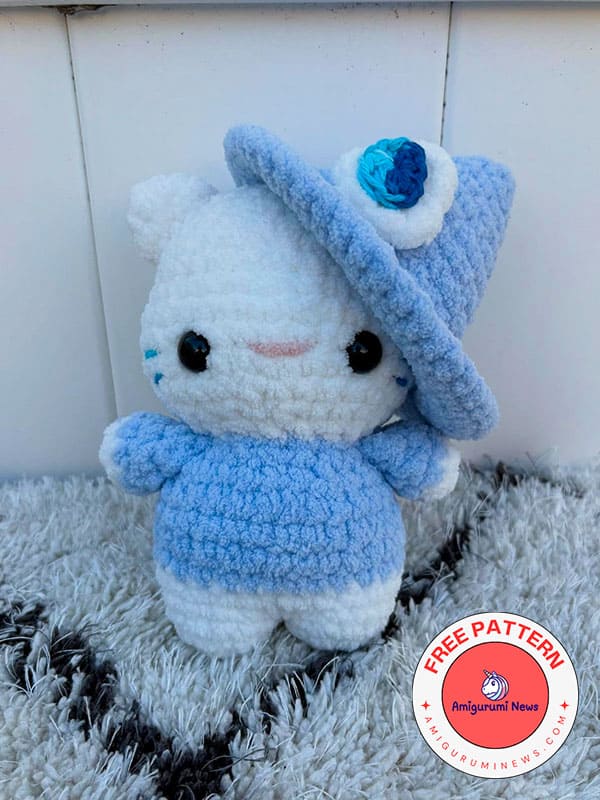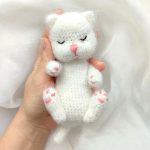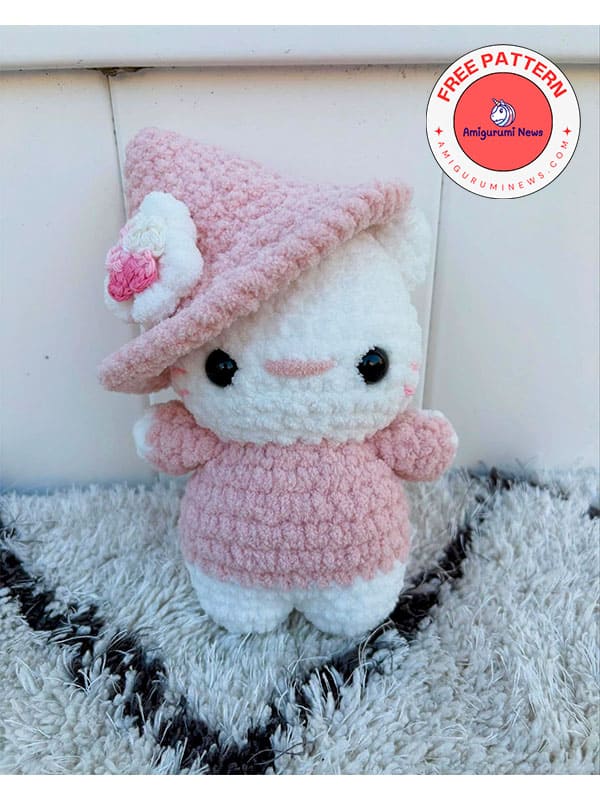
This crochet cat pattern features three different witch hat designs. Design your own crochet kitten amigurumi with clover, flower, and teardrop-shaped witch hat designs. Work with your favorite colors and create this adorable amigurumi kitten for Halloween. The kitten, one of children’s favorite crochet animals, is now available for free step-by-step. It’s also a great tutorial for amigurumi beginners.
Witch the crochet cat pattern
Designer: catalios.crafts
Materials:
Bernat blanket super bulky weight 6 yarn (pink, dusty, baby blue, white).
Loops and threads sweet snuggles lite (baby green).
Use can use any super bulky weight 6 yarn.
6.50 mm hook.
Yarn threading needle.
Stitch markers.
14 mm black safety eyes.
Abbreviations:
FO- fasten off
mr- magic ring
ch- chain
sc- single crochet
inc- increase
dec- decrease
tr- treble crochet
dc- double crochet
slst- slip stitch
BLO- back loop only
Head:
r1: 6sc in mr (6)
r2: 6inc (12)
r3: (sc, inc) x6 (18)
r4: (sc, inc, sc) x6 (24)
r5: (3sc, inc) x6 (30)
r6-8 sc around (30) [3 rounds]
r9: (2sc, inc, 2sc) x6 (36)
r10-12 sc around (36) [3 rounds]
r13: (2sc, dec, 2sc) x6 (30)
r14: (3sc, dec) x6 (24)
r15: (sc, dec, sc) x6 (18)
sl st, FO, weave in tail.
Attach eyes between r11-12, 5st apart.
Stuff firmly.
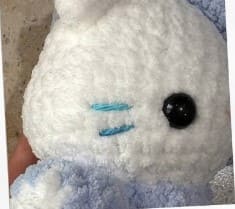
Embroider nose and whiskers.
• nose: about 3 stitches wide.
• whiskers: 2 stitches wide, skip one st from the eye.
Tail:
r1: 6sc in mr (6)
r2: (sc, inc) x3 (9)
r3: (sc, inc, sc) x3 (12)
r4-6: sc around (12) [3 rounds]
r7: (sc, dec, sc) x3 (9)
r8: (sc, dec) x3 (6)
Sl st, FO, leave long tail to sew.
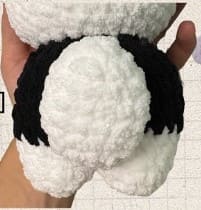
Do not stuff, attach between r5-6 of body.
Arms x2:
[starting in white]
r1: 6sc in mr (6)
r2: inc, change color, 1sc, (inc, sc) x2 (9)
r3-4 sc around (9)
Do not stuff, fold in half and close, with 4sc, ch, FO, leave long tail to sew.
Ears:
r1: 4sc in mr (4)
r2: (inc, sc) x2 (6)
r3: (inc, sc) x3 (9)
Sl st, FO, leave long tail to sew.
Do not stuff, Sew between r3-7 of head.
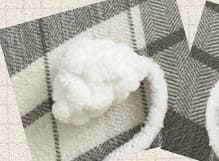
Body:
[starting in white]
Leg 1:
r1. 6 sc in mr (6)
r2. 6 inc (12)
r3. sc around (12)
FO, leave long tail.
Leg 2:
r1. 6 sc in mr (6)
r2. 6 inc (12)
r3. sc around (12)
+6 sc (not a complete round)
Attach to first leg:
r4. sc around (12 and 12) (24)
r5. (5sc,inc)x4 (28)
Sew gap + change color.
r6-9. sc around (28) [4 rounds]
r10. (5sc,dec)x4 (24)
r11. (sc,dec,sc)x6 (18)
+5 sc (not a complete round)
Slst, FO, leave long tail to sew.
Stuff firmly.
Attaching to first leg:
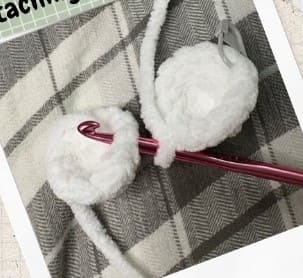
Sew gap:
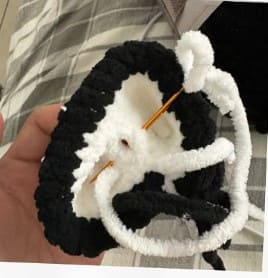
Witch Hat:
r1: 4 sc in mr (4)
r2: 4 inc (8)
r3: (sc, inc) x4 (12)
r4: (sc, inc, sc) x4 (16)
r5: (3sc, inc) x4 (20)
r6: (2sc, inc, 2sc) x4 (24)
r7: (5sc, inc) x4 (28)
r8: sc around (28)
r9: (3sc, inc, 3sc) x4 (32)
r10: BLO (7sc, inc) x4 (36)
r11: (5sc, inc) x6 (42)
r12: (3sc, inc, 3sc) x6 (48)
r13: sc around (48)
+ 6sc (this will not be a complete round)
Sl st, FO, leave long tail to sew.
Assembly
3 versions
Accessories: All accessories will be made in a magic ring.
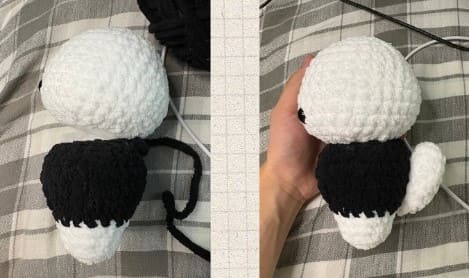
Attach head to body.
Sew arms to the side of the body on the last row of the body.
Sew tail on the back, in the middle where the color change starts.
Bloom:
r1. make a mr, ch 1, dc, ch 2, slst, (ch 2, dc, ch2, slst)x4, tighten mr, FO.
Make a big one using white weight 6 white yarn and a small one using weight 4 or 5 pink yarn “if you don’t have weight 6 yarn, you can double up on weight 4 or 5.
Sew one ear on the right side between r3-7.
Sew witch hat on the left.
Glue small flower on the big one. Then glue big flower anywhere on the hat near the bottom.
Clover:
r1: make a mr, ch 1, dc, ch 2, sl st, (ch 2, dc, ch 2, sl st) x3, tighten mr, ch 4, sl st into 2nd ch from hook, sl st, sl st, FO.
*make a big one using weight 6 white yarn and a small one using weight 4 or 5 green yarn* if you don’t have weight 6 yarn, you can double up on weight 4 or 5.
Sew witch hat on top of the head.
Sew both ears on the hat close to where the ears would stick out.
Glue small clover on the big one. Then glue big clover anywhere on the hat near the bottom.
Drip:
r1: make a mr, 4dc, 2sc, 1tr, 2sc, tighten mr, sl st to first dc, FO.
*make a big one using weight 6 white yarn and a small one using weight 4 or 5 blue yarn* if you don’t have weight 6 yarn, you can double up on weight 4 or 5.
Sew one ear on the left side between r3 – 7.
Sew witch hat on the right.
Glue small drop on the big one. Then glue big drop anywhere on the hat near the bottom.
