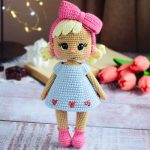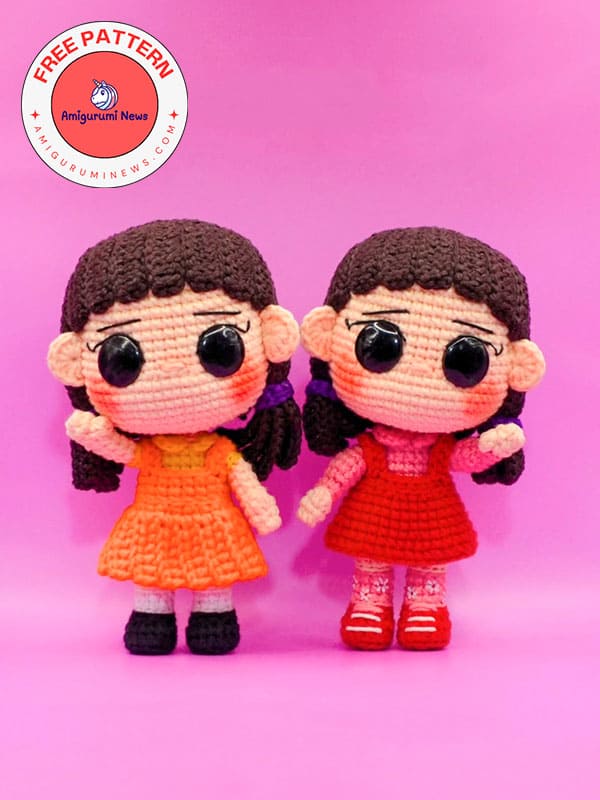
Young-Hee, whom we know from the series Squid Game, can now be made into an amigurumi crochet doll. Here’s a great amigurumi doll pattern you can give as a gift to Squid Game enthusiasts. I wanted to start the weekend with a wonderful amigurumi pattern. You can make this Young-Hee character in two different dresses: orange or red. If you’re making her in a red dress, many of the details will be red. She’ll also look adorable with the flower details on her legs. I think you’ll want to make both. Here’s a step-by-step tutorial on how to crochet Young-Hee, the character from the popular TV series Squid Game.
Crochet young-hee doll pattern
Designer: pumpicrochet
Materials for young-hee
Cotton yarn in thickness 2 or sport, in skin color, white, purple and dark brown, for the version red light, green light, yellow, black and orange, for the version jump rope: pink and red.
Crochet hook 2.0 mm or according to the thickness of your yarn.
15 mm flat safety eyes.
Black embroidery thread for the eyes.
Other: synthetic filling, needle, scissors, wire, blush.
Abbreviations:
MR: magic ring
slst: slip stitch
ch: chain
sc: single crochet
inc: increase
dec: decrease
hdc: half double crochet
dc: double crochet
FLO: front loop only
BLO: back loop only
tr: treble crochet
BO: bobble stitch (3 dc closed together)
Head
In skin color
1.-6 sc in MR (6)
2.-6 inc (12)
From here, begin working with the reverse side of the fabric facing outwards.
3 to 10.-12 sc (12) 8 rounds
11. BLO 12 inc (24)
Continue working, the rounds already crocheted will remain on the inside of the head, this will form the removable head.
12.- (1 sc, 1 inc, 1 sc) x8 (32)
13.- (3 sc, 1 inc) x8 (40)
14.- (2 sc, 1 inc, 2 sc) x8 (48)
15.-(7 sc, 1 inc) x6 (54)
16.- (4 sc, 1 inc, 4 sc) x6 (60)
17 to 20.-60 sc (60) 4 rounds
21.-18 sc, (1 sc, 1 dec, 1 sc) x6, 18 sc (54)
22 to 29.-54 sc (54) 8 rounds
Insert the safety eyes between rounds 22-23 of the head, with 4 sc visible between them. Now it’s time to embroider the eyelashes and, on round 26, embroider the eyebrows.
30.- (7 sc, 1 dec) x6 (48)
31.- (3 sc, 1 dec, 3 sc) x6 (42)
32.-(5 sc, 1 dec) x6 (36)
Start stuffing
33.-(2 sc, 1 dec, 2 sc) x6 (30)
34.- (3 sc, 1 dec) x6 (24)
35.- (1 sc, 1 dec, 1 sc) x6 (18)
36.-(1 sc, 1 dec) x6 (12)
Finish stuffing.
37.-6 dec (6)
Close with a needle, passing through the front loop of the 6 remaining stitches.

Ears x2
In skin color.
In MR, make:
• 2 ch, 8 dc (8)
Leave a long tail for sewing to the head.
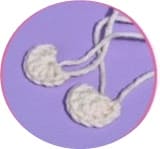
Hair ties
In purple.
Ch 11, start on the second chain from the hook and make,
• 10 sc (10)
Leave a long tail for sewing onto the hair.
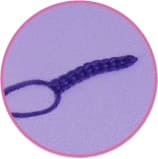
Hair
In dark brown.
1.-6 sc in MR (6)
2.-6 inc (12)
3.- (1 sc, 1 inc) x6 (18)
4.-(1 sc, 1 inc, 1 sc) x6 (24)
5.- (3 sc, 1 inc) x6 (30)
6.- (2 sc, 1 inc, 2 sc) x6 (36)
7.-(5 sc, 1 inc) x6 (42)
8.- (3 sc, 1 inc, 3 sc) x6 (48)
9.-(7 sc, 1 inc) x6 (54)
10.- (4 sc, 1 inc, 4 sc) x6 (60)
11.-60 sc (60)
Do not fasten off, continue working the strands from here.
Without cutting the yarn we will make the strands of hair all around the contour, there are 23 strands.
1-2.- Ch 12, start on the third chain from the hook and make: 10 dc (10) Skip 1 sc from the base and make 1 slst.
3-4- Ch 14, start on the third chain from the hook and make: 12 dc (12) Skip 1 sc from the base and make 1 slst.
5-6.- Ch 20, start on the third chain from the hook and make: 18 dc (18) Skip 2 sc from the base and make 1 slst.
7-8.- Ch 22, start on the third chain from the hook and make: 20 dc (20) Skip 2 sc from the base and make 1 slst.
9-15.- Ch 11, start on the fourth chain from the hook and make: 8 tr (8) Skip 2 sc from the base and make 1 sist. Repeat this process until you have 7 strands.
16-17.- Ch 22, start on the third chain from the hook and make: 20 dc (20) Skip 2 sc from the base and make 1 slst.
18-19.- Ch 20, start on the third chain from the hook and make: 18 dc (18) Skip 2 sc from the base and make 1 slst.
20-21.- Ch 14, start on the third chain from the hook and make: 12 dc (12) Skip 1 sc from the base and make 1 slst
22-23.- Ch 12, start on the third chain from the hook and make: 10 dc (10) Skip 1 sc from the base and make 1 slst
Leave a long tail for sewing to the head.

Head assembly
Join the ears to the head, between rounds 20 and 24, with 4 sc of separation to the eyes.
Embroider the nose between rounds 21-22 of the head with 2 sc wide.
Finally, we will join the hair together. The fringe should be positioned starting from round 29 of the head at the front, and the longest strand will from the ponytails and go just behind the ears.
Onc ethe hair is joined, we will sew the hair ties we crocheted earlier onto the ponytails.
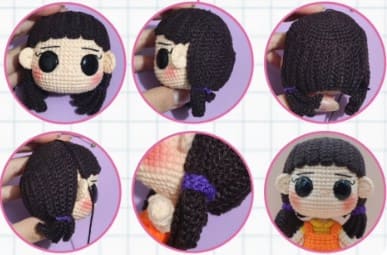
Arms x2
Start in skin color.
1.-7 sc in MR (7)
2-7 sc (7)
3.-3 sc, 1 BO, 3 sc (7)
4 to 7-7 sc (7) 4 rounds
Color change to yellow.
8.- FLO 7 sist (7)
9.-BLO 7 sc (7)
Fasten off.
Repeat procedure for the 2nd arm.
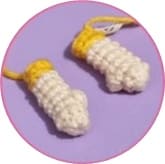
Legs x2
Start with black. Work around the chains.
Stuff as you go along.
Ch 5, start on the second chain from the hook and make:
1.-1 inc, 2 sc, 3 sc in the same stitch, 3 sc (10)
2.-1 inc, 3 sc, 3 inc, 1 sc, 2 inc (16)
3.-BLO 5 sc, 6 hdc, 5 sc (16)
Insert a piece of plastic into the base to keep it flat.
4-16 sc (16)
5.-4 sc, 4 dec, 4 sc (12)
Change color to white.
6.-BLO 16 slst (16)
7.- BLO 3 sc. 1 dec, 2sc, 1 dec, 3 sc (10)
8-10 sc (10)
Change color to skin.
9.-BLO 10 slst (10)
10.-BLO 10 sc (10)
11.-10 sc (10)
Change color to white.
12-FLO 10 slst (10)
13.-BLO 10 sc (10)
Fasten off only on the first leg, continue working the body from the second leg.

Body
14.-2 sc in leg 2, 2 chains joining to leg 1, 10 sc in leg 1, 2 sc over the chains and 8 sc over the remaining stitches of leg 2 (24)
These stitches may vary depending on your tension and the location of the junction of the rounds in your work.
15.-24 sc (24)
16.-13 sc, 2 dec, 7 sc (22) The decreases in this round should be centered on the front of the body.
17.-22 sc (22)
Color change to yellow.
18.-FLO 22 slst (22)
19.-BLO 22 sc (22)
20.-8 sc, 1 dec, 9 sc, 1 dec, 1 sc (20)
21.-20 sc (20)
Continue stuffing as you go along.
Join the arms to the body.
22.-7 sc, 3 sc joining to the first arm, 6 sc, 3 sc joining to the second arm, 1 sc (20) Remember that this position may change depending on whether your fabric tends to twist, so you can modify the number of stitches, making sure that they are on the sides of the body with 6 sc in front separating them.
23.- 7 sc, 4 sc around the first arm, 6 sc, 4 sc around the second arm, 1 sc (22)
Optional: Before continuing, insert wire into the arms and join both wires in the center to reinforce the neck structure.
24.-6 sc, 3 dec, 4 sc, 3 dec (16) The decreases go on the sides of the body as they form the shoulders.
Color change to skin color.
25.-BLO 16 slst (16)
26.-BLO 8 dec (8)
27 to 32.-8 sc (8) 6 rounds
33.-4 dec (4)
Close with the help of a needle, passing through the front loop of the 4 remaining stitches.

Neck edge
In yellow.
Return to the front loop of color yellow that was left free when you completed round 25 of the body.
Center yourself on the front and work as follows:
• 1 sc, 2 hdc, 1 sc, 8 slst, 1 sc, 2 hdc, 1 sc (16)
Fasten off and hide thread.
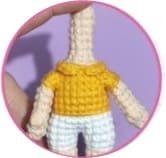
Dress
In orange.
Leave a long tail at the beginning.
We will start working in rows, that is, at the end
of each round, make 1 ch and turn the work.
Ch 7, start on the second chain from the hook and make:
1.- 3 sc, 3 hdc (6)
2.-6 sc (6)
3.- BLO 3 sc, 3 hdc (6)
4.-6 sc (6)
Continue crocheting, repeating the instructions for rows 3 and 4 until you reach row 30.
Join with 1 slst to the 7th chain made at the beginning. When performing this step, it is important that the front loops that were left free while working remain on the visible side, as they will give texture to the skirt of the dress.
From here, we will continue working in joined rounds.
1.- 30 sc (30) Work 1 sc on the edge of each row.
2.- (1 sc, 1 dec) x10 (20)
3.- BLO 20 sc (20) 4.-20 sc (20)
Work the dress straps.
5.- 7 sc, (Ch 9, start on the second chain from the hook and make: 8 sc, 1 sc at the base) this will form the first strap, 5 sc, (Ch 9, start on the second chain from the hook and make: 8 sc, 1 sc at the base) this will form the second strap, 6 sc Leave a long tail for sewing the straps to the dress.
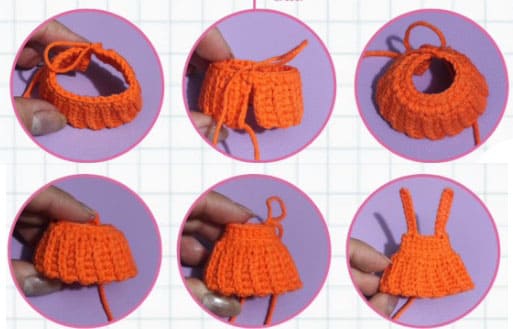
Using the long tail left at the beginning, sew the open side of the skirt.
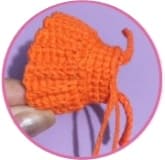
Place the dress on the body of our doll and sew the straps to the back.
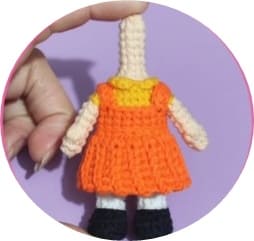
Arms x2
Start in skin color.
1.-7 sc in MR (7)
2.-7 sc (7)
3.-3 sc, 1 BO, 3 sc (7)
4 to 7.-7 sc (7) 4 rounds
Color change to yellow.
8.- FLO 7 slst (7)
9.- BLO 7 sc (7)
Fasten off.
Repeat procedure for the 2nd arm.
Legs x2
Start with red. Work around the chains.
Stuff as you go along.
Ch 5, start on the second chain from the hook and make:
1.-1 inc, 2 sc, 3 sc in the same stitch, 3 sc (10)
2.-1 inc, 3 sc, 3 inc, 1 sc, 2 inc (16)
3.- BLO 5 sc, 6 hdc, 5 sc (16)
Insert a piece of plastic into the base to keep it flat.
4.-16 sc (16)
5.- 4 sc, 4 dec, 4 sc (12)
Change color to pink.
6.-BLO 16 slst (16)
7.- BLO 3 sc, 1 dec, 2sc, 1 dec, 3 sc (10)
8 to 9.-10 sc (10) 2 rounds
Color change to skin.
10.- BLO 10 slst (10)
11.- BLO 10 sc (10)
Change color to white.
12.-FLO 10 slst (10)
13.-BLO 10 sc (10)
Fasten off only on the first leg, continue working the body from the second leg.
Embroider the sholaces with pink and white thread.
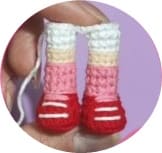
Body
14.-2 sc in leg 2, 2 chains joining to leg 1, 10 sc in leg 1, 2 sc over the chains and 8 sc over the remaining stitches of leg 2 (24)
These stitches may vary depending on your tension and the location of the junction of the rounds in your work.
15.-24 sc (24)
16.-13 sc, 2 dec, 7 sc (22) The decreases in this round should be centered on the front of the body.
17.-22 sc (22)
Color change to pink.
18.- FLO 22 slst (22)
19.-BLO 22 sc (22)
20.-8 sc, 1 dec, 9 sc, 1 dec, 1 sc (20)
21.-20 sc (20)
Continue stuffing as you go along.
Join the arms to the body.
22.-6 sc, 4 sc joining to the first arm, 6 sc, 4 sc joining to the second arm (20) Remember that this position may change depending on whether your fabric tends to twist, so you can modify the number of stitches, making sure that they are on the sides of the body with 6 sc in front separating them.
23.- 6 sc, 5 sc around the first arm, 6 sc, 5 sc around the second arm (22)
Optional: Before continuing, insert wire into the arms and join both wires in the center to reinforce the neck structure.
24.-6 sc, 3 dec, 4 sc, 3 dec (16) The decreases go on the sides of the body as they form the shoulders.
Color change to skin color.
25.-BLO 16 slst (16)
26.-BLO 8 dec (8)
27 to 32.-8 sc (8) 6 rounds
33.-4 dec (4)
Close with the help of a needle, passing through the front loop of the 4 remaining stitches.
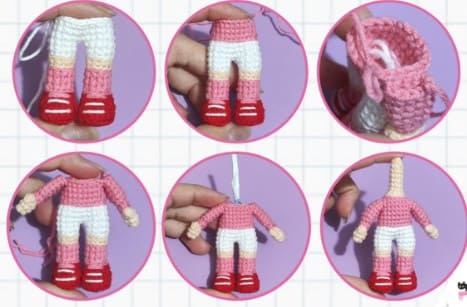
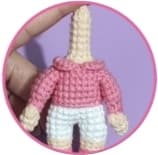
Neck edge
In yellow:
Return to the front loop of color yellow that was left free when you completed round 25 o the body.
Center yourself on the front and work as follows:
• 1 sc, 2 hdc, 1 sc, 8 slst, 1 sc, 2 hdc, 1 sc (16)
Fasten off and hide thread.
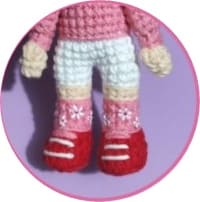
Leg details
Paint or embroider white flowers with red centers on pink socks.
Red dress
In red.
We will start the dress from the bottom.
Make 36 ch and close by joining with a slst to the first ch.
1 to 2.-36 (36) 2 rounds
3.- (7 sc, 1 dec) x4 (32)
4 to 6.-32 sc (32) 3 rounds
7.- (1 sc, 1 dec, 1 sc) x8 (24)
Work in BLO and make the straps of the dress. 5.-9 sc, (Ch 13, start on the second chain from the hook and make:12 sc, 1 sc at the base) this will form the first strap, 5 sc, (Ch 13, start on the second chain from the hook and make:12 sc, 1 sc at the base) this will form the second strap, 8 sc.
Leave a long tail to sew the straps to the dress.
Place the dress on the body of our doll and sew the straps to the back.


