
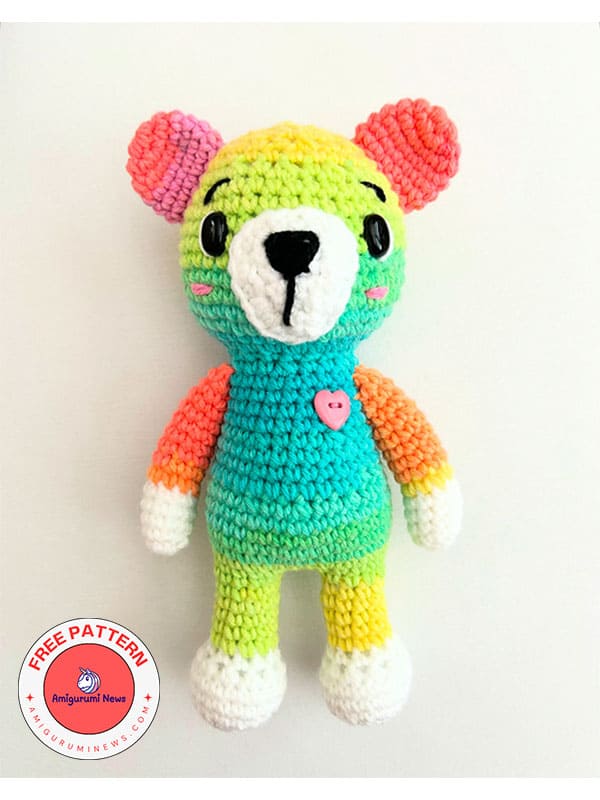
Hello friends, crochet rainbow teddy bear is with you. This amigurumi teddy bear comes to you step by step for free. If you want to download a free pdf, I will add the designer’s ravelry account below. You can reach it from there. You can easily make this crochet bear with rainbow yarn. The most popular amigurumi teddy bear toy for children can now be made in color. You can sew a heart button or use different accessories to decorate your teddy bear. This cute crochet teddy bear will be 10.5 inches in size when completed.
Crochet rainbow bear pattern
Designers: Youvebeenyarned
Materials:
-4mm hook
-Stuffing
-Oval safety eyes
-Heart button (I’ve had mine in my stash for awhile and don’t remember where it came from)
-Worsted yarn: Red Heart Super Saver in the color retro stripe, white, and scraps of black
Finished bear measures approx 10.5 inches tall.
If you will be using Red Heart retro stripe, keep in mind that depending on which color your skein starts with, your bear won’t be colored exactly the same as pictured.
Stuff the bear as you go.
Legs:
Make 2. Do not fasten off the second leg. You will continue crocheting (see below)
Starting with white
1: Sc 8 into magic ring
2: 2 sc in each st (16)
3: (sc 3, 2 sc in next) repeat (20)
4-5: Sc
6: Sc dec around (10)
7: Sc
Switch to retro stripe
8-12: Sc
After finishing the second leg, do not fasten off. Continue below
13: Sc 3, ch 3, join to the last st of the 1st leg and sc 10 around, ch 3, you will now be back around to the other leg, sc 7 and join to first sc. (20 sts, 6 chs)
14: Sc (26)
15: (Sc 3, sc inc) repeat. The round will end with 2 sc sts. (32)
16: (Sc 3, sc inc) repeat (40)
17-19: Sc
20: (Sc 2, sc dec) repeat (30)
21-23: Sc
24: (Sc 3, sc dec) repeat (24)
25-28: Sc
29: (Sc 2, sc dec) repeat (18)
30: (sc 7, sc dec) repeat (16)
31: 2 sc in each st (32)
32: Sc
33: (Sc, Sc inc) repeat (48)
34-35: Sc
36: (Sc 3, sc dec) repeat (39)
37-41: Sc
Place safety eyes between rows 38 and 39 about 8 stitches apart.
42: (Sc, sc dec) repeat (26)
43: Sc
44: (Sc, sc dec) repeat (18)
45: Sc
46: (Sc, sc dec) repeat (12)
47: sc dec around (6)
Fasten off, finish stuffing and cinch hole closed.
Arms:
Starting with white.
1: Sc 9 into magic ring
2-5: Sc (9)
Switch to retro stripe
6-14: Sc
Fasten off. Only stuff the arm a little over halfway
Snout:
With white.
Ch 7
1: Sc in 2nd ch from hook and in each ch across (6)
2: Sc dec, sc 2, sc dec (4)
3: Sc
4: Sc dec across (2)
5: Sc dec
6: Sc around the perimeter to create a more polished triangle.
Stitch on a nose in black before sewing the snout to the head.
Ears:
With retro stripe.
1: 7 sc into magic ring
2: 2 sc in each st around (14)
3-6: Sc
Don’t stuff the ears
Finishing touches: To make the eyes pop, embroider a stitch of white on the side of each eye and little eyebrows in black. Add a couple little stitches in pink for the cheeks. If you have a heart button, stitch it onto the chest over the heart


