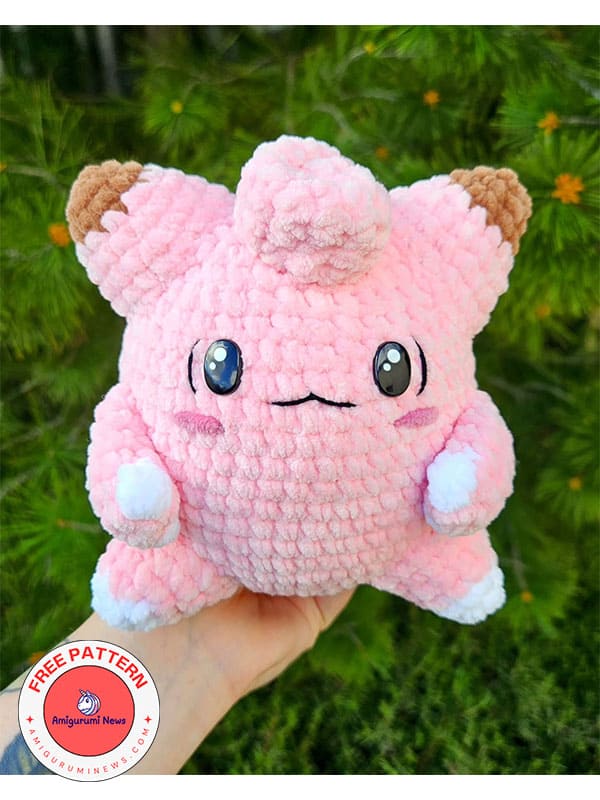
Today, we’re continuing our crochet Pokemon pattern, and here’s Clefairy, an amigurumi. I think everyone knows this adorable Pokemon character. Clefairy resembles a plump pink star. With its pointed ears and curled tail, it has a unique personality. It also has a pair of small wings on its back. This wonderful Clefairy amigurumi is now available for free, step-by-step, to our valued Pokemon fans.
Amigurumi clefairy crochet pokemon pattern
Designer: legendofclefairy
Materials needed
– Yarn in the following colours (I used acrylic):
• Pink
• Brown
• White
• Black
• Dark pink
– Crochet hook size: 4mm.
– Stitch markers
– Safety eyes: 6mm.
– Needle
– Polyfill stuffing
– Scissors
– Black felt
Abbreviations (US terminology)
slst: slip stitch
ch: chain
sc: single crochet
dc: double crochet
tr: treble crochet
MR: magic ring
dec: decrease
inc: increase
FO: fasten off
BBL: bobble stitch
Body – In pink
• R1: 6sc in MR (6)
• R2: (inc) x6 (12)
• R3: (1sc, 1inc) x6 (18)
• R4: 1sc, 1inc, (2sc, 1inc) x5, 1sc (24)
• R5: (3sc, 1inc) x6 (30)
• R6: 2sc, 1inc, (4sc, 1inc) x5, 2sc (36)
• R7: (5sc, 1inc) x6 (42)
• R8: 3sc, 1inc, (6sc, 1inc) x5, 3sc (48)
• R9-17: sc around for 9 rounds (48)
• R18: 3sc, 1dec, (6sc, 1dec) x5, 3sc (42)
• R19: (5sc, 1dec) x6 (36)
• R20: sc around (36)
• R21: 2sc, 1dec, (4sc, 1dec) x5, 2sc (30)
• R22: sc around (30)
• R23: (3sc, 1dec) x6 (24)
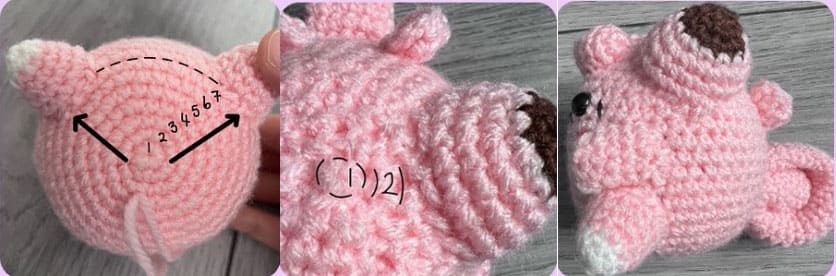
Insert safety eyes between rows 17-18 (counting the rows up from the bottom) approx. 5 stitches apart.
Begin stuffing.
• R24: 1sc, 1dec, (2sc, 1dec) x5, 1sc (18)
• R25: (1sc, 1dec) x6 (12)
• R26: (dec) x6 (6).
FO and weave in the end. It should end up looking like a magic ring at the top.

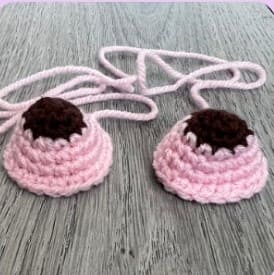
Ears – make 2
Begin in brown.
• R1: 6sc in MR (6)
• R2: (1inc, 1sc) x3 (9)
• R3: (1inc, 2sc) x3 (12)
Colour change to pink.
• R4: (1inc, 3sc) x3 (15)
• R5: (1inc, 4sc) x3 (18)
• R6: (1inc, 5sc) x3 (21)
• R7: sc around (21) and FO, leaving a long tail for sewing.
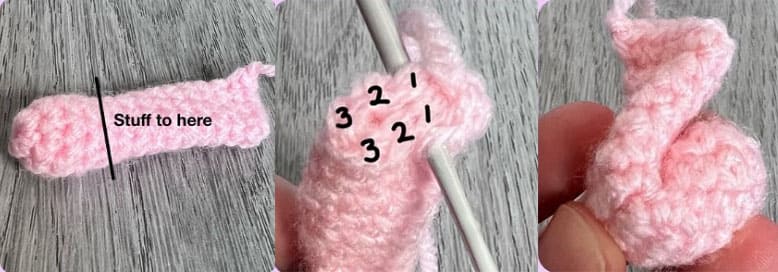
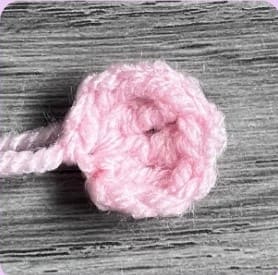
Head Curl – in pink
• R1: 6sc in MR (6)
• R2: (1inc, 2sc) x2 (8)
• R3-14: Sc around for 12 rounds (8)
At R9, firmly stuff the end of the curl up to R4-5, but do not stuff the whole curl – this will act as the firm focus point to loop the rest of the curl around
• R15: Fold in half, 3sc though both sides. FO leaving a long tail for sewing. Curl the rest of the tail around the end ball, and the flat end should lay flat on the head.
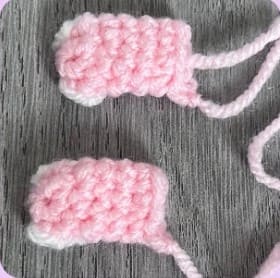
Arms make 2
Begin in pink.
• R1: 6sc in MR (6)
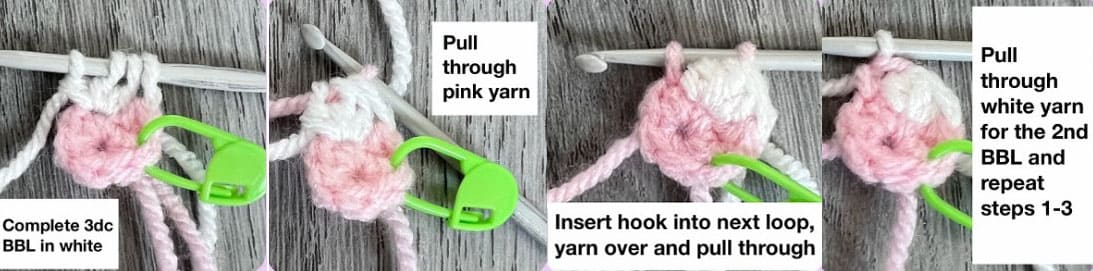
We will be using the bobble stitch (BBL) in round 2 to make the claws. For each bobble, colour change to white. For extra clarity, I have also highlighted which stitches should be pink. Refer to the pictures on the right for guidance.
• R2: 1inc, BBL, sc, BBL, 2sc (7)
FO the white, and continue working in pink only.
• R3: (1inc, 6sc) (8)
• R4-R5: sc around for 2 rounds (8)
• R6: dec, 6sc (7) – FO, leaving a long tail for sewing.
The finished arms should be oriented this way up.
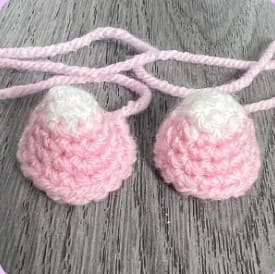
Legs – make 2
Begin in white.
• R1: 6sc in MR (6)
• R2: (1inc, 2sc) x2 (8)
Colour change to pink
• R3: (1inc, 3sc) x2 (10)
• R4: (1inc, 4sc) x2 (12)
• R5: (1inc, 5sc) x2 (14)
• R6: (1inc, 6sc) x2 (16) – FO, leaving a long tail for sewing.
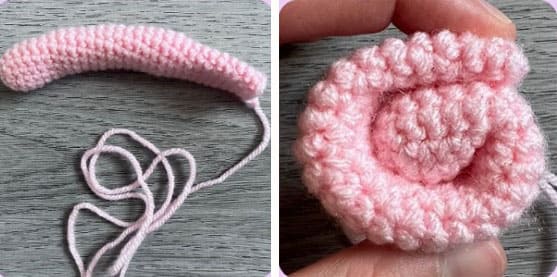
Tail – in Pink
• R1: 8sc in MR (8)
• R2: (1inc, 3sc) x2 (10)
• R3: (1inc, 4sc) x2 (12)
• R4-R30: sc around for 27 rounds (12) – FO leaving a long tail for sewing.
The tail should be lightly stuffed to give it shape, but it should not be stuffed too much as you need to be able to curl it up into a spiral. It can be stuffed more than the image for a ‘fuller’ look.
Wings – make 2 in pink
All in MR – ch3, tr3, ch3 from the tr3, slst into MR then tighten the ring. FO and leave a long tail.
Assembly
• Attach the flat part of the head curl to the top of the head. The bulk of the curl should be centred approximately 2 rounds above the eyes.
• The ears should be attached from round 3 to round 10/11 from the top
• To attach the legs, count 7 rounds from the bottom then begin attaching the legs at round 8. Place them diagonally from the centre of the bottom as shown in the pictures.
• Attach the arms just above the legs, and line the flat part up with the back- most part of the legs.
• Curl up the tail and attach it to the back & towards the bottom so that it helps with stability.
• The wings should be attached just above the tail.
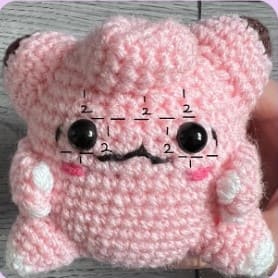
Embroidery
• The cheeks should be sewn 1 row below the eyes.
• The mouth should be 1 row above the cheeks.
• Don’t forget the details at the side of the eyes!
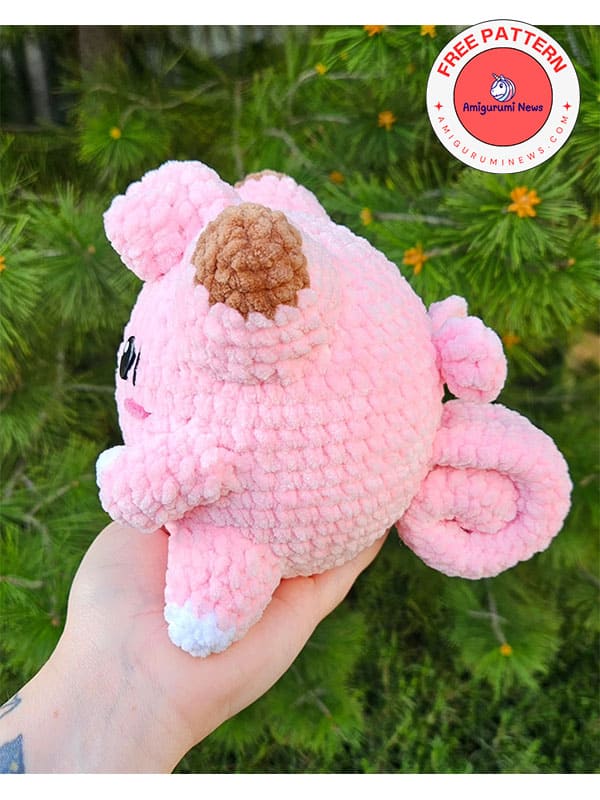
Here is the side view: