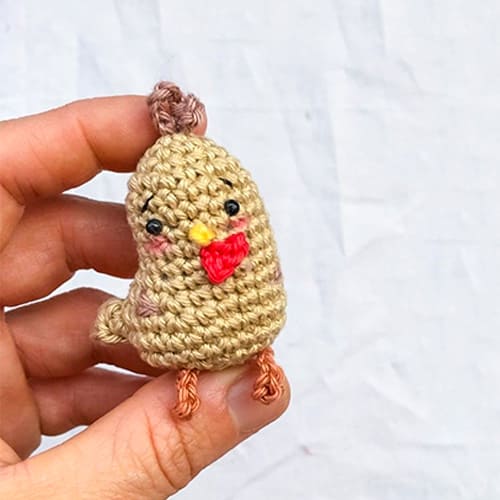
We are welcoming Christmas today, my friends, with the amigurumi chick key chain pattern. I wish you all a Merry Christmas and a Happy New Year. I would like to thank the owner of the pattern for the amigurumi chick. It’s a great amigurumi keychain. A great amigurumi keychain idea to gift to your friends at Christmas. Complete the cute chick quickly thanks to the step-by-step detailed and easy amigurumi keychain pattern instructions and gift it to your loved ones. Now I invite you to the free amigurumi pattern instruction.
Amigurumi Chick Keychain Free PDF Pattern
Designer: banban_crochets
Materials
Cotton yarn in colours:
Yellow, orange, red, white and pink.
2.5 mm hook
Polyfill
Needle
Black and white sewing thread for eyes
Abbreviations
MR: Magic ring
Sc: Single crochet
Slst: Slip stitch
Ch: Chain
Inc: Increase
Dec: Decrease
Head and body
Start with yellow.
Rnd 1. 6 sc in MR
Rnd 2. 6 inc (12)
Rnd 3. (1sc,inc)*6 (18)
Rnd 4. (2sc,inc)*6 (24)
Rnd 5. (3sc,inc)*6 (30)
Rnd 6-10. sc around (30)
Rnd 11. (4sc,inc)*6 (36)
Rnd 12. (5sc,inc)*6 (42)
Rnd 13-17. sc around (42)
Rnd 18. (5sc,dec)*6 (36)
Rnd 19. (4sc,dec)*6 (30)
Rnd 20. (3sc,dec)*6 (24)
Stuff.
Rnd 21. (2sc,dec)*6 (18)
Rnd 22. (1sc,dec)*6 (12)
Rnd 23. 6 dec, Fasten off.
Wings (Make 2)
Rnd 1. 6 sc in MR
Rnd 2. 6 inc (12)
Rnd 3. 1sc, inc (18)
Rnd 4. Fold it in half, and make 9 sc across (9)
Sew it on the sides of the body (wider part up)
Legs (Make 2)
In orange.
Rnd 1. 6 sc in MR
Rnd 2. 6 inc (12)
Rnd 3. sc around (12)
Rnd 4. 6 dec (6)
Rnd 5. Fold in half, 1 sc across in the middle and chain 4
Fasten off, sew to the lower body.
Mini christmas hat
Start in white.
Rnd 1. 6 sc in MR (6)
Rnd 2. 6 inc (12)
Rnd 3. sc around (12)
Rnd 4. dec 6 times (6)
Change to red.
Rnd 5-8. 6 sc (6)
Rnd 9. (1sc,inc)*3 (9)
Rnd 10. sc around (9)
Rnd 11. (2sc,inc)*3 (12)
Change to white.
Rnd 12. To make the frill, chain 3 and sc into the next st, chain 3 and sc into the next st, and repeat till the end.
Fasten off, sew to the side of the head.

Instructions for sewing
Sew eyes between rnd 7 and rnd 10.
Beak between rnd 9 and rnd 11.
Wings between rnd 9 and rnd 14.
Bend the tip of hat and sew to make a curve effect.


