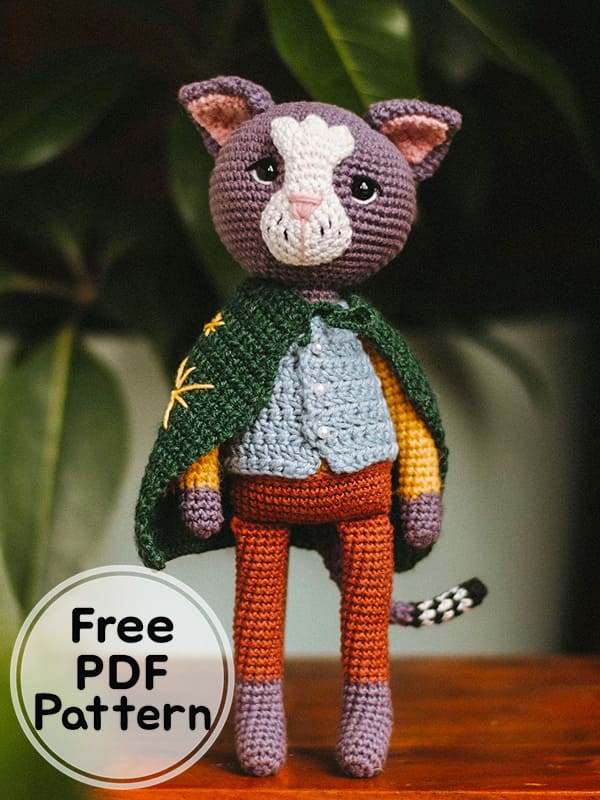
Greetings friends, today I will share with you a wonderful amigurumi pattern. Thank you to the pattern owner for this wonderful amigurumi cat. Here is the magician amigurumi cat. Thanks to the detailed step by step pattern instruction, you can complete the cute and magnificent amigurumi cat. Your kids will love this magician cat. Check out the free amigurumi pattern instruction to make them a playmate right now. Don’t forget to follow us for more free animal amigurumi patterns. Happy weekends.
Magician Crochet Cat Amigurumi Free PDF Pattern
Designer: egracecrochet
Materials
• Yarn: (fingering/sock weight)
– Dark purple
– Copper/brown
– Yellow
– White
– Black
– Pink
– Grey blue
– Teal
• Hook (2.75mm)
• Toy stuffing/ polyester fiber fill
• Scissors
• Sewing needle
• Stitch marker
• Safety eyes (8 mm)
• Sewing needle
• Buttons (2)
• Pipe cleaner (optional)
Abbreviations
MR: Magic ring
Sc: Single crochet
Rnd: Round
Ch: Chain
Hdc: Half double crochet
Slst: Slip stitch
FLO: Front loop only
BLO: Back loop only
Inc: Increase
Dec: Decrease
Inc hdc: Increase half double crochet
Legs
Rnd 1. using dark purple working in a spiral 6 sc in MR
Rnd 2. 6 inc (12)
Rnd 3-7. (5 rnds) sc in all (12)
To make the heel, the following will be crocheted in rows.
Row 8. 2 sc, slst, ch 1, turn
Row 9. 3 sc, slst, ch 1, turn
Row 10. 4 sc, slst, ch 1, turn
Row 11. 5 sc, slst, ch 1, turn
Return to working in a spiral, stuff as you go.
Rnd 12-15. (4 rnds) sc in all (12)
Before each color change make shift stitches until the change is centered with the heel.
Move stitch marker, the next sc will be the new start to each rnd (change to copper/brown).
Rnd 16-33. (18 rnds), sc in all (12)
Rnd 34. fold in half (be sure the feet are facing forward) and sc together (6)
(for leg one) fasten off and weave in the end.
(for leg two) do not cut, continue to body.
Body
Rnd 1. using copper/ brown, working in a spiral, be sure legs are both facing forward.
Ch 6 and attach second leg with sc in FLO x6, sc in BLO x6, sc accross ch x6, sc in BLO x6, sc in FLO x6, sc accorss ch x6 (36)
Rnd 2. (5sc,inc)*6 (42)
Rnd 3-7. (5 rnds) sc in all (42)
Before each color change make shift.
Stitches untill the change is centered in the back. Move stitch marker, the next sc will be the new start to each rnd.
Rnd 8. change to yellow, BLO sc in all (42)
Stuff as you go.
Rnd 9-12. (4 rnds) sc in all (42)
Rnd 13. (5sc,dec)*6 (36)
Rnd 14-17. (4 rnds) sc in all (36)
Rnd 18. (4sc,dec)*6 (30)
Rnd 19-21. (3 rnds) sc in all (30)
Rnd 22. (3sc,dec)*6 (24)
Rnd 23-24. (2 rnds) sc in all (24)
Change to dark purple.
Rnd 25. BLO (2 sc, dec)*6 (18)
Rnd 26-27. (2 rnds) sc in all (18)
Fasten off, and weave in the end.
Collar
Rnd 1. using yellow attach yarn to rnd 25 of the body.
FLO slst in each st (24)
Fasten off, and weave in the end.
Head
Rnd 1. (using dark purple, working in a spiral) 6 sc in MR
Rnd 2. 6 inc (12)
Rnd 3. (1sc,inc)*6 (18)
Rnd 4. (2sc,inc)*6 (24)
Rnd 5. (3sc,inc)*6 (30)
Rnd 6. (4sc,inc)*6 (36)
Rnd 7. (5sc,inc)*6 (42)
Rnd 8. (6sc,inc)*6 (48)
Rnd 9. (7sc,inc)*6 (54)
Rnd 10. (8sc,inc)*6 (60)
Rnd 11-20. (10 rnds) sc in all (60)
Insert safety eyes between rnds 14/15 approx. 9 stitches apart. Stuff as you go.
Rnd 21. (8sc,dec)*6 (54)
Rnd 22. (7sc,dec)*6 (48)
Rnd 23. (6sc,dec)*6 (42)
Rnd 24. (5sc,dec)*6 (36)
Rnd 25. (4sc,dec)*6 (30)
Rnd 26. (3sc,dec)*6 (24)
Rnd 27. (2sc,dec)*6 (18)
Fasten off, leaving a long tail for sewing.
Sew on to the body.
Arms (Make 2)
Rnd 1. using dark purple, working in a spiral, 5 sc in MR
Rnd 2. 5 inc (10)
Rnd 3-5. (3 rnds) sc in all (10)
Change to yellow, stuff as you go.
Rnd 6-25. (20 rnds) sc in all (10)
Rnd 26. fold in half and sc together (5)
Fasten off, leaving a long tail for sewing:
Sew on to body, one one each side, below collar.
Tail
Rnd 1. using dark purple working in a spiral, 6 sc in MR
Rnd 2. sc in all (6)
Rnd 3. change to black sc in all (6)
Rnd 4. change to white, sc in all (6)
Rnd 5. change to black, sc in all (6)
Rnd 6. change to white, sc in all (6)
Rnd 7. change to black, sc in all (6)
Rnd 8. change to white, sc in all (6)
Rnd 9. change to black, sc in all (6)
Change to dark purple.
Rnd 10-24. (15 rnds) sc in all (6)
Fasten off, leaving a long tail for sewing.
Ears (Make 2)
Rnd 1. using dark purple, working in a spiral, 5 sc in MR
Rnd 2. sc in all (5)
Rnd 3. 5 inc (10)
Rnd 4. sc in all (10)
Rnd 5. (sc,inc)*5 (15)
Rnd 6. (2sc,inc)*5 (20)
Rnd 7. sc in all (20)
Rnd 8. (3sc,inc)*5 (25)
Rnd 9. (4sc,inc)*5 (30)
Rnd 10-11. (2 rnds) sc in all (30)
Rnd 12. fold in half and sc together (15)
Fasten off, leaving a long tail for sewing.
Sew on to head.
Inner ears (Make 2)
Row 1. using pink, working in rows
Ch 2, in 2nd ch from hook, sc 3 in the same ch, ch1, turn (3)
Row 2. inc, sc, inc, ch 1, turn (5)
Row 3. inc, 3sc, inc, ch 1, turn (7)
Row 4. sc in all, ch 1, turn (7)
Row 5. inc, 5 sc, inc, ch 1, turn (9)
Row 6. sc in all, ch 1, turn (9)
Row 7. inc, 7 sc, inc (11)
Fasten off, leaving a long tail for sewing.
Sew on to ears.
Muzzle
Part one.
Rnd 1. using white, working in a spiral.
6 sc in MR
Rnd 2. 6 inc (12)
Rnd 3. (sc,inc)*6 (18)
Rnd 4. (2sc,inc)*6 (24)
Fasten off, and weave in the end.
Part two (piece A)
Rnd 1. using white, working in a spiral.
4 sc in MR
Rnd 2. (sc,inc)*2 (6)
Rnd 3. sc in all (6)
Repeat rnds 1-3 pieces B and C.
Fasten off and weave in the end for piece A and B, do not cut yarn for piece C:continue working three.
Part three.
Note: we will merge pieces. A,B and C from part two with 18 sc.
Rnd 1. start with piece C.
(Piece A) crochet around half of piece using 3 sc, (piece B) join and crochet around using 6 sc, (Piece A) join and crochet remaining 3 sc, (Piece C) join and crochet around using 6 sc (18)
You should have 18 sc joining parts, A,B and C, after this rnd.
Rnd 2. (sc,dec)*6 (12)
Rnd 3. (4sc,dec)*2 (10)
Rnd 4-5. (2 rnds) sc in all (10)
Rnd 6. fold in half and sc together (5)
Do not cut move to part four.
Part four.
Rnd 1. attach back to part one (the circle part of the muzzle)*inc, (5sc,inc)*3 slst
Fasten off, leaving a long tail for sewing.
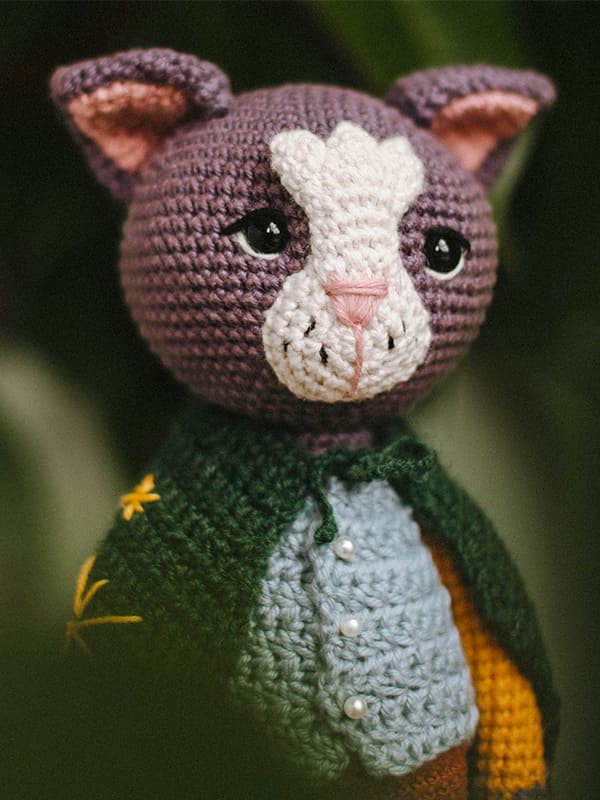
Embroider nose and freckles before sewing to head.
Vest
Row 1. using grey blue, working in rows ch 1, turn at the end of each row ch 31, in 2nd ch from hook, hdc across (30)
Row 2. hdc inc, 30 hdc, hdc inc (32)
Row 3. hdc inc, 4 hdc, ch 6, skip 6, 10 hdc, ch 6, skip 6, 4hdc, hdc inc (34)
Row 4. 6 hdc, 6 hdc in ch 6, 10 hdc, 6 hdc in ch 6, 6 hdc (34)
Rows 5-9. (5 rows) hdc in all (34)
Row 10. hdc inc, 32 hdc, hdc inc (36)
Rows 11-13. (2 rows) hdc in all (36)
Fasten off and weave in the ends.
Cape
Row 1. using teal, working in rows ch 1, turn at the end of each row.
Ch 31, in 2nd ch from hook, hdc across (30)
Row 2. hdc in all (30)
Row 3. hdc inc, 28 hdc, hdc inc (32)
Row 4. hdc in all (32)
Row 5. hdc inc, 30 hdc, hdc inc (34)
Row 6. hdc inc, 32 hdc, hdc inc (36)
Row 7. hdc inc, 34 hdc, hdc inc (38)
Row 8. hdc inc, 36 hdc, hdc inc (40)
Rows 9-28. (20 rows) hdc in all (40)
Fasten off and weave in the end.
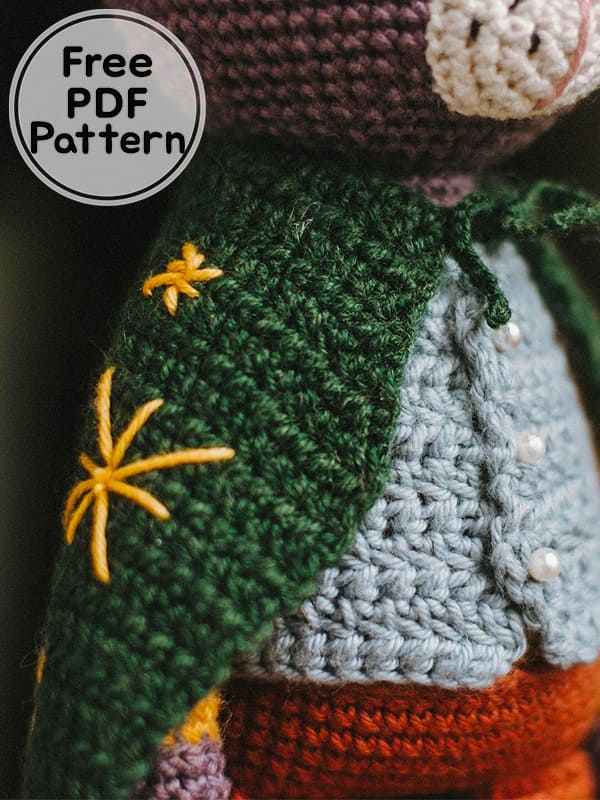
For straps, attach yarn to first stitch of row 1, ch 25 (or desired lenght) fasten off, and weave in the end.
Do this again on the last stitch of row 1 for the second strap.
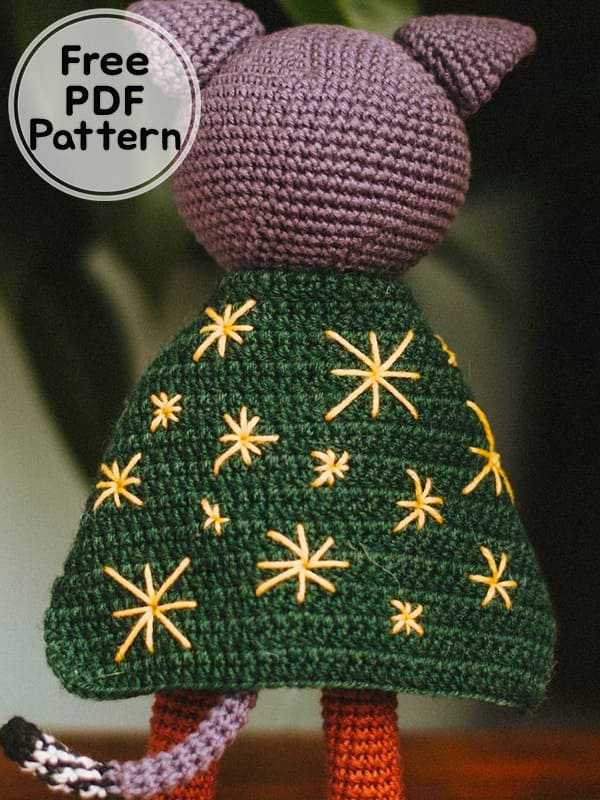
Add embroidered/ felt stars, spots, anything you’d like.
Assembly
• Sew muzzle between eyes.
• Sew each inner ear to the center of the ear, use pins to map where you woul like to sew the ears to the top of the head.
• Sew tail below color change in the center of the back.
• Optional: leave vest open to take on or off, or add buttons and sew it onto the body.
• Optional: add embroidered/felt stars, polka dots, flowers, etc to cape: or leave it a solid color.
• Optional: add skirt to front loops (rnd8) of the body to give a slight wardrobe change.
Your magician cute cat amigurumi toy is ready! You did a great job, congratulations!