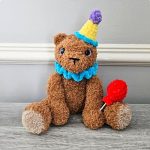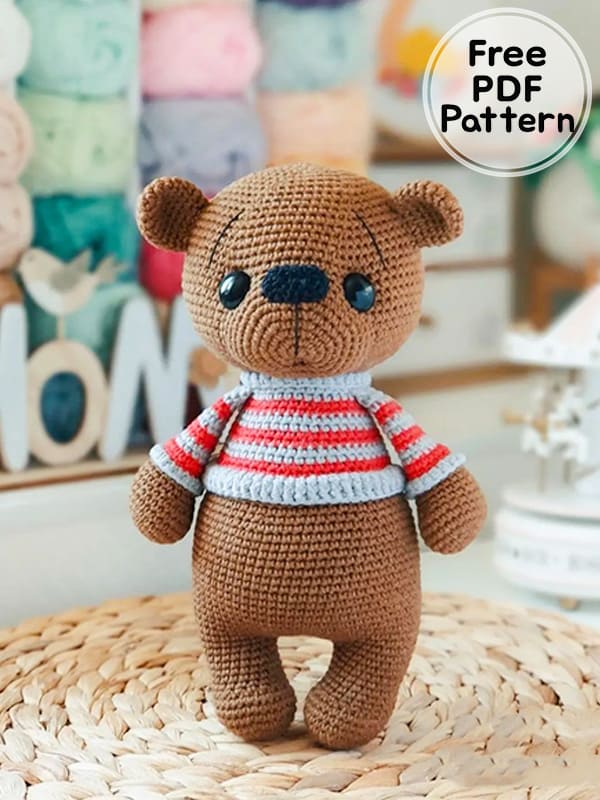
I’m with you guys with a crocheted bear named Timka. The height of the crochet teddy bear is about 23 cm. To make such a crochet bear, the author used YarnArt Jeans yarn and a 1.75 mm hook. The legs, body and head of the toy are crocheted in one piece, the handles are crocheted while the body is crochet, and the remaining parts are sewn. The description of the amigurumi pattern is step by step and detailed. I would like to thank the pattern designer for the free crochet bear pattern and invite you to the pattern instruction.
Crochet Bear Timka Amigurumi Free PDF Pattern
Designer: liska_nbr
Necessary materials
• Yarn main brown shade YarnArt Jeans or Alize cotton gold – 50g, the same yarn in red and gray for a sweater. I used YarnArt Jeans yarn: brown 40 tone, red 26 tone, gray 46 tone.
• Hook 1.75mm.
• Eyes 13-15mm.
• Nose 20*15mm or knitted with black thread.
• Matching threads for sewing on details and tightening (like iris).
• Filler holofiber or sintepukh.
• Tools: large long needle, scissors, stitch marker.
Finished toy size: 23 cm.
Abbreviations
MR: Magic ring
Sc: Single crochet
Ch: Chain
Dc: Double crochet
Hdc: Half double crochet
Inc: Increase
Dec: Decrease
Slst: Slip stitch
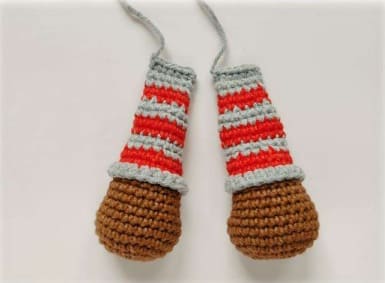
Upper paws (Make 2)
Start crochet with the main color yarn.
Crochet in a spiral.
Rnd 1. 5 ch, start crocheting from the second loop from the hook; increase, 2sc, 4sc in one loop, 2sc, increase = 12sc.
Rnd 2. 2 inc, 2sc, 4 inc, 2sc, 2 inc = 20sc.
Rnd 3. (1sc, inc) -2 times, 2sc, (1sc, inc) -4 times, 2sc, (1sc, inc) -2 times = 28sc.
Rnd 4-7. 28sc (4 rows) = 28sc.
Rnd 8. 8 dec, 12sc = 20sc.
Rnd 9-10. 20sc (2 rows) = 20sc + 5sc at the end of the 5th row for offset.
Change the thread color to red.
Rnd 11. 20sc=20sc.
Rnd 12. 20 sc for the back half loop = 20 sc.
Rnd 13. 20sc=20sc.
Change the thread color to gray.
Rnd 14. (3 sc, dec)-4 times=16 sc.
Rnd 15. 16sc=16sc.
Change the thread color to red.
Rnd 16-17. 16sc (2 rows) = 16sc
Change the thread color to grey.
Rnd 18-19. 16sc (2 rows) = 16sc.
Change the thread color to red.
Rnd 20. (2 sc, dec)-4 times=12 sc.
Rnd 21. 12sc=12sc.
Change thread color to gray.
Rnd 22-23. 12sc (2 rows) = 12sc.
Stuff only the lower part of the paw to sleeves.
Crochet another 5 sc for the offset, fold the piece in half and crochet together on both sides of 6 sc.
Lower paws (Make 2)
Stuff the details as you crochet.
Rnd 1. 6 sc in MR
Rnd 2. 6 inc (12)
Rnd 3. (1sc, inc) -6 times = 18sc.
Rnd 4. (2sc, inc) -6 times = 24sc.
Rnd 5. (3sc, inc) -6 times = 30sc.
Rnd 6-8. 30sc (3 rows) = 30sc.
Rnd 9. 8 dec, 14sc = 22sc.
Rnd 10-12. 22sc (3 rows) = 22sc.
Rnd 13. 18sc, inc, 3sc = 23sc.
Rnd 14-15. 23sc (2 rows) = 23sc + 7sc to shift the row.
Fasten the thread, cut.
Crochet the second paw in the same way as the first one up to 12 rows. From the 13th row, crochet the paw in a different way.
Rnd 13. 12 sc, inc, 9 sc= 23 sc.
Rnd 14-15. 23 sc (2 rows) = 23 sc.
On the second paw, the thread does not need to be cut, then we will crochet the body.
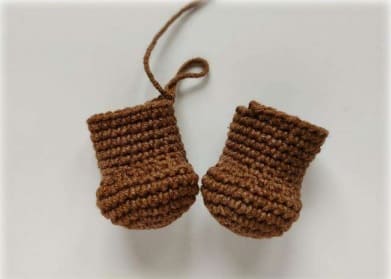
Body
Stuff the body as you crochet.
Rnd 16. On the last paw where the thread was left, we continue to crochet 5ch, now connect with the first paw, starting from the last loop, where the connecting column was made 23sc, 1sc into the loop with which they began to crochet this paw, 5 inc in ch, 1sc into that loop where they finished crochet the left paw (thus, in the corners between the paws, increases should be obtained), 23sc on the second paw = 63sc.
Rnd 17. for ch – (2sc, inc, 2sc), 11sc, inc, 34sc, inc, 11sc = 66sc.
Rnd 18-31. 66 sc (14 rows) = 66 sc.
Rnd 32. (9 sc, dec) -6 times = 60 sc.
Rnd 33-34. 60sc (2 rows) = 60sc.
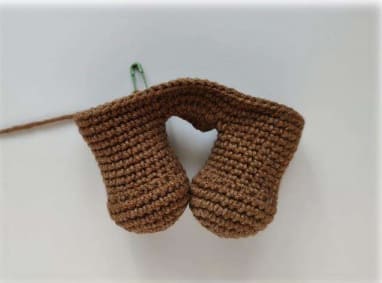
Rnd 35. (8sc, dec)-6 times=54sc.
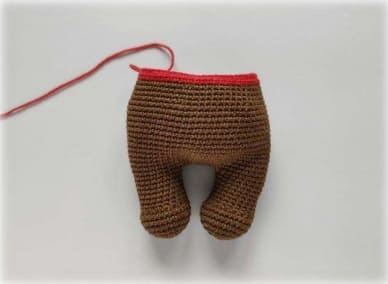
Next, change the color of the thread to red and crochet in stripes, changing the thread every two rows.
Rnd 36. 54sc=54sc.
Rnd 37. 54 sc for the back half loop = 54 sc.
Rnd 38. (7 sc, dec)-6 times=48 sc.
Change the thread color to grey.
Rnd 39-40. 48sc (2 rows) = 48sc.
Change the thread color to red.
Rnd 41. 48sc = 48sc.
Rnd 42. (6sc, dec) -6 times = 42sc.
Change the thread color to grey.
Rnd 43-44. 42sc (2 rows) = 42sc.
Change the thread color to red.
Rnd 45. 42sc = 42sc.
Rnd 46. (5sc, dec) -6 times = 36sc.
Change the thread color to grey.
Rnd 47. 36sc = 36sc.
In the next row we crochet the upper paws.
Rnd 48. 14sc, attach the foot and crochet together 6sc, 10sc, attach the second paw and crochet together 6sc = 36sc.
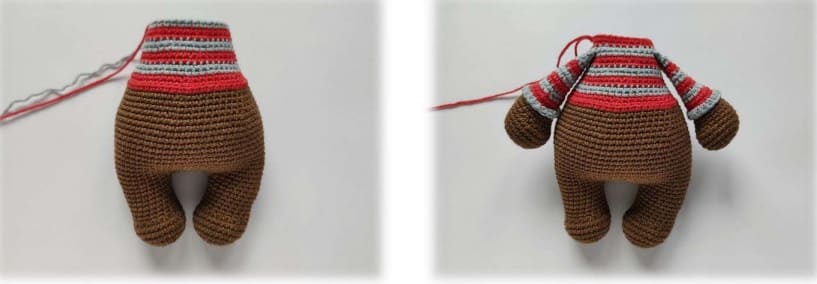
Change the thread color to red.
Rnd 49. (4sc, dec) -6 times = 30sc.
Rnd 50. 30sc = 30sc.
Stuff tightly and evenly into the body.
Head
Change the thread color to the main one.
Rnd 51. 30 inc for the BLO = 60 sc.
Rnd 52. (9sc, inc) -6 times = 66sc
Rnd 53. (10sc, inc) -6 times = 72sc
Rnd 54. (11sc, inc) -6 times = 78sc
Rnd 55-63. 78sc (9 rows) = 78sc
Rnd 64. (11sc, dec) -6 times = 72sc
Rnd 65-66. 72sc (2 rows) = 72sc.
Rnd 67. (10sc, dec) -6 times = 66sc.
Rnd 68-69. 66sc (2 rows) = 66sc.
Rnd 70. (9sc, dec) -6 times = 60sc.
Rnd 71. (8sc, dec) -6 times = 54sc.
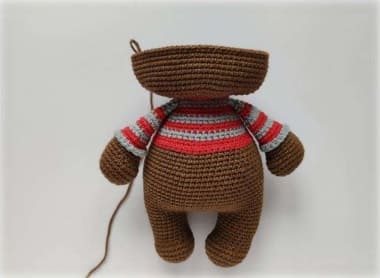
Set the eyes on the mount between 62-63 side by side, at a distance of 12-13 loops.
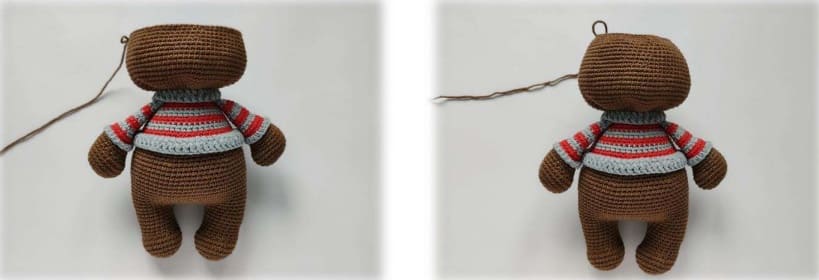
Until you have stuffed and tied your head, it will be more convenient to make a harness on a sweater.
Make a tie at the neck and bottom of the sweater for the front loops of the 36th and 50th rows.
1. Attach the yarn to the back of the toy, pick up 2ch inc and work in each dc st, around the neck 30 dc, under the sweater 54 dc.
2. Crochet the second row with convex embossed double crochets.
Fasten the thread, cut.
Tuck the ends of the threads inward.
Next, finish crocheting the head.
Rnd 72. 54sc=54sc.
Rnd 73. (7sc, dec)-6 times=48sc.
Rnd 74. (6sc, dec)-6 times=42sc.
Rnd 75. (5sc, dec)-6 times=36sc.
Rnd 76. (4sc, dec)-6 times=30sc.
Stuff your head tightly and evenly.
Rnd 77. (3 sc, dec)-6 times=24sc.
Rnd 78. (2 sc, dec)-6 times=18 sc.
Rnd 79, (1 sc, dec)-6 times=12 sc.
Rnd 80. 6 dec =6sc.
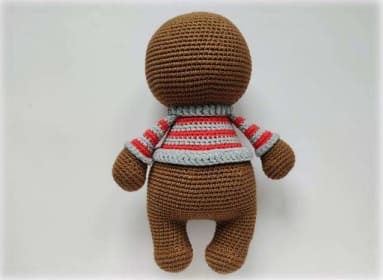
Pull the hole, cut the thread and thread it inside the head.
Ears (Make 2)
Crochet in a circle, in a spiral.
Rnd 1. 6 sc in the magic ring = 6 sc.
Rnd 2. 6 inc= 12sc.
Rnd 3. (1sc, inc) -6 times = 18sc.
Rnd 4-8. 18sc (5 rows) = 18sc.
Rnd 9. (1sc, dec) -6 times = 12sc.
Fasten the thread, leave a long end for stitching.
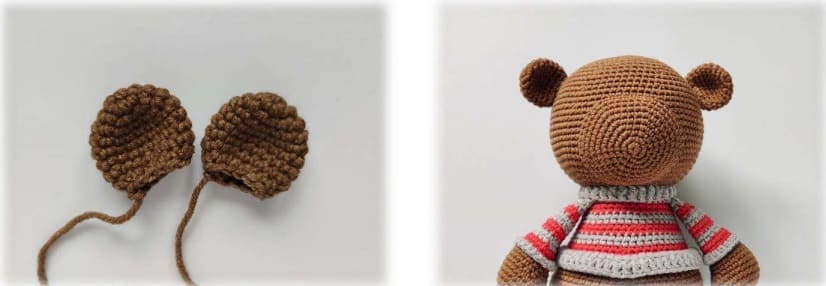
Sew the ears to the head.
Muzzle
Crochet in a circle, in a spiral.
Rnd 1. 6sc in the magic ring = 6sc.
Rnd 2. 6 inc = 12sc.
Rnd 3. (1sc, inc) -6 times = 18sc.
Rnd 4. (2sc, inc) -6 times = 24sc.
Rnd 5. (3sc, inc) -6 times = 30sc.
Rnd 6. (4sc, inc) -6 times = 36sc.
Rnd 7. (5sc, inc) -6 times = 42sc.
Rnd 8-9. 42sc (2 rows) = 42sc.
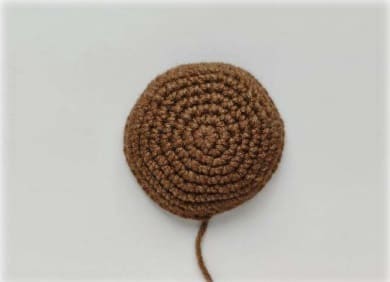
Fasten the thread, leave a long end for stitching.
Set the spout on the mount between 7-8 side by side.
Sew the muzzle to the head, when sewing the muzzle lightly fill with filler.
Spout
1. Make on 5 ch, from the second loop from the hook 3sc, 3sc into one, 2sc, inc = 10sc.
2. inc, 2sc, 3 inc, 2sc, 2 inc = 16sc.
3. 16 sc=16 sc.
Fasten the thread, leave a long end for stitching.
Sew to the muzzle.
Decor
If you installed the eyes on the mount, then you can simply embroider the eyebrows on the bear.
If you wish, you can make a tightening under the eyes, look at the photo for a tightening scheme.


