Hello friends,
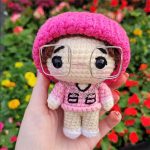
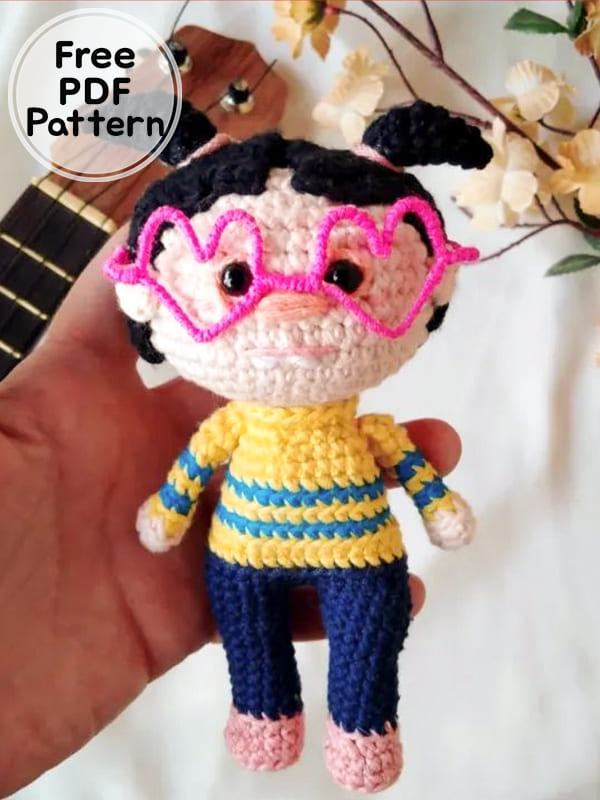
You will have a lot of fun while crocheting free amigurumi crochet doll. It is medium difficulty to crochet the baby amigurumi free patterns, which is very cute with its heart glasses, step by step. You can see how the glasses are made in the description section. It will be the children’s favorite amigurumi crochet toy.
You can change the yarn colors of the crochet toy free amigurumi patterns. You can change the colors of sweaters and pants. Let’s complete the legs and body part as one piece. After completing the arms and head part, you can decorate it as you wish. Thank you to the creator of the cute amigurumi crochet dolls.
Crochet Doll La Chilindrina Amigurumi Free Patterns PDF
Designer: valros10
Materials
crochet hook 1.75mm
3mm crochet hook
Hilaze cotton various colors (navy blue, royal blue, pink, tangerine, skin color, yellow, fiusha or neon pink, black and white)
Maximum adhesion glue (the one available in your region. Recommended E6000)
White wire caliber 20 6 22 30cm approx
Stuffed
maskint tape 6 micro porp tape 3M
Scissors, flat pints, cutting pliers and yarn needle
Abbreviation
MR – magic ring
sc – single crochet
hdc – half double crochet
slst- Slip Stitch
inc- increase
dec- decrease
ch – chain
FLO- Front loop only
BLO- Back loop only
Rnd- round
Legs (x2)
we started in pink
Rnd 1. MR 7sc
Rnd 2. 7 inc (14sc)
Rnd 3. BLO 14sc
Rnd 4. 14sc
Rnd 5. 5sc, 2 dec in hdc, 5sc (12sc)
Change to navy blue
Rnd 6. BLO 12sc
Rnd 7-11. 12sc
Rnd 12. 3sc, inc, 5sc, inc, 2sc (14sc)
Rnd 13-14. 14sc
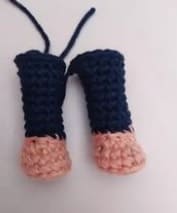
We finish and cut. In the second leg we weave 3 sc more and join with 3 chains
Body
Rnd 15. 14sc, 3 sc (corresponding to the chains), 14 sc, 3 sc (corresponding to the chains) (34 sc)
Rnd 16-18. 34sc
Change to yellow
Rnd 19. BLO 34sc
Rnd 20. 6sc, dec, 15sc, dec, 9sc (32sc)
change to royal blue
Rnd 21. BLO 5sc, dec, 15sc, dec, 8sc (30sc)
Change to yellow
Rnd 22. BLO 30sc
change to royal blue (last round of this color)
Rnd 23. (8sc, dec) x 3 (27sc)
Change to yellow
Rnd 24. BLO 27sc
Rnd 25. 5sc, dec, 12sc, dec, 4sc, dec (24sc)
Rnd 26. (6sc, dec) x 3 (21sc)
Rnd 27. 4sc, dec, 4sc, dec, 3sc, dec, 4sc (18sc)
Rnd 28. (sc, dec) x 6 (12sc)
Knit 18 hdc on round 27 (as shown in the image)
We finish off and leave a long tail to sew the head.
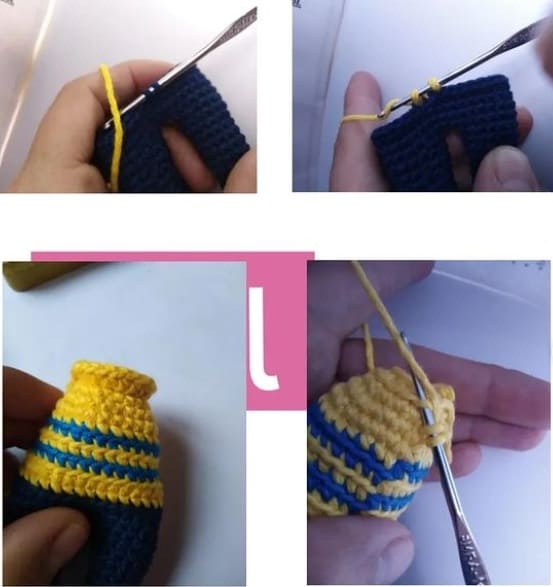
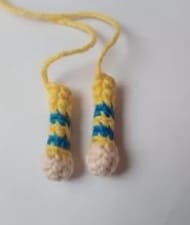
Arms (x2)
We started in beige
Rnd 1. MR 6sc
Rnd 2. (inc, sc) x 3 (9sc)
change to yellow
Rnd 3. BLO (dec, sc) x 3 (6sc
change to blue
Rnd 4. BLO sc
change to yellow
Rnd 5. BLO 6sc
change to blue
Rnd 6. BLO 6sc
change to yellow
Rnd 7. BLO 6sc
Rnd 8-9. 6sc
Finish off and leave a long tail to sew
Hair
With 3mm hook
We knit in black color 13ch and go up for the second
Round 1. 7hdc, 3sc, 2slst we turn and weave
Round 2. 2slst, 3sc, 7 hdc turn, ch up and knit
Round 3. 7hdc, 3sc, 2slst we turn and weave
Round 4. 2slst, 3sc, 7 hdc turn, go up with two ch and weave
Round 5. 7 hdc, 3sc, 2slst we turn and weave
Round 6. 2slst, 3sc, 7 hdc turn, go up with two ch and weave
Round 7. 7 hdc, 3sc, 2slst we turn and weave
Round 8. 2slst, 3slst, 7 hdc turn, go up with two ch and weave
Round 9. 7 hdc, 3sc, 2slst we turn and weave
Round 10. 2slst, 3sc, 7hdc turn, go up with two ch and weave
Round 11. 7 hdc, 3sc, 2slst we turn and weave
Round 12. 2slst, 3sc, 7 hdc turn, go up with two ch and weave
Round 13. 7 hdc, 3sc, 2slst we turn and weave
Round 14. 2slst, 3sc, 7 hdc
Finish off and leave a long tail to sew to the head
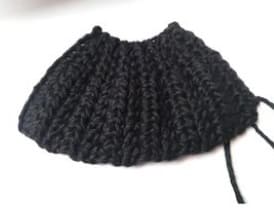
Hair Pigtails
in black color
Rnd 1. MR 6sc
Rnd 2. sc, 2 inc, 3sc (8sc)
Rnd 3. 2sc, 2 inc in hdc, 4sc (10sc)
Rnd 4. 10sc
Rnd 5. dec, 6sc, dec (8sc)
Rnd 6. dec, 4sc, dec (6sc)
Rnd 7. 3 dec (3sc)
With the agulha yarn we close the points and finish.
The tails are not stuffed
We add yarn to the rows at the beginning to sew the tails
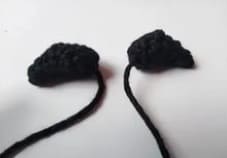
Ears (x2)
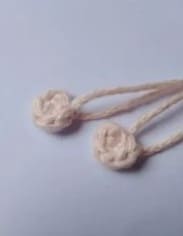
MR 6 sc we close and leave a long tail to sew.
Head
in beige
Rnd 1. MR 8sc
Rnd 2. 8 inc (16sc)
Rnd 3. (sc, inc) x 8 (24sc)
Rnd 4. (2sc, inc) x 8 (32sc)
Rnd 5. (3sc, inc) x 8 (40sc)
Rnd 6. (4sc, inc) x 8 (48sc)
Rnd 7-14. 48sc
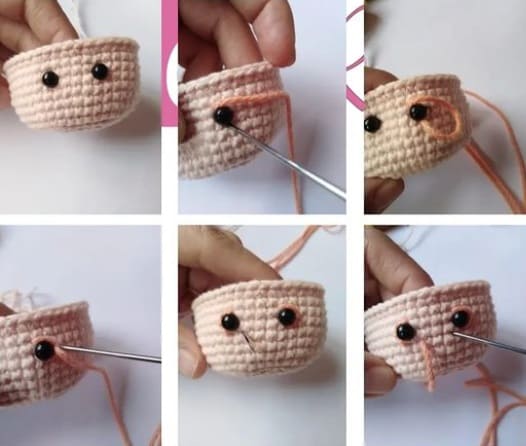
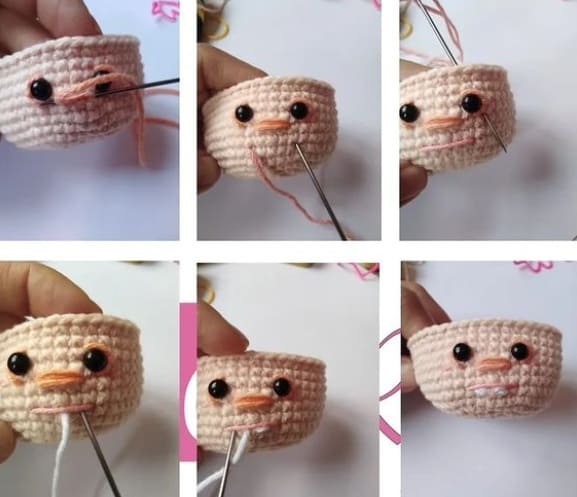
Eyes between round 11 and 12 with 4 sts apart
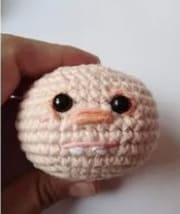
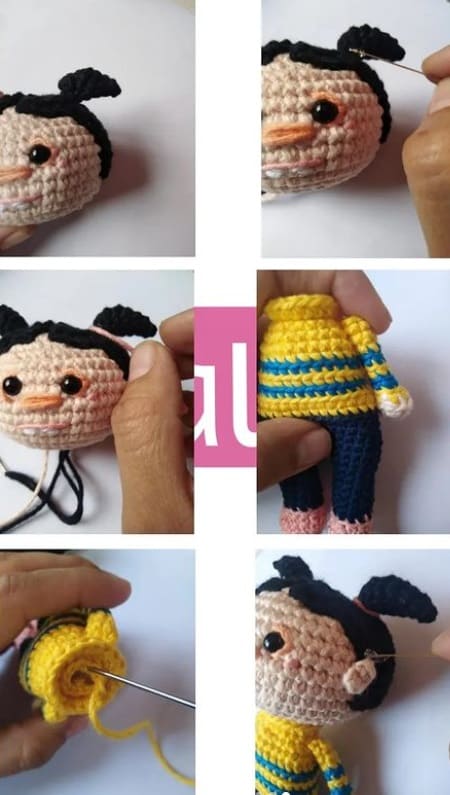
It is suggested to embroider at this moment the details of the face as shown in the images.
Rnd 15. (4sc, dec) x 8 (40sc)
Rnd 16. (3sc, dec) x 8 (32sc)
Rnd 17. (2sc, dec) x 8 (24sc)
Rnd 18. (sc, dec) x 8 (16sc)
Rnd 19. 8 dec (8sc)
We finish off and cut the thread
Glasses
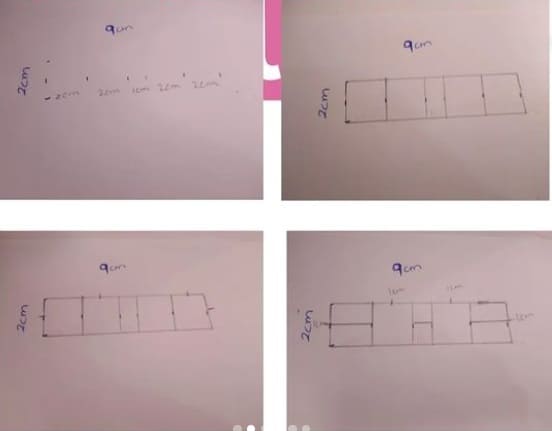
You will need fiusha or neon pink yarn, wire, glue and a sheet of paper to trace the lenses
• Measure and mark (as shown in the images)
• Draw the vertical and horizontal lines (as it appears in the images)
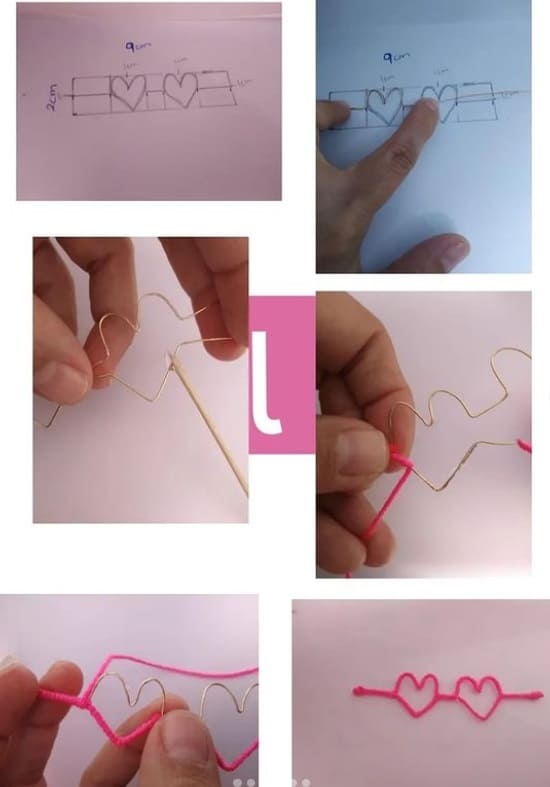
• Mark the hearts without leaving the boxes
• With our hands we are following the shape that he gave us for the glasses, starting with the upper part and when we reach the edge we do not cut, we bend the wire and continue to finish, we cut.
• To cover the lenses, first, we glue the beaks and cover them with yarn
• Once dried, we continue with what would be the first leg of the lens (remember to put the glue first before the yarn), the upper part of the hearts and we finish with the other leg.
• We fold only the legs with the support of the tweezers or with our hands and let it dry.
Assembly
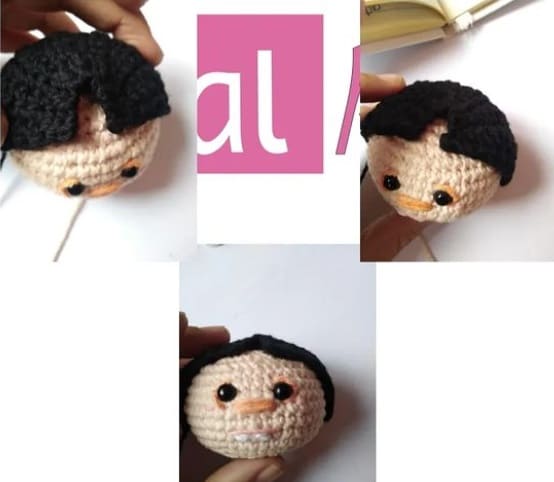
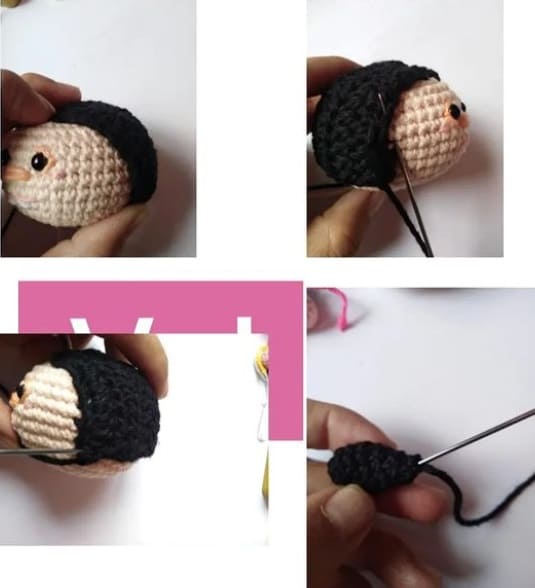
• We place the hair: we fold it and leave the narrowest part facing up, that will help us to simulate the part of the hairstyle.
• Sew at the height of round 14, centering it and leaving 1 separation stitch
• Then we sew the rest of the hair, we must leave 5 points of separation between the hair and the eyes, it stretches when sewing
• We sew the tails being located with reference to the edge of the eye
• We put a little glue and paste a little piece of pink yarn
• We place the hands and sew them taking care that the lines are accommodated.
• We sew the head to the body, from the turn of 12 sts
• We sew the ears taking care that their distance is between the eyes and the nose.
• We put glue above the ears and glue the glasses.
Your amigurumi doll is ready


