
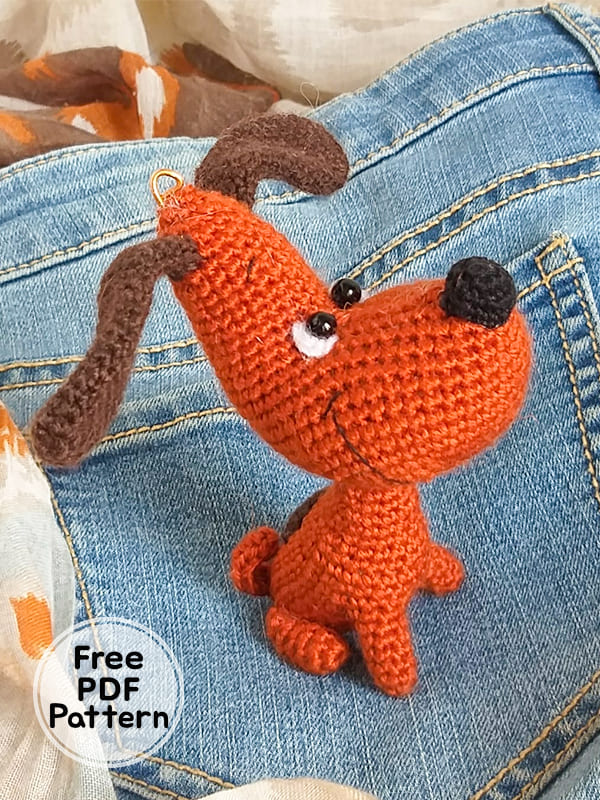
I brought you a completely free crochet keychain dog pattern from Margarita Yakovleva. First of all, I would like to thank Margarita, the owner of the pattern. It’s a great crochet keychain. The finished size of the crochet dog keychain is about 10-12cm. The designer used a 1.25mm crochet hook to make such a tiny dog. Crochet dog’s front legs and body are one piece, the rest are fixed separately. There are detailed pictures to help you during the step-by-step free amigurumi pattern instructions. Let’s create our own crochet keychains together.
Crochet Keychain Dog Amigurumi PDF Free Pattern
Designer: Margarita Yakovleva
Materials and tools
1. Yarn of the main color (color – at your discretion) I have: Wool with acrylic 400 m / 100 g for the body and ears. A little black yarn of the same thickness on the nose.
2. Filler (holofiber)
3. Hook suitable for yarn (I have 1.25 Clover)
4. Scissors
5. Needle with a large eye
6. Beads – 6 mm for the eyes, or ready-made eyes
7. Black cotton thread (for example, floss) for sewing eyes and embroidering a mouth
8. Wire with a cross section of 1-1.5 mm, a length of 15 cm
9. Pliers for working with wire
Abbreviations
MR: Magic ring
Sc: Single crochet
Ch: Chain
Slst: Slip stitch
Inc: Increase
Dec: Decrease
Hdc: Half double crochet
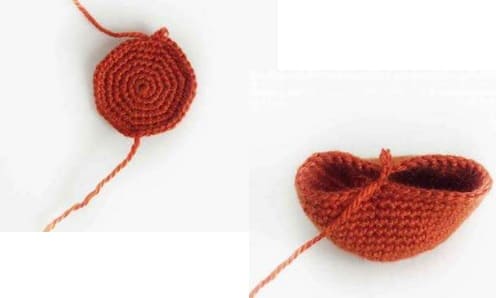
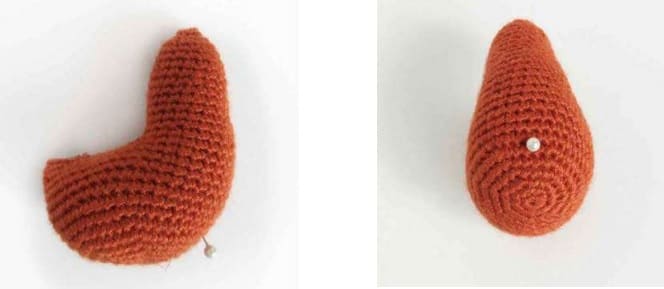
Head
1. 7 sc in MR = 7
2. (inc)*7 = 14
3. (1sc , inc)*7 = 21
4. (2 sc, inc)*7 = 28
5. (3 sc, inc)*7 = 35
6. (4 sc, inc)*7 = 42
7-15. = 42 sc
16. 20 sc, skip 21 stitches, 1 sc = 21
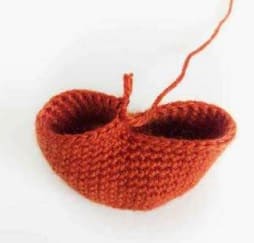
We continue to crocheting in a small ring.
17-18. = 21
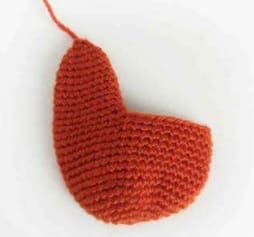
19. 9 sc, dec, 10 sc = 20
20-21. = 20
22. 5 sc, dec, 6 sc, dec, 5 sc = 18
23. = 18
24. 7 sc, dec, 7 sc, dec = 16
25. = 16
26. 8 sc, dec, 6 sc = 15
27. (3 sc, dec)*3 =12
28. (2 sc, dec)*3 = 9
29. 3 dec, fasten, thread the thread inside the part.
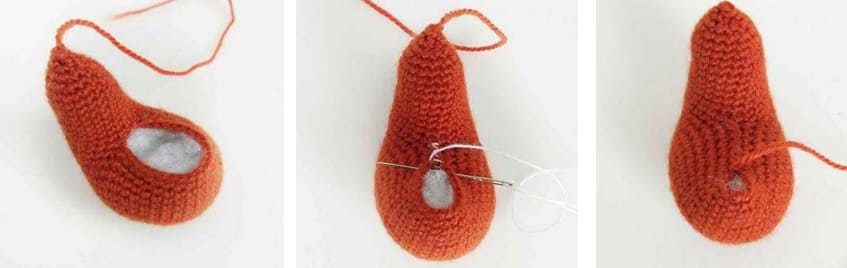
Insert an additional thread (cm 20) into the needle and sew the muzzle over the edge. We begin to sew up from the “nose bridge”, we do not reach 7-8 mm to the end of the nose. (For example, I showed it with a white thread) Add filler to the resulting hole to give the muzzle sufficient volume. The hole may not be closed.
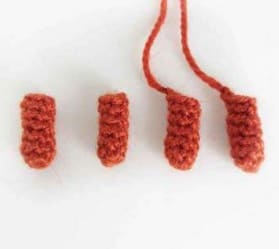
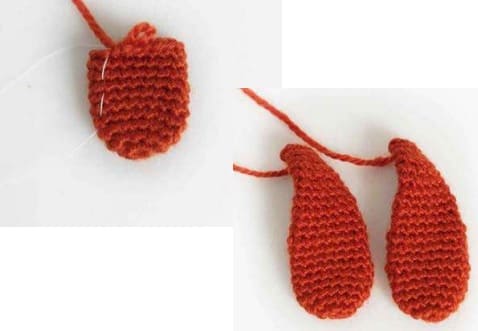
Paws (Make 4)
1. 6 sc in MR = 6
2-6. = 6 sc
At two legs (hind legs), leave a thread of 20 cm for sewing.
Body
1. 6 sc in MR= 6
2. inc*6 =12
3. (1 sc, inc)*6=18
4-7. = 18
Next, crocheting the front paws.
8. 6 sc, 2 sc on the inside of the left paw, 2 sc, 2 sc on the inside of the right paw, 6 sc = 18
9. 6 sc, 4 sc on the loops of the left paw, 2 inc, 4 sc on the loops of the right paw, 6 sc = 24
10. = 24
We stuff the paws (tightly) and the lower part of the body.
11. (6 sc, dec)*3 = 21
12. = 21
13. (5 sc, dec)*3 = 18
14. = 18.
We continue to moderately stuff as we knit.
15. (4 sc, dec.)*3 = 15
16 -17. = 15
18. (3 sc, dec)*3 = 12
19. = 12
20. (2 sc, dec)*3 = 9
21. = 9
Fasten the thread, leave a piece of thread (15-20 cm) for sewing.
Ears (Make 2)
1. 7 sc in MR= 7
2. inc*7 =14
3. (6 sc, inc)*2 = 16
Place a marker. This is the edge of the ear.
4-10. = 16
11. 8 sc, dec, 6 sc = 15
12. dec, 13 sc = 14
13. = 14
14. 7 sc, dec, 5 sc = 13
15. dec, 11 sc = 12
16. = 12
17. 3 sc, dec, 4 sc, dec, 1 sc = 10
18. = 10
19. 2 sc, dec, 3 sc, dec, 1 sc = 8
20. 7 sc, slst, fasten the thread, leave 15-20 cm of thread for sewing.
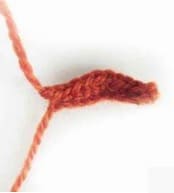
Tail
1. Make 11 ch. In the second loop from the hook we knit: sl st, 2 sc, 2 dc, 2 dc in one loop, 2 dc, 2 sc, leave the thread for sewing.
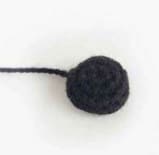
Nose
1. 6 sc in MR= 6
2. inc*6 = 12
3. (3 sc, inc)*3=15
4. 15, fasten the thread, leave 15-20 cm of thread for sewing.
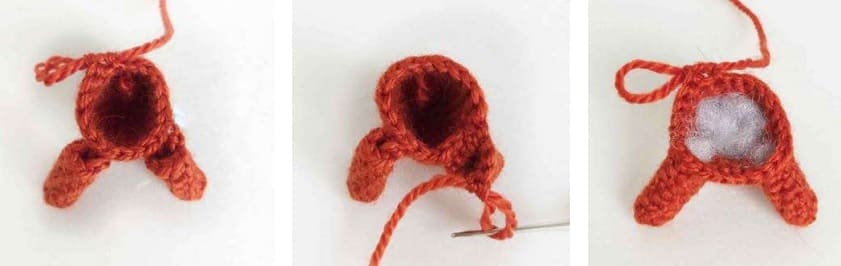
Assembling the toy
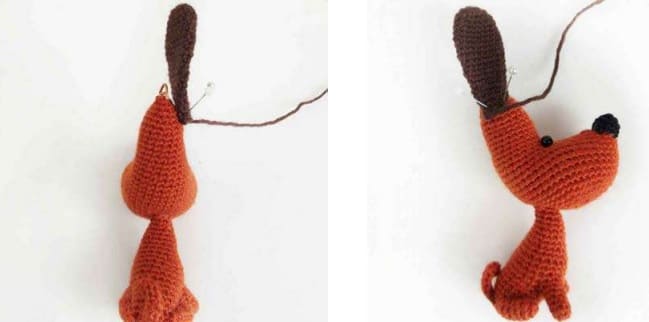
* Cut a wire 15 cm long. The wire serves as a frame for the torso and allows you to slightly adjust the position of the head. Fold over one end. If the wire is winding, then strip most of the wire. This can be done with a knife.
* Insert the end of the wire (with a bent edge) into the hole in the neck. With rotational movements, push the wire almost to the end of the body. Add filler to the body and neck.
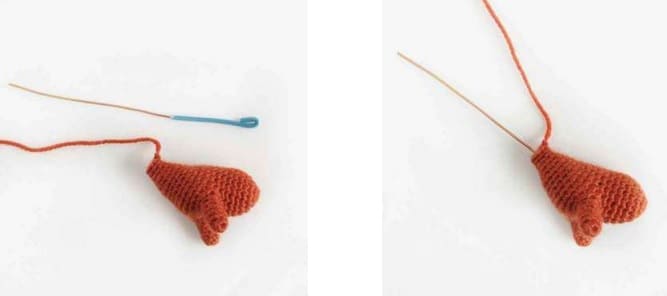
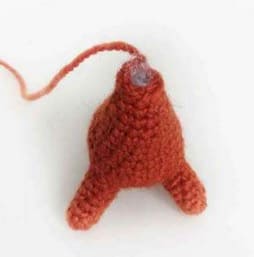
* Mark on the head a point for attaching the neck. This point is between 7 and 8 next to the start of knitting. (With photo)
* Mark the location of the eyes. Sew on the eyes. Insert the needle next to the hole marked for the neck, bring it out in the eye area, bring it to the starting point. When sewing on the eye, you can make a tightening so that the eye sits deeper. Repeat 2-3 times. Sew on the second eye in the same way.
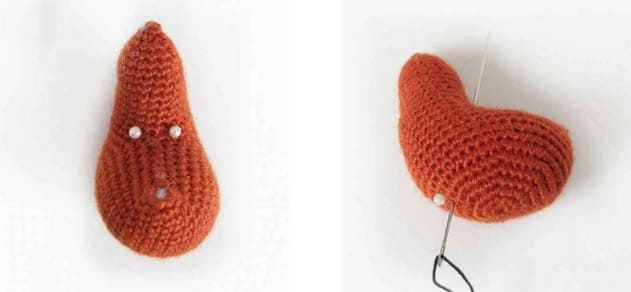
* Widen the hole, for example with a thick knitting needle. Insert the wire at the intended point of the head and bring it out at the crown.
* Sew the body to the head.
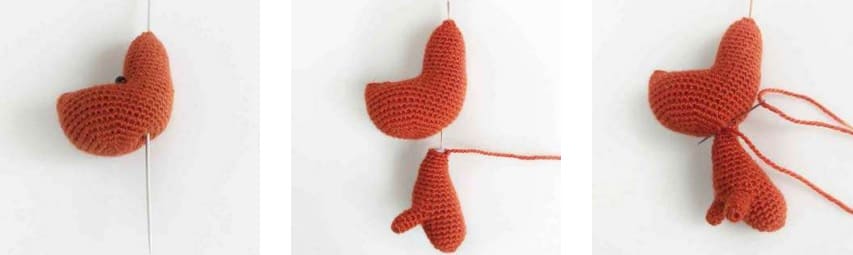
* Stuff the hind legs 2/3. Plant the dog and mark the location of the legs. Fold the leg in half and sew, grabbing both edges. Press it to the body and continue to sew to about the middle of the leg.
* Sew on a ponytail.
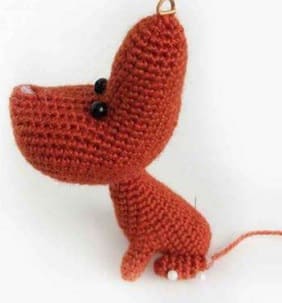
* If the dog will be a keychain, then use pliers to make a loop at the end of the wire. If the dog will be a toy, cut off the excess wire.
* Put a muzzle on the hole in the muzzle and sew it on, adding a little filler to the muzzle.

* Sew the ears 4-5 rows below the crown.
* Embroider a smile, starting about 10 rows from the beginning of knitting the head. Embroider the eyebrows with the same thread.
* If desired, you can make a forelock.
Cheerful crochet puppy is ready!


