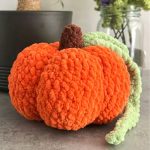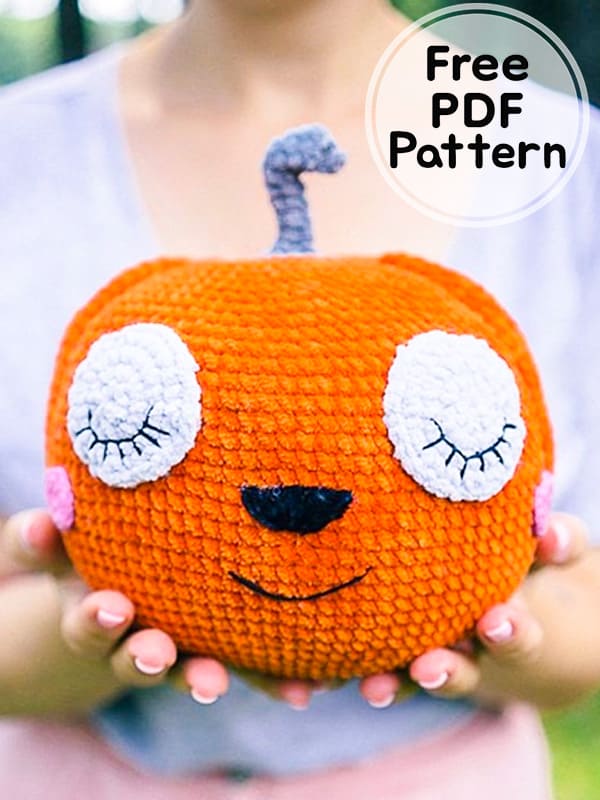
Greetings to everyone, I am trying to share halloween patterns for you as halloween is approaching. First of all, many thanks to the pattern designer for the crochet pumpkin model. The crochet pumpkin pattern is easy level, you can complete the cute crochet pumpkin by following the detailed step by step amigurumi pattern instruction. If you wish, you can make a beautiful pillow from a crocheted pumpkin, and decorate your house with your own hands during Halloween. Now I invite you to a free crochet pumpkin pattern instruction. Stay tuned for more free amigurumi patterns and halloween patterns.
Crochet Pumpkin Free PDF Amigurumi Pattern
Designer: mumigurumi
Materials and tools
• Yarn: YarnArt dolce baby
• Fibre content: 100% micro polyester (chenille)
• Yarn weight: aran/ medium
• Length: 85 meters
• Ball weight: 50 gr
• Colours: orange (you will need two skeins), white or light grey for the eyes, grey or brown for the stem, black for the hat.
• 3.5, 4mm hook
• a little bit of black and pink yarn for decorating the face
• Polyester fiberfill for stuffing (a lot)
• Tapestry needle
• Stitch marker
• Embroidery floss for shaping the pumpkin (or any other strong piece of yarn you have at hand)
Abbreviations
Ch: Chain
MR: Magic ring
Sc: Single crochet
Inc: Increase
Dec: Decrease
BLO: Back loop only
Slst: Slip stitch
Pumpkin
We start from the bottom with orange yarn.
Rnd 1: 8 sc in magic ring (8)
Rnd 2: 8 inc (16)
Rnd 3: [1 sc, 1 inc] x 8 (24)
Rnd 4: [2 sc, 1 inc] x 8 (32)
Rnd 5: [3 sc, 1 inc] x 8 (40)
Rnd 6: [4 sc, 1 inc] x 8 (48)
Rnd 7: [5 sc, 1 inc] x 8 (56)
Rnd 8: [6 sc, 1 inc] x 8 (64)
Rnd 9: [7 sc, 1 inc] x 8 (72)
Rnd 10: [8 sc, 1 inc] x 8 (80)
Rnd 11: [9 sc, 1 inc] x 8 (88)
Rnd 12: [10 sc, 1 inc] x 8 (96)
Rnd 13-32: sc around (96)
Rnd 33: [10 sc, 1 dec] x 8 (88)
Rnd 34: sc around (88)
Rnd 35: [9 sc, 1 dec] x 8 (80)
Stuff as you go.
Rnd 36: sc around (80)
Rnd 37: [8 sc, 1 dec] x 8 (72)
Rnd 38: sc around (72)
Rnd 39: [7 sc, 1 dec] x 8 (64)
Rnd 40: [6 sc, 1 dec] x 8 (56)
Rnd 41: [5 sc, 1 dec] x 8 (48)
Rnd 42: [4 sc, 1 dec] x 8 (40)
Rnd 43: [3 sc, 1 dec] x 8 (32)
Rnd 44: sc around (32)
Change to grey yarn.
Rnd 45: sc around in BLO (32)
Rnd 46: [2 sc, 1 dec] x 8 (24)
Rnd 47: [2 sc, 1 dec] x 6 (18)
Rnd 48: [1 sc, 1 dec] x 6 (12)
Rnd 49: sc around (12)
Rnd 50: 6 dec
Fasten off. Weave in the ends.

Eyes
With white or light grey yarn.
Rnd 1: 8 sc in magic ring (8)
Rnd 2: 8 inc (16)
Rnd 3: [1 sc, 1 inc] x 8 (24)
Rnd 4: [2 sc, 1 inc] x 8 (32)
Finish with a SlSt. Leave a long tail for sewing.
Designing the face
Pin eyes to the pumpkin approximately between rounds 24 and 32, 10 stitches apart. With black lightweight yarn embroider the eyelashes. You can use any cotton yarn leftovers.

With the same yarn sew a mouth.
With black yarn (the same velvety yarn we used to make the hat) sew the nose.
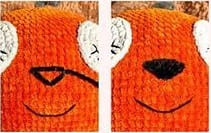
It’s time to shape your pumpkin.
We will need a tapestry needle for this. Pull the tail through the center of the pumpkin, wrap the yarn around the side, and pull back through the center.You can regulate the thread tension until you’ve got the look you like.
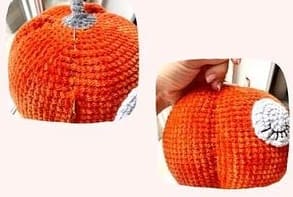
Repeat this a few more times to create indents around the pumpkin. I made 5 in total. Fasten off and secure the ends.
With pink light weight yarn make two cheeks:
Rnd 1. 8 sc in MR (8)
Rnd 2. 8 inc (16)
Finish with a slst, leaving a tail. Sew cheeks to the crochet pumpkin.


