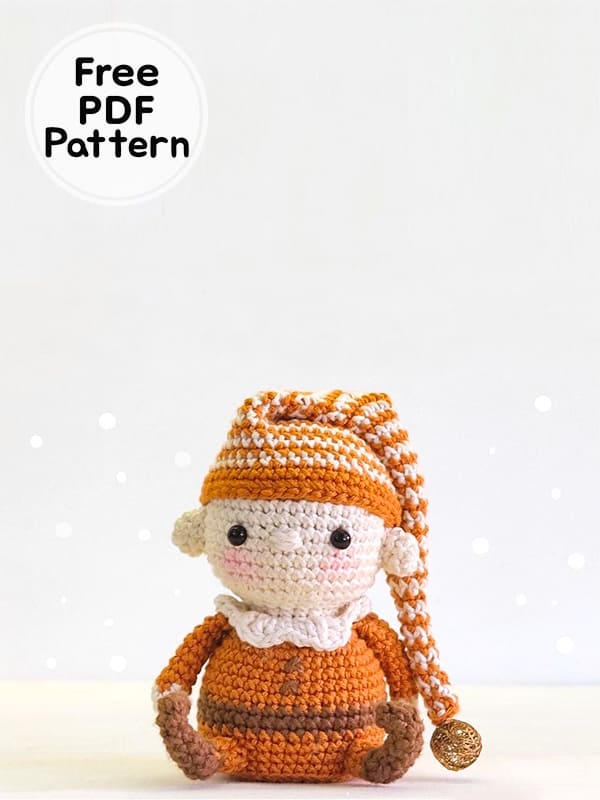
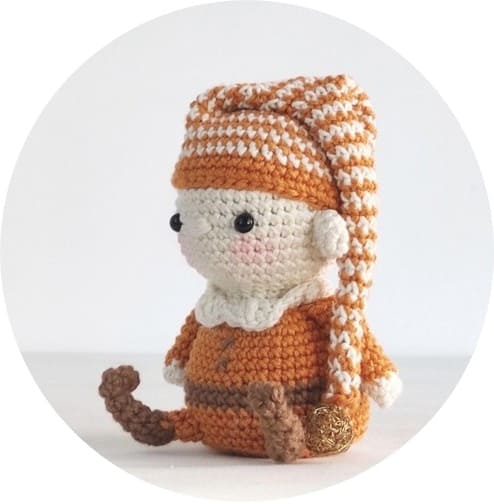
Greetings my friends, today I bring you the elf elliot crochet doll pattern, the mascot of christmas. Thank you very much to the owner of the pattern for the cute elf crochet doll. You can easily complete the free crochet doll pattern, which you can follow step by step with detailed pictures, and present it to your loved ones at Christmas. She looks pretty cute with her crocheted christmas efl hat and colorful outfit. The crochet doll’s head and body are embroidered in one piece. The remaining parts are fixed by working with crochet separately. Now, without further ado, I would like to invite you to a free amigurumi pattern instruction. Merry Christmas!
Elf Elliot Crochet Doll Free PDF Amigurumi Pattern
• 4 ply yarn in ochre, brown and cream
• 2.5 mm crochet hook
• Yarn needle
• Pins
• Fiberfill
• Scissors
• Stitch markers
• 6 mm safety eyes
• Small bell
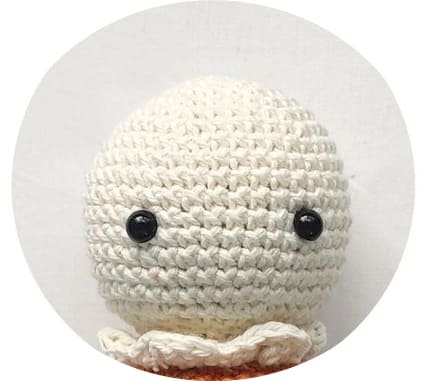
With cream yarn.
Rnd 1. 6 sc in MR (6)
Rnd 2. 6 inc (12)
Rnd 3. (sc,inc)*6 (18)
Rnd 4. (2sc,inc)*6 (24)
Rnd 5. (3sc,inc)*6 (30)
Rnd 6. (4sc,inc)*6 (36)
Rnd 7. (5sc,inc)*6 (42)
Rnd 8-16. sc all around (42) (nine rounds)
Place the eyes, 8 stitches apart, between rows 12 and 13.
Rnd 17. (3sc,2dec)*6 (30)
Rnd 18. (1sc,2dec)*6 (18)
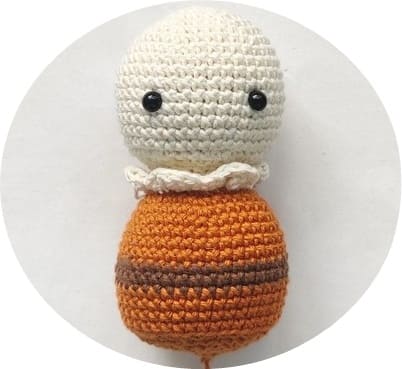
Rnd 19. sc all around (18), stuff head.
Continue crocheting the body.
Body
Rnd 20. (2sc,inc)*6 (24)
Change colour to ochre.
Rnd 21. BLO- (3sc,inc)*6 (30)
Rnd 22. (4sc,inc)*6 (36)
Rnd 23. (5sc,inc)*6 (42)
Rnd 24-27. sc all around (42) (four rounds)
Change colour to brown.
Don’t cut the ochre yarn.
Rnd 28-29. sc all around (42) (two rounds)
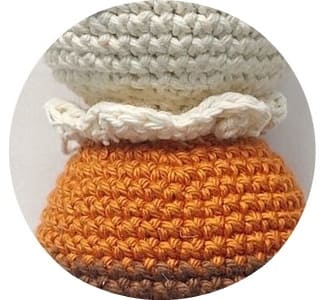
Change colour to back to ochre.
Rnd 30-33. sc all around (42) (four rounds)
Rnd 34. BLO- (5sc,dec)*6 (36)
Rnd 35. (4sc,dec)*6 (30)
Rnd 36. (3sc,dec)*6 (24)
Rnd 37. (2sc,dec)*6 (18), start stuffing.
Rnd 38. (sc,dec)*6 (12)
Rnd 39. 6 dec (6)
Fasten off and close the hole.
Collar
With cream yarn, on the BLO of round 20,
*(sc,hdc) in one stitch
(hdc,dc) in the next stitch,
(hdc,sc) in the next stitch * 6 times (48)
Fasten off leaving a long tail to sew.
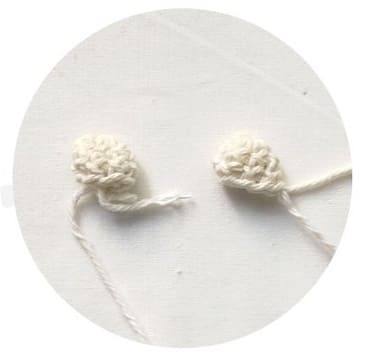
Ears (Make 2)
With cream yarn.
Rnd 1. 6 sc in MR (6)
Rnd 2-3. sc all around (6) (2 rounds)
Fasten off leaving a tail for attaching.
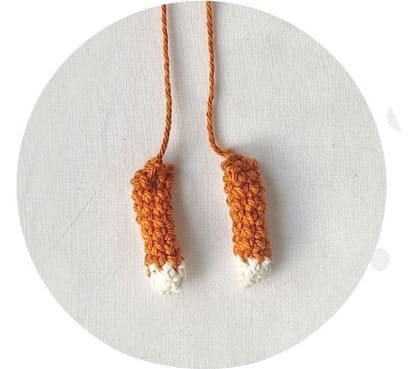
Arms (Make 2)
With cream yarn.
Rnd 1. 6 sc in MR (6)
Rnd 2. sc all around (6)
Change colour to ochre.
Rnd 3-10. sc all around (6) (8 rounds)
Flatten and make 4 sc through the front and back of the arm so that it is closed.
Fasten off leaving a tail for attaching.
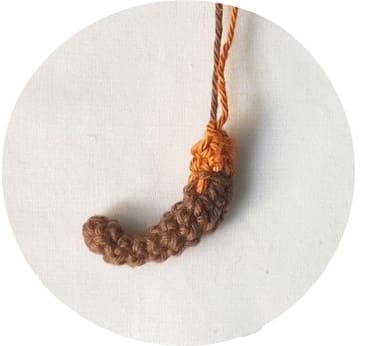
Legs (Make 2)
With cream yarn, leaving a long tail.
Rnd 1. 4 sc in MR (4)
Rnd 2-4. sc all around (4) (3 rounds)
Rnd 5. (sc,inc)*2 (6)
Rnd 6-7. sc all around (6) (2 rounds)
Rnd 8-9. sc, 4 hdc, sc (6) (2 rounds)
Change colour to ochre.
Rnd 10-11. sc all around (6) (2 rounds)
Fasten off leaving a tail for attaching.
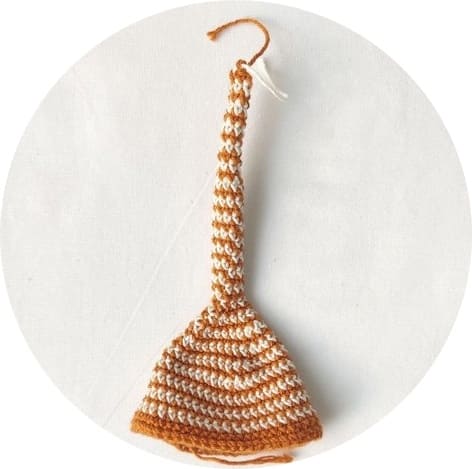
Hat
With ochre yarn, leaving a long tail to attach to the head.
Ch 48 (48)
Slst to make a ring.
Rnd 1. 48 sc (48)
Rnd 2. (6sc,dec)*6 (42)
Alternate between ochre and cream yarn.
Don’t cut the yarn. pick it up every other round.
Rnd 3-8. sc all around (42) (6 rounds)
Rnd 9. (12sc,dec)*3 (39)
Rnd 10. (11sc,dec)*3 (36)
Rnd 11. (10sc,dec)*3 (33)
Rnd 12. (9sc,dec)*3 (30)
Rnd 13. (8sc,dec)*3 (27)
Rnd 14. (7sc,dec)*3 (24)
Rnd 15. (6sc,dec)*3 (21)
Rnd 16. (5sc,dec)*3 (18)
Rnd 17. (4sc,dec)*3 (15)
Rnd 18. (3sc,dec)*3 (12)
Rnd 19. (2sc,dec)*3 (9)
Continue alternating colours.
Rnd 20-35. sc all around (9) (sixteen rounds)
Rnd 36. (1sc,dec)*3 (6)
Rnd 37-44. sc all around (6) (eight rounds)
Fasten off and leave some tails to attach the bell.
Assembly
1. Attach the ears on the sides between rows 12 and 14.
2. Embroider the nose between the eyes.
3. Attach the base of the hat all around, two rows above the eyes. Stitch the tail of the hat down, behind the ear, so it remains in place. Tie the bell at the end.
4. Stitch the ends of the scallops of the collar down.
5. Attach the arms on the side.
6. Attach the legs, 8 stitches apart, on the last two rows of the body. Curl the ends of the shoes backward and stitch them down using the brown yarn tails. Then thread the same yarn through the legs and into the body and pull tight. Knot both yarn tails at the back of the body and hide them. This will help point the shoes upright.
7. Embroider 2 ‘x’- shapped buttons on the shirt.
8. Add blush to the cheeks.