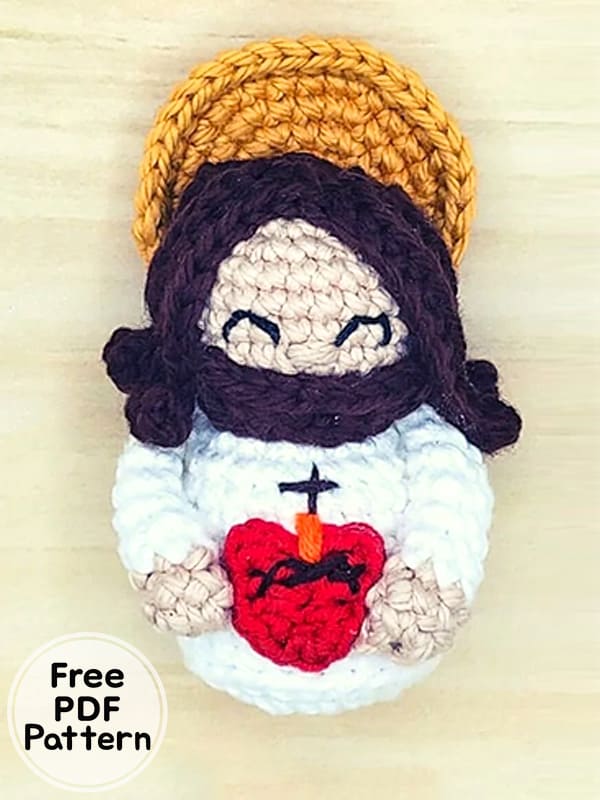
Greetings my friends, today I will share with you the pattern of the Jesus Christ amigurumi crochet doll. Thank you very much to the owner of the pattern. At Christmas time, you can bless your home with handmade Jesus Christ. The Jesus Christ amigurumi pattern is an easy amigurumi pattern for beginners. All you have to do is follow the step by step amigurumi patterns instructions. Jesus Christ also has a crocheted heart, don’t forget to make the heart. Now I invite you to the free pattern instruction.
Jesus Christ Crochet Doll Amigurumi Free PDF Pattern
Designer: lindsey_crochets
Abbreviations
MR: Magic ring
Sc: Single crochet
Inc: Increase
Dec: Decrease
Slst: Slip stitch
Ch: Chain
Hdc: Half double crochet
Dc: Double crochet
Heart
Use weight 2 red yarn and a 1.75 mm hook. Begin with a several inch long starting tail.
Round 1: ch 2, in the 2nd ch from the hook, complete: 3 sc, 2 dc, tr, ch 3, sl st, ch 3, tr, 2 dc, 3 sc, sl st to the first sc you made.
Fasten off, Use starting tail to sew the hole in the middle closed.
Use brown embroidery yarn to embroider three “x’s” along the top half of the heart to make the crown of thorns. Set aside.
Body
Begin with white worsted weight yarn and a 2.5 mm hook. Stuff as you go.
Round 1: ch 2, 6 sc in the 2nd chain from the hook (6)
R 2: inc. x 6 (12)
R 3: inc. x 12 (24)
R 4: BLO 24 sc (24)
R 5-11 (7 rounds): 24 sc (24)
Sew or glue on the heart or body (leaving plenty of room to embroider the flame and cross). Use orange weight 2 yarn to embroider a small flame. Use brown embroidery yarn to embroider a small cross on the top of the flame.
R 12: (2 sc, dec ) x 6 (18)
R 13: (sc, dec.) x 6 (12)
Change to beige worsted weight yarn.
R 14: BLO inc. x 12 (24)
R 15-19 (5 rounds): 24 sc (24)
Embroider closed eyes near round 17 about 2 stitches apart. Each of the eyes I created is about 2 stitches wide. Add a nose in between and slightly below the eyes (mine is between rounds 16 and 17): insert a little bit of yarn into your tapestry needle and wrap around a stitch or two several times and tie your two yarn ends in the back (on the inside of the head).
R 20: (2 sc, dec.) x 6 (18)
R 21: (sc, dec.) x 6 (12)
R 22: dec. x 6 (6)
Fasten off, and weave in any loose ends.
Arms (Make 2)
Begin in beige worsted weight yarn and 2.5 mm hook. Stuffing is not necessary.
R 1: ch 2, 6 sc in the 2nd chain from the hook (6)
R 2: 6 sc (6)
Change to white yarn.
R 3: FLO 6 sc
R 4-9: (6 rounds): 6 sc (6)
R 10: Fold the arm half and close together with 3 sc (3)
Fasten off, and leave a long tail for sewing.
Sew the arms onto the body so that they stick out forward a little bit (so that you can later position and sew the arms onto the body more easily)
I sew them near rounds 11 and 12. (you can see pictures of how o sewed the arms on in the hair section below).
Beard
Use brown worsted weight yarn and a 2.5 mm hook.
R 1: ch 9, starting from the 2nd ch from the hook complete: 3 sc, ch 2, sk 2, 3sc.
Fasten off, and leave a long tail for sewing.
If desired. Sew or glue the beard on right below the nose.
Hair
Use brown worsted yarn and a 2.5mm hook. Leave a tail of several inches
before beginning (if you wish to sew instead of glugin it on later).
R 1: ch 2, 6 sc in the 2nd chain from the hook (6)
R 2: (sc,inc)*3 (9)
R 3: (ch 12, starting from the 2nd ch from the hook, complete 11 sc back down the ch, sc in the next stitch)*9
Fasten off, and weave in ends.
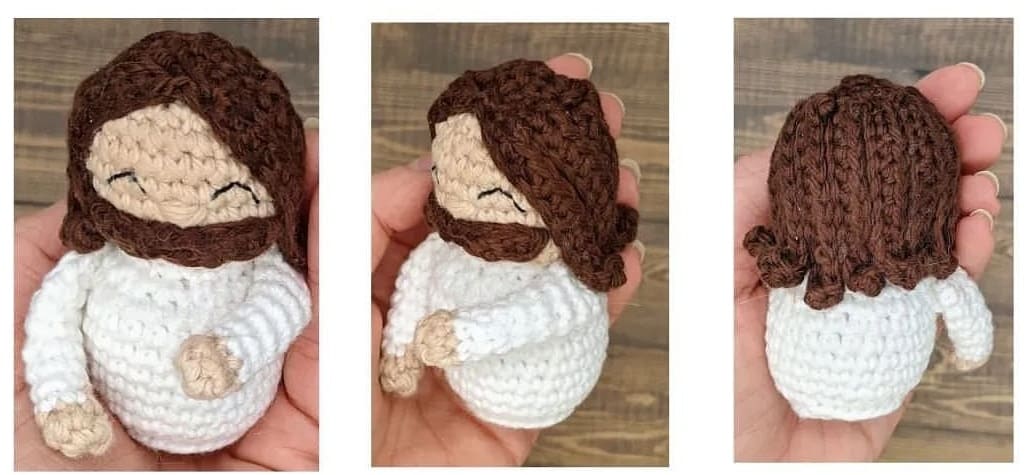
Sew or glue the top circle of the hair (rounds 1 and 2) onto the top of the head using the beginning tail, Before attaching it, make sure that two strands in the front middle are centered for an even part. Next, use sewing pins to arrange each strand is arranged onto the head, (Be careful as you do so, The head is small, and so if you stick the pins all the way through, they will likely poke through the other side of the head).
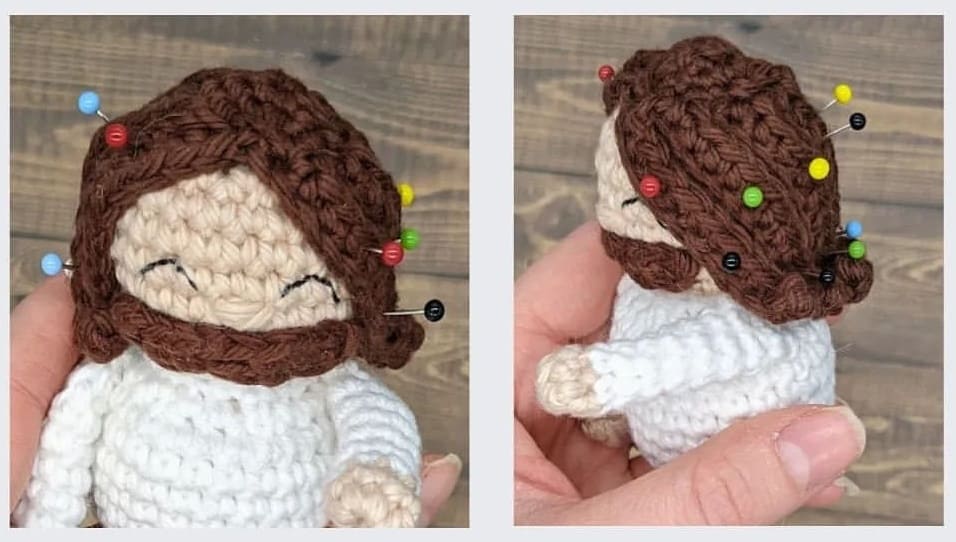
Next, either glue each strand onto the head or sew each strand onto the head. If you are sewing the hair strands down, I recommend sewing down one side of each strand and up the other side, sewing strands together where necessary to hide any gaps. If you’re gluing, a cotton swab (or similar object) might help you apply glue into small, hard to reach places.
Halo
Use gold worsted weight yarn and a 2.5 mm hook.
R 1: ch 2, 6 sc in the 2nd chain from the hook (6)
R 2: inc. x 6 (12)
R 3: (sc, inc.) x 6 (18)
R 4: (2 sc, inc.) x 6 (24)
R 5: (3 sc, inc.) x 6 (30)
R 6: (4 sc, inc.) x 6, sl st to the next stitch (36)
Fasten off and weave in ends Glue the halo onto the back of the head.
Lastly, sew or glue the arms onto the body so that they are cradling the heart.


