
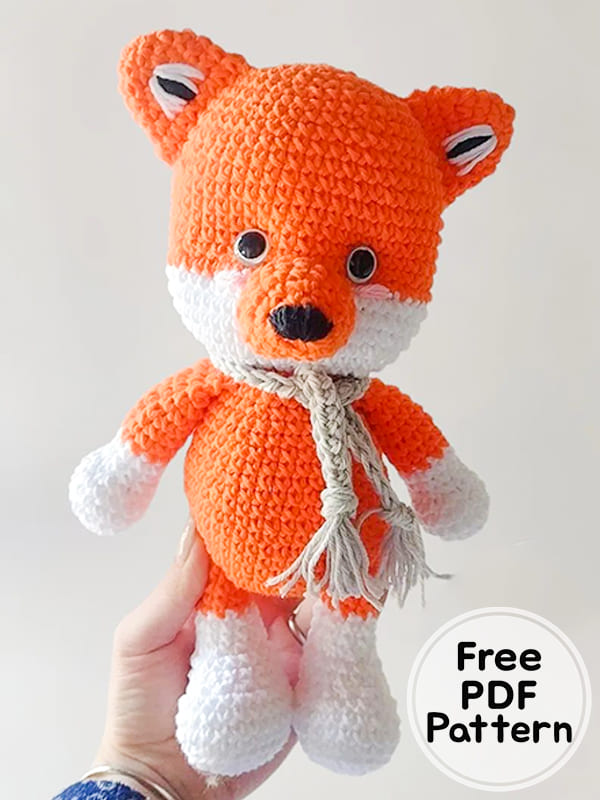
Hello everyone, today I shared the cute amigurumi fox pattern for you. It’s easy to crochet the fox amigurumi pattern free step by step. The scarf is crocheted to be suitable for the winter season. We will crochet all parts of the free fox amigurumi pattern separately. Let’s sew the completed parts into place on the body part. You can change the thread color of the amigurumi fox free pattern. You can use brown and black yarn. You can make eyes using plastic accessories. If you are making it for small children, you can crochet the fox’s eyes using black yarn. It will be a safer toy. Thank you to the creator of the fox amigurumi pattern. Don’t forget to add it to your favorite list and share it with your loved ones.
Little Fox Amigurumi PDF Free Pattern
Designer: capullitode.aleli
Materials
8/6 cotton thread orange, white, gray and a little pink
crochet hook 2.5mm
Scissors
pins
wool needle
point marker
silicone fleece
8mm safety eyes
black and white embroidery thread
Safety nose no 2 (optional)
Abbreviations
MR – magic ring
sc – single crochet
ch – chain
inc- increase
dec- decrease
()- repeating sequence
x – repeat followed by
dc – double crochet
DTR- Translate treble crochet
hdc – half double crochet
slst- Slip Stitch
BLO- Back loop only
Note
The crochet technique is knitted, with low points in the form of x. but it doesn’t matter what form of sc you choose. I used the spiral technique. So you’re going to need a dot marker. Since almost everything is knitted in one piece, I suggest you knit in the order that the pattern was written. The only thing you will have to sew are his ears and his snout. Instead of using safety eyes you can also embroider them, for more safety in babies. I hope you enjoy knitting little fox a lot.
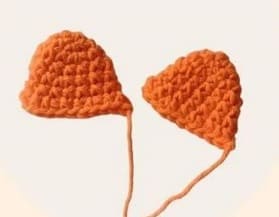
Ears (x2)
Color Orange
Rnd 1. 6 sc in a MR
Rnd 2. (inc, 1 sc) x 3 (9sc)
Rnd 3. (inc, 2sc) x 3 (12sc)
Rnd 4. 12 sc
Rnd 5. (1 inc, 5 sc) x 2 (14sc)
Rnd 6. 14 sc
Rnd 7. (1 sc, 1 inc) x 7 (21sc)
Close with slst and leave thread to sew to the head
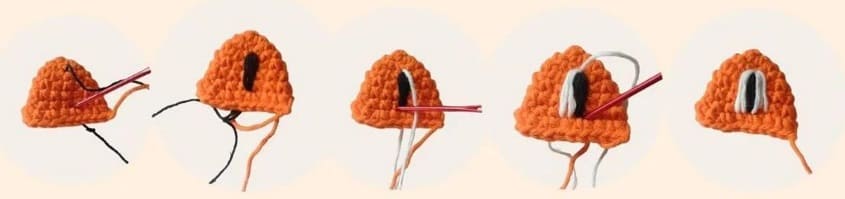
With a little bit of black and white thread, embroider the spots on the ears.
Tail
White and orange color
Rnd 1. 6 sc in a MR
Rnd 2. (inc, 1 sc) x 3 (9sc)
Rnd 3. (inc, 2 sc) x 3 (12sc)
Rnd 4. 14 sc
Rnd 5. (1 inc, 5 sc) x 2 (14sc)
Rnd 6. 14sc
Rnd 7. (1 sc, 1 inc) x 7 (21sc)
Rnd 8-9. 2 rows of 21 sc
Rnd 10. change to orange color: 21sc
Rnd 11. (5sc, 1 dec) x 3 (18sc)
Rnd 12. 18 sc
Rnd 13. (4 sc, 1 dec) x 3 (15sc)
Rnd 14. (3 sc, 1 dec) x 3 (12sc)
Rnd 15. (1 dec, 4 sc) x 2 (10sc)
Rnd 16. 10 sc
Rnd 17. Fold the knitting and knit 5 sc taking both parts together (5 sc)
Snout
In orange to white
Rnd 1. 8 sc in a MR
Rnd 2. (inc, 3 sc) x 2 (10sc)
Rnd 3. (1 sc, 1 inc) x 5 (15sc)
Rnd 4. (4sc, 1 inc) x 3 (18sc)
Rnd 5. 18 sc, close with slst
Leave thread to sew to the face
Arms (x2)
White and orange color
Rnd 1. 7 sc in a MR
Rnd 2. (inc x 7 (14sc)
Rnd 3. (1 inc, 6 sc) x 2 (16sc)
Rnd 4-6. 16 sc for 3 rows
Rnd 7. (2 sc, 1 dec) x 4 (12sc)
Rnd 8. 4 sc, 2 dec, 4 sc (10sc)
Fill the hand well
Rnd 9-10. 10 sc, in the 2 rows.
Change to orange color
Rnd 11-15. 10 sc in all 5 rows
Fill with fiber
Rnd 16. (1 dec, 3 sc) x 2 (8sc)
Rnd 17. 2 sc, fold the fabric in half and join them with 4 sc taking the threads from both parts. Close and cut the thread leaving a short tail.
Legs (x2)
White and orange color
Rnd 1. 6 chains: from the second chain 4 sc, 1 inc, from the other side: 3 sc, 1 inc (11sc)
Rnd 2. 1 inc, 3 sc, 2 inc, 4 sc, 1 inc (15sc)
Rnd 3. 1 inc, 3 sc, 6 inc, 3 sc, 2 inc (24sc)
Rnd 4. through BLO 24 sc
Rnd 5-7. 24 sc in all 3 rows
Rnd 8. 6 sc, (dec) x 6, 6 sc (18sc)
Rnd 9-10. 18sc
Rnd 11. 3 sc, (dec) x 6, 3 sc (12sc)
Rnd 12-13. 12sc in the 2 rows
Rnd 14. change to orange: 5 sc, dec, 5 sc (11sc)
Rnd 15-16. 11 sc in the 2 rows
Rnd 17. 5 sc, dec, 4 sc (10sc)
Rnd 18. 1 sc, fold the fabric and knit 5 sc taking both parts. Close and cut the thread.
Body
With orange
Rnd 1. 7 sc in a MR
Rnd 2. (inc) x 7 (14sc)
Rnd 3. (1 sc, 1 inc) x 7 (21sc)
Rnd 4. (2 sc, 1 inc) x 7 (28sc)
Rnd 5. (3 sc, 1 inc) x 7 (35sc)
Rnd 6. (4 sc, 1 inc) x 7 (42sc)
Rnd 7. In this row we will place the legs: 8 sc, 5 sc together the body and 1 leg, 1 inc, 14 sc, 1 inc, 5 sc together the body and the other leg, 7 sc, 1 inc (45sc)
Rnd 8. In this and the next row we join the tail: 43 sc, 2 sc weaving the tail and the body together. We continue weaving the tail in the next row.
Rnd 9. 3 sc weaving the tail and body together. 42 sc
Rnd 10-12. 45 sc in the 3 rows
Rnd 13. (12 sc, 1 dec) x 3 (42sc)
Rnd 14. 42 sc
Rnd 15. (5 sc, 1 dec) x 6 (36sc)
Rnd 16-17. 36 sc in the 2 rows
Rnd 18. (4 sc, 1 dec) x 6 (30sc)
Rnd 19. 30 sc
Rnd 20. (3 sc, 1 dec) x 6 (24sc)
Rnd 21. 6 sc, 4 sc together the body with one of the arms, 8 sc, 4 sc together the body with the other arm, 2 sc (24sc)
Rnd 22. 24sc
Rnd 23. (2 sc, 1 dec) x 6 (18sc) Fill. From here we will continue with the head. You must have the legs, the tail and the arms ready because we will join them to the body as we weave it.
Head
White and orange
Rnd 1. 18 inc (36sc)
Rnd 2. (5 sc, 1 inc) x 6 (42sc)
Rnd 3. (6 sc, 1 inc) x 6 (48sc)
Rnd 4. (7 sc, 1 inc) x 6 (54sc)
Rnd 5-7. 54 sc in all 3 rows
Change to orange
Rnd 8. 54 sc + 7 sc
Rnd 9. Place the marker in the first st. 14sc, (2sc, 1dec) x 2, 10sc, (1 dec, 2sc) x 2, 14sc (50sc)
Rnd 10-14. 50 sc in the 5th row
Rnd 15. 13 sc, 1 dec, 20 sc, 1 dec, 13 sc (48sc)
Rnd 16-17. 2 rows of 48 sc
Rnd 18. (6 sc, 1 dec) x 6 (42sc)
Rnd 19. 42 sc
Rnd 20. (5 sc, 1 dec) x 6 (36sc)
Rnd 21. (4 sc, 1 dec) x 6 (30sc)
Rnd 22. (3 sc, 1 dec) x 6 (24sc)
Rnd 23. (2 sc, 1 dec) x 6 (18sc)
Rnd 24. (1 sc, 1 dec) x 6 (12sc)
Place safety eyes on row 9. 8 sc apart between them. I close the final ring.
We continue from the last row of the body
Assembly
Place the ears and sew with a wool needle, between rows 13 and 20 of the head.
Place the snout and sew, with a wool needle. Between rows 3 and 8 on the head, before binding off the last sts, fill with fleece, just a little.
Embroider the nose with a few stitches of black thread 9 on row 1 of the snout.
Sink the eyes with orange yarn passing from one side to the other and gathering behind. Knot and hide the threads.
Embroider the cheeks with pink thread, making a few stitches below and towards the side of the eye.
Scarf
Color Gray
Knit 50 ch. From the third: knit 47 hdc, 2 ch and 1 slst
For the fringes, cut 5 or 6 strips of thread and with them weave a slst at one end. Repeat the same on the other end.


