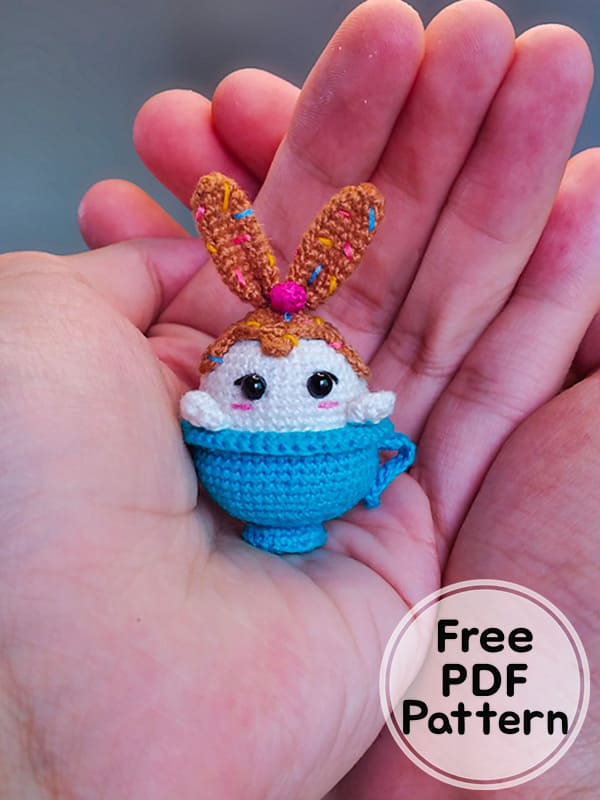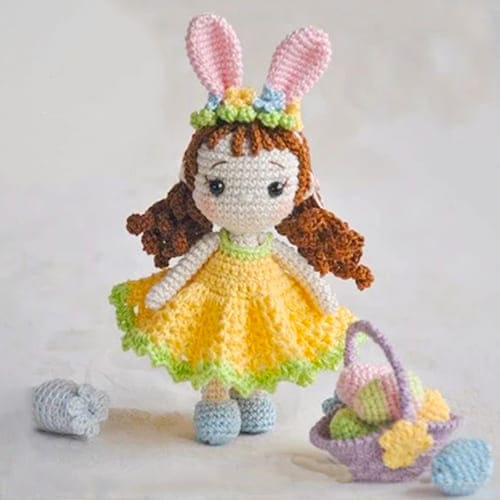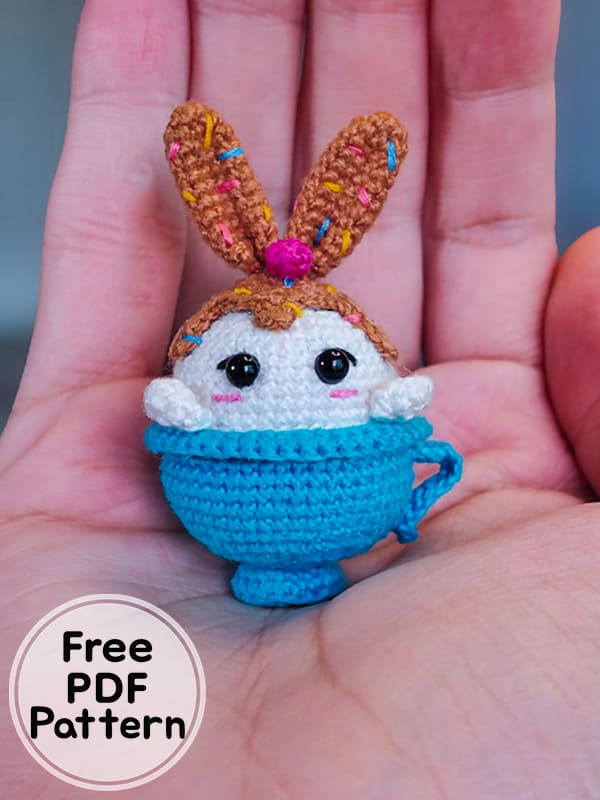
Greetings to all friends, today we will work with you a very small cute bunny amigurumi pattern. First of all, I would like to thank the owner of the pattern for the cute amigurumi rabbit. The crocheted amigurumi bunny is positioned in a tea cup and it looks very cute. The rabbit’s ears, on the other hand, are quite different with their chocolate appearance. Thanks to the step-by-step detailed crochet pattern instruction and detailed pictures, you can make the cute bunny even if you are a beginner.
Tiny Easter Crochet Bunny Amigurumi Free PDF Pattern
Designer: João Pedro Basques
Abbreviations
Magic ring
Chain = ch
Single crochet = sc
Increase = inc
Decrease = dec
Half double crochet = hdc
Stitches = sts
Back loop only = BLO
Final size: about 5cm
Materials
• 1.25mm crochet hook
• Yarn according to your crochet hook.
• Embroidery thread
• Tapestry needle or sewing needle
• Pins
• Stuffing
• Eyes of your choice
• Scissors
Colors
Yarn: (Approximate required amount)
Brown (30 meters)
White (40 meters)
Turquoise (50 meters)
Pink (5 meters)
Embroidery thread:
Pink (2 meters)
Turquoise (2 meters)
Yellow (2 meters)
Black (2 meters)
Bunny
Rnd 1. 6sc in magic ring (6sts)
Rnd 2. 6inc (12sts)
Rnd 3. (1inc, 1sc) x6 (18sts)
Rnd 4. (1inc, 2sc) x6 (24sts)
Rnd 5. (1inc, 3sc) x6 (30sts)
Rnd 6. (1inc, 4sc) x6 (36sts)
Rnd 7. (1inc, 5sc) x6 (42sts)
Rnd 8 until 12. 42sc around (42sts)
Rnd 13. (1inc, 6sc) x6 (48sts)
If you’re going to put safety eyes, place them now between rounds 8 and 9, with about 4 stitches of distance between them.
Fasten off and leave a long tail for sewing! [Image 1]

Paws
Let’s make 2!
Rnd 1. 5sc in magic ring (5sts)
Rnd 2. 5inc (10sts)
Rnd 3. 10sc around (10sts)
Fasten off and leave a long tail for sewing! [Image 2]
Tea cup
Rnd 1. 6sc in magic ring (6sts)
Rnd 2. 6inc (12sts)
Rnd 3. (1inc, 1sc) x6 (18sts)
Rnd 4. 18sc in BLO (18sts)
Rnd 5. 18sc around (18sts)
Rnd 6. (1dec, 1sc) x6 (12sts)
Rnd 7. 12inc (24sts)
Rnd 8. (1inc, 2sc) x8 (32sts)
Rnd 9. (1inc, 3sc) x8 (40sts)
Rnd 10. (1inc, 4sc) x6 (48sts)
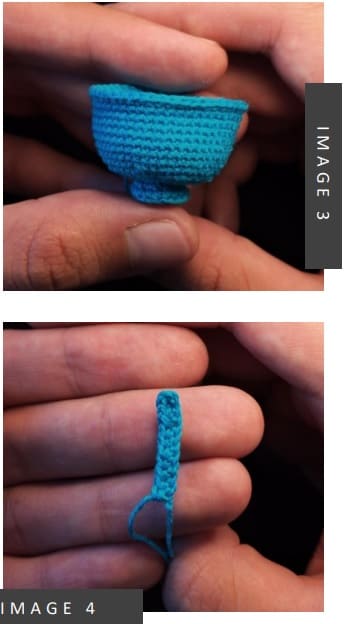
Rnd 11 until 19. 48sc around (48sts)
Fasten off! [Image 3]
Handle
Rnd 1. 12ch in the third chain from the hook: 10hdc (22sts)
Fasten off and leave a long tail for sewing! [Image 2]
Chocolate
Ears
Let’s make 2!
Rnd 1. 6sc in magic ring (6sts)
Rnd 2. 6inc (12sts)
Rnd 3 until 12. 12sc around (12sts) [Image 5]
Fasten off and leave a long tail for sewing!
Syrup
Rnd 1. 6sc in magic ring (6sts)
Rnd 2. 6inc (12sts)
Rnd 3. (1inc, 1sc) x 6 (18sts)
Rnd 4. (1inc, 2sc) x 6 (24sts)
Rnd 5. (1sc, 6ch, starting in the second chain from the hook: 5sc, in the next stitches of the base: 3sc and 4ch, in the third chain from the hook: 2hdc, skips 1 stitch from the base, in the next stitches of the base: 3sc) x2 (24sts) [Image 6] [Chart 1]
Fasten off and leave a long tail for sewing!
Cherry
Rnd 1. 5sc in magic ring (5sts)
Rnd 2. 5sc around (5sts)
Close the stitches, fasten off and leave a long tail! [Image.7]

Assembling
Let’s start by folding the last two rounds of the tea cup and sewing the bunny base on round 17 of the cup, don’t forget to stuffing [Image 8]. Sew paws on rabbit base with about 12sts of distance between them [Image 9]. Fasten off and hide the yarn.
Place the syrup on top of the rabbit and sew the ears on top of the syrup [Image 10]. Sew cherry between ears and the handle on the side of the cup using the leftover yarns [Image.11].
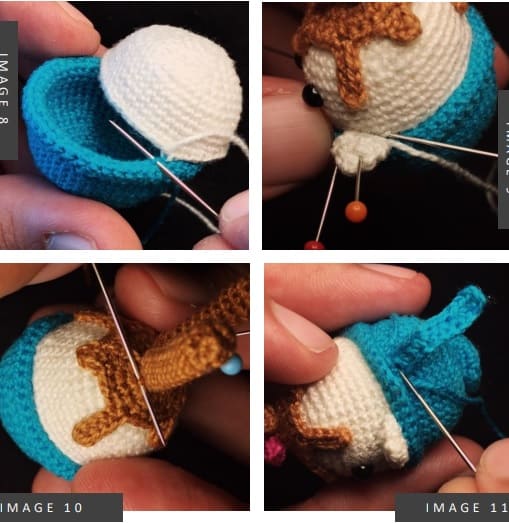
Fasten off and hide the yarn. Optionally, embroider the sprinkles over the chocolate parts and make the details of the face. Use colored yarns or embroidery threads!
