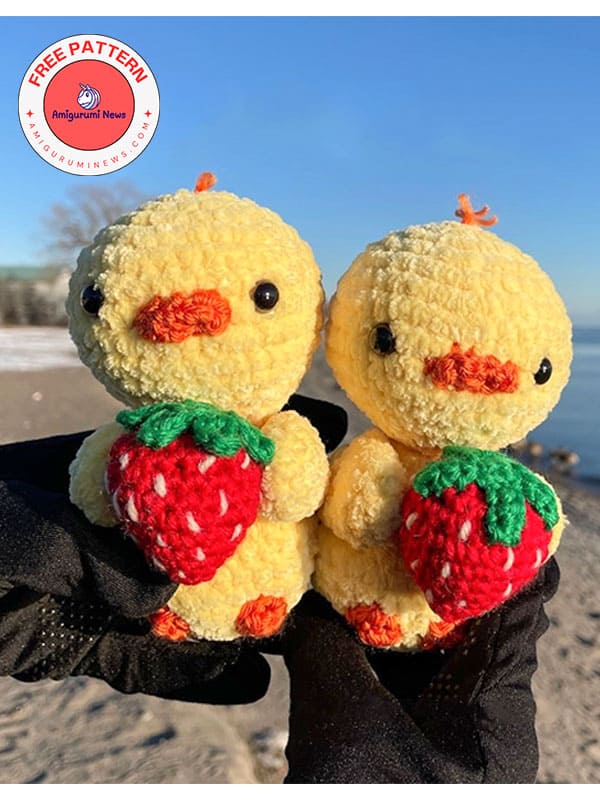
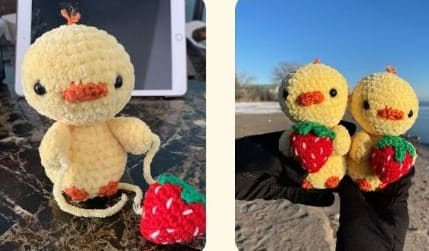
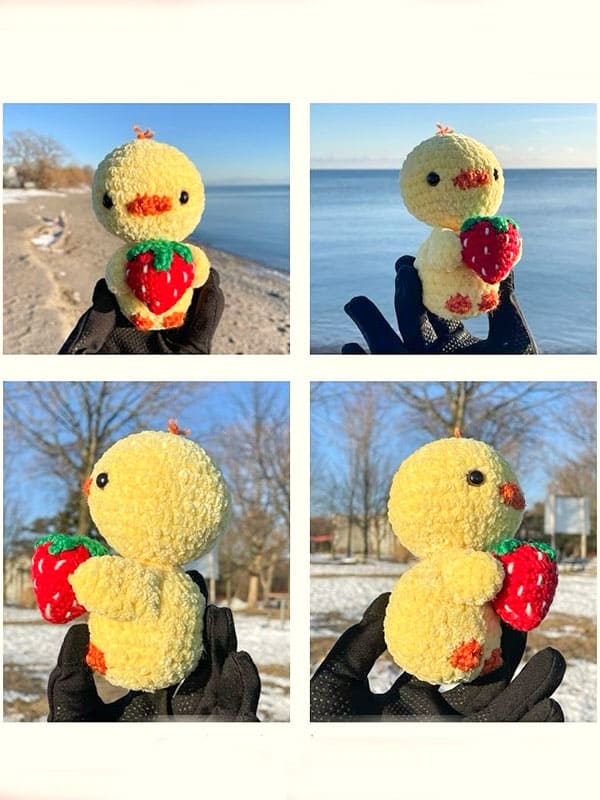
Follow this amigurumi pattern to make a little crochet chick holding a strawberry. I have shared a lot of crochet chicks with you lately and each one was special and different. We present you another amigurumi chick pattern that you cannot find anywhere else. It is holding a strawberry in its hand and looks very cute. We can also call it a crochet chick pattern for beginners. Because it is quite easy to make. When making the strawberry, you can think of it not only for the chick, but also as a keychain. You can create two different toys from the same amigurumi pattern.
Yarn:
• You can use any type of yarn in colors of your choice. Adjust your hook size to match your yarn weight for the best results.
• What I used in this pattern.
• Plush yarn in yellow for the baby chick (Premier’s just chenille, #6 super bulky weight in yellow).
• Orange worsted weight yarn for the beak and feet.
• Red, white, green worsted weight yarn for the strawberry.
Hook:
• Use a hook size compatible with your chosen yarn.
• What I used in this pattern.
• A 4.0mm hook for the chick and a 3.5 mm hook for the strawberry.
• Stuffing: polyfill or similar.
• Safety eyes: add eyes of your preferred size or embroider them for a different look.
• Yarning needle.
• Scissors.
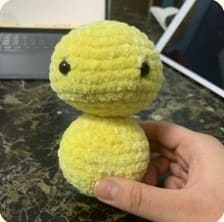
Using yellow plush yarn and a 4.0 mm hook for chick.
R1. 6 sc in MR (6)
R2. inc around (12)
R3. (sc,inc) rpt (18)
R4. (2sc,inc) rpt (24)
R5. (3sc,inc) rpt (30)
R6. (4sc,inc) rpt (36)
R7-10. sc around (4 rounds) (36)
R11. (4sc,dec) rpt (30)
R12. (3sc,dec) rpt (24)
R13. (2sc,dec) rpt (18)
Place your eyes now – as you see fit.
R14. (1sc,dec) rpt (12)
Stuff the head.
R15. dec around (6)
Start of body.
R16. inc around (12)
R17. (sc,inc) rpt (18)
R18. (2sc,inc) rpt (24)
R19. (3sc,inc) rpt (30)
R20-23. sc around (4 rounds) (30)
R24. (3sc,dec) rpt (24)
R25. sc around (1 rounds) (24)
R26. (2sc,dec) rpt (18)
R27. (1sc,dec) rpt (12)
Stuff the body.
R28. dec around (6)
Fasten off, leaving a small tail, enough to close the hole.
Wings (make 2)
Using yellow plush yarn.
R1. 4 sc in MR (4)
R2. inc around (8)
R3-8. sc around (6 rounds) (8)
Fasten off, leaving a long tail for sewing.
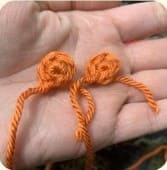
Beak
Using orange worsted weight yarn.
R1. ch 5
R2. sc 4, starting from the second chain from the hook.
Fasten off, leaving a long tail for sewing.
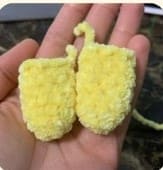
Feet (make 2)
Using orange worsted weight yarn.
R1. 4 sc in MR (4)
R2. sc around (4)
Fasten off, leaving a long tail for sewing.
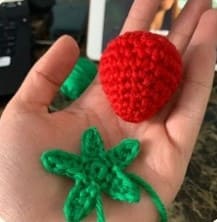
Strawberry
Using red worsted weight yarn and a 3.5 mm hook.
R1. 6 sc in MR (6)
R2. (sc,inc) rpt (9)
R3. (2sc,inc) rpt (12)
R4. (3sc,inc) rpt (15)
R5. (4sc,inc) rpt (18)
R6. (5sc,inc) rpt (21)
R7-8. sc around (2 rounds) (21)
R9. (5sc,dec) rpt (18)
R10. (1sc,dec) rpt (12)
Stuff.
R11. (1sc,dec) rpt (6)
Fasten off, leaving a small tail, enough to close the hole.
The strawberry is ready, now let’s move on to the stem part.
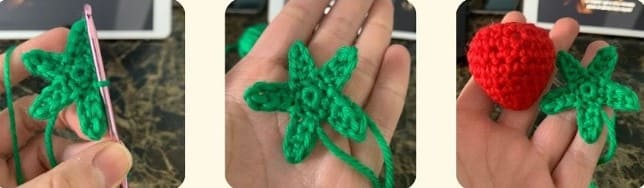
Stem
Using green worsted weight yarn.
R1. 5 sc in MR (5)
R2. sl st in first stitch, ch 4, sc in second chain from hook, hdc in each of the next two chains, sl st in next stitch (repeat till end) – should have 5 sections in total.
Fasten off, leaving a long tail for sewing.
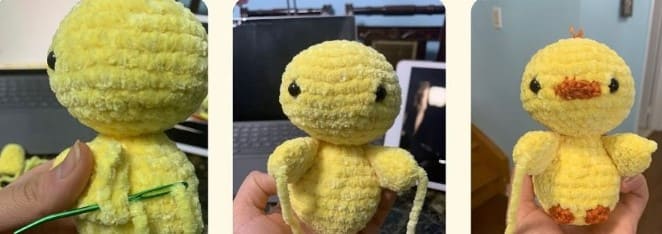
Baby chick assembly:
• Sew the wings onto the sides of the chick’s body. Once you’re done, weave the excess yarn through the tips of the wings. We’ll use this yarn to sew the strawberry on later.
• Sew the beak between the eyes. Once finished, weave the remaining yarn through the top of the head and trim it, leaving a small strand to create a cute little baby hair on top of the chick’s head.
• Sew the feet to the bottom of the body, positioning them as close together or as far apart as you prefer.
• Don’t worry about perfection- I’m not the best at sewing either! just do your best.
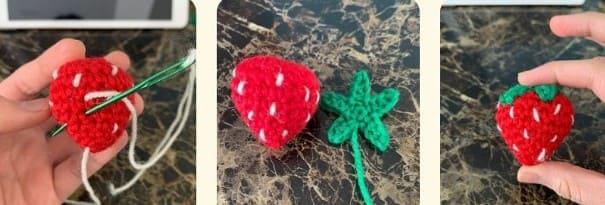
Strawberry assembly:
• Use black or white yarn to create seeds on the strawberry.
• Sew stem to top of strawberry.
Attaching the strawberry to the baby chick’s wings:
• Take the excess yarn at the tips of the wings (the yarn you left earlier) and use your needle to weave it through the strawberry several times until it feels secure.
• Repeat the process with the excess yarn on the other wing.
• Once both wings are attached, make sure both yarn tails exit through the same stitch on the back of the strawberry. Then, tie a knot and hide the yarn tails.