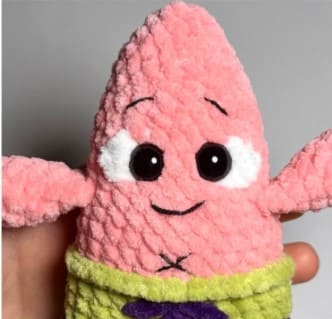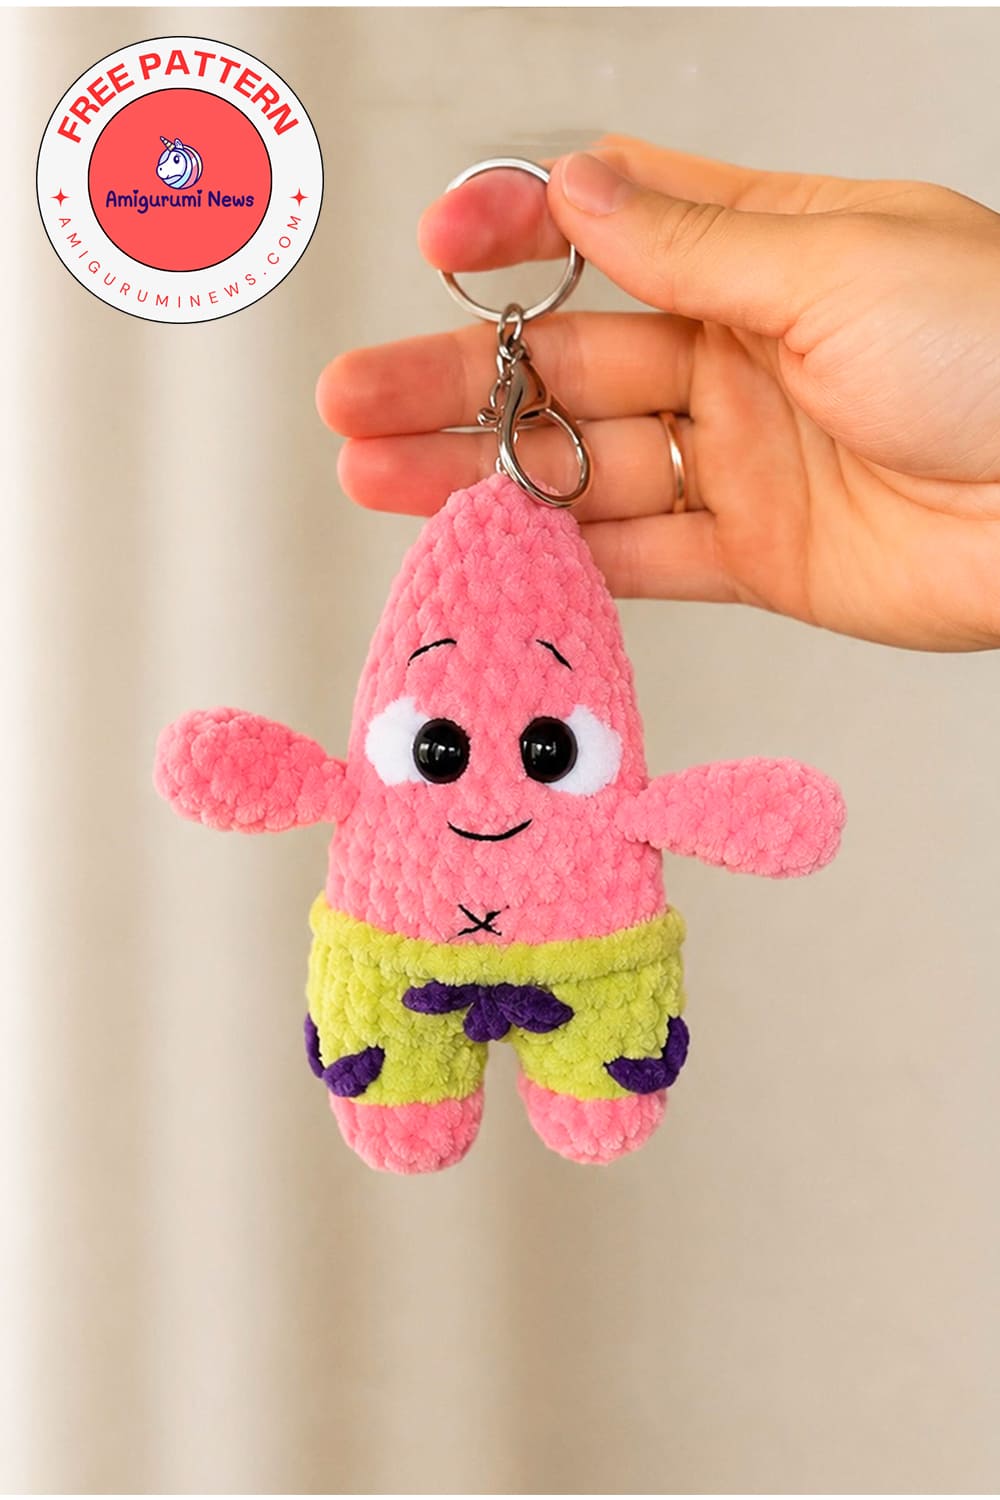
Crochet projects inspired by cartoon characters are becoming increasingly popular among handmade craft lovers. One of the most charming ideas is the crochet patrick star keychain, which brings the fun and playful energy of the beloved pink starfish into a small, portable accessory. Many beginners and experienced crocheters search for a crochet patrick star free pattern to create their own version at home. These designs are perfect for gifting, selling, or adding to a personal collection of crochet spongebob characters inspired items.
Crochet patrick star keychain pattern
Creating crochet spongebob characters can be both relaxing and rewarding, especially when starting with simple amigurumi styles. The crochet patrick star free pattern is often recommended for beginners because it uses basic stitches and easy shaping techniques. Once you understand the structure, you can customize colors, facial expressions, and size to match your personal style. The crochet patrick star keychain version is especially popular because it works up quickly and makes a cute accessory for bags, keys, or gifts. Many crafters enjoy experimenting with different yarn textures to give their creations a unique look.
Overall, crochet spongebob characters themed projects are a fun way to improve your skills while creating nostalgic designs. Whether you follow a crochet patrick star free pattern or design your own version, each piece reflects creativity and personality. The crochet patrick star keychain is a great starting point for any fan of handmade toys.
Designer: amigurumi_vira_
Necessary materials and tools:
1. Yarn: Himalaya dolphin baby:
• Pink 80346- main color
• White 80301- for the whites of the eyes
• Purple 80328- for the flowers on the shorts
2. Yarn: Yarnart dolce:
• Green 799- for the shorts
3. Yarn: Yarnart jeans:
• Black 53- for the mouth, eyebrows, and belly button.
4. Crochet hook: 3.5-4 mm
5. Safety eyes: 12 mm
6. Stuffing
7. Scissors
8. Stitch markers
9. Sewing pins
10. Tapestry needle (large eye) for embroidery and a small needle for facial details.
11. Keychain clasp (lobster clasp)
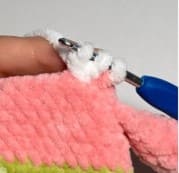
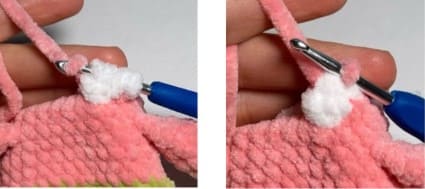
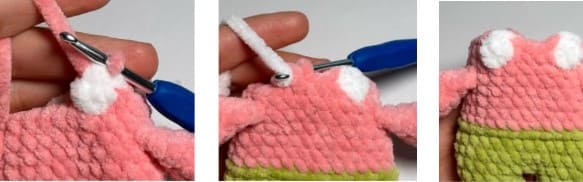
Eye whites- step-by-step instructions
We will crochet the whites of the eyes directly onto the head using white yarn, creating small bobble stitches made of three double crochets (dc). A bobble stitch is a group of double crochets worked into the same stitch and joined together at the top and base.
How to crochet a bobble stitch:
1. Yarn over, insert the hook into the desired stitch, pull up a loop, yarn over and pull through two loops. Two loops remain on the hook this is the first unfinished dc.
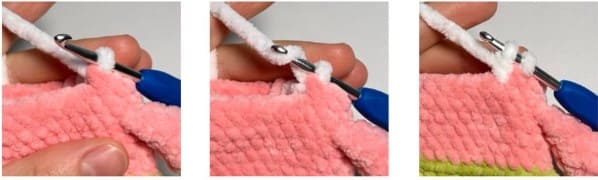
2. Yarn over, insert the hook into the same stitch, pull up a loop, yarn over and pull through two loops. Three loops remain on the hook.
3. Yarn over, insert the hook into the same stitch, pull up a loop, yarn over and pull through two loops. Four loops remain on the hook.

4. Yarn over and pull through all four loops on the hook at once the bobble stitch is complete.
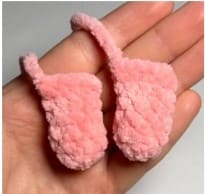
Arms (2 pieces)
Crochet with the main color.
Rnd 1. 6 sc in MR (6)
Rnd 2. (2 sc, inc) x 2 (8)
Rnd 3-6. 8 sc (4 rounds)
Stuff the piece about 2/3 full.
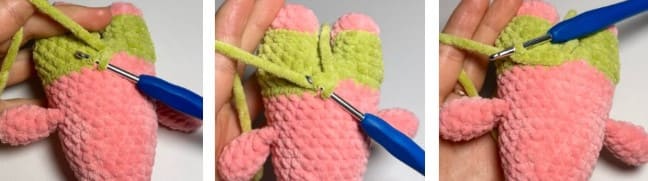
Fold the arm in half and crochet 4 sc through both sides. Fasten off and secure the yarn.
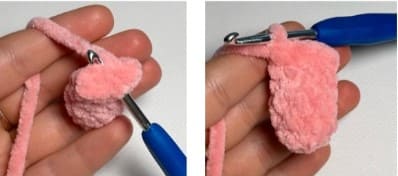
Crochet the second arm in the same way.
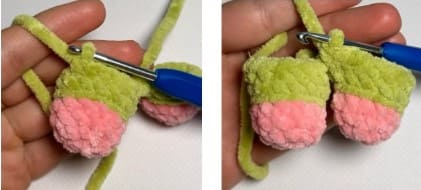
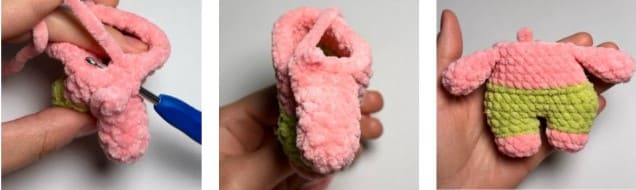
Legs-body-head
First leg:
Start crocheting with the main color.
Rnd 1. 6 sc in MR (6)
Rnd 2. 6 inc (12)
Rnd 3-4. 12 sc (2 rounds)
Change to green yarn. Cut and secure the main color yarn.
Rnd 5. 12 slst (12)
Rnd 6. work in back loops only: 12 sc (12)
Additionally, crochet 3 sc so that the color change is positioned at the back.
Cut and secure the yarn, leaving a tail of approximately 10 cm (4 in).

Second Leg:
Work the second leg the same way as the first one. The only difference is that after Round 6 you do not crochet the additional sc.
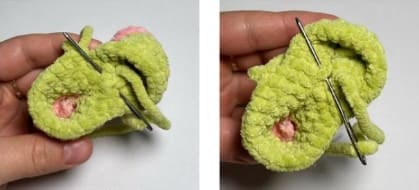
Do not cut the yarn, continue crocheting the body. Chain 2 (ch 2).

Take the first leg.
Rnd 7. Starting from the inner side of the thigh, crochet in the round of the first leg: 5 sc, 2 inc, 5 sc, then along the chain: 2 sc, then on the second leg: 5 sc, 2 inc, 5 sc, and on the opposite side of the chain: 2 sc (32).
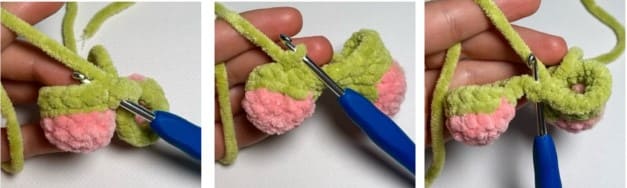
Legs joined.
The legs are now joined.
Place a stitch marker at the start of the right leg.
Rnd 8. 32 sc (32)
Rnd 9. 6 sc, dec, 14 sc, dec, 8 sc (30)
If you have an opening between the legs, this is the right time to sew it closed using the yarn tail from the first leg.
Then change to the main color.
To keep the color change positioned at the back, crochet 14 sc until the back side and change color.
Cut and fasten off the green yarn.
*From this point, further row counting starts from here.
From this moment, begin stuffing the leg gradually.
Rnd 10. 30 sl st (30)
Rnd 11. Working in back loops only: 7 sc, dec, 14 sc, dec, 5 sc (28)
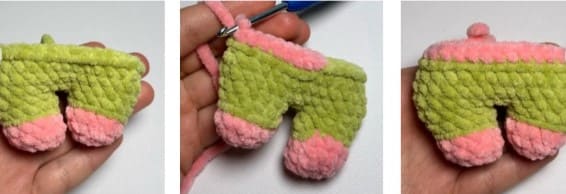
Rnd 12-13. 28 sc (2 rounds)
Rnd 14. 7 sc, dec, 13 sc, dec, 4 sc (26)
In the next round, we will attach the arms. The stitch marker should run exactly along the center back. If needed, work a few shift stitches to align it properly.
Rnd 15. In the body: 5 sc, together with the first arm 4 sc, in the body 8 sc, together with the second arm 4 sc, in the body 5 sc (26)
Rnd 16. 7 sc, dec, 8 sc, dec, 7 sc (24)
In Round 17 we will crochet the eye whites.
You can find the step-by-step instructions on how to crochet the eye whites (the “bobble stitch”) on pages 10-11.
It is important that the eye whites are placed symmetrically on the front side of the head.
For convenience, you can mark two stitches with pins where you will crochet them there should be 4 sc between them. If you want the eyes to be placed further apart, make 6 sc between the bobbles.
I worked Round 17 using this scheme:
Rnd 17. 9 sc, bobble stitch in white yarn, 4 sc, bobble stitch in white yarn, 9 sc (24)
Rnd 18. 24 sc (24)
Rnd 19. (6sc,dec)x3 (21)
Rnd 20. 21 sc (21)
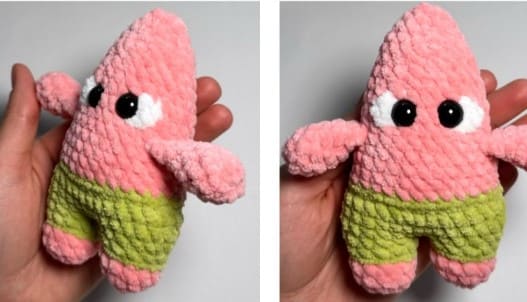
Insert and secure the safety eyes next to the eye whites (bobble stitches)

Stuff the legs and the body with holofiber (fiberfill), including the head.
Continue stuffing gradually while crocheting until the end.
Rnd 21. (5sc,dec)x3 (18)
Rnd 22. 18 sc (18)
Rnd 23. (4sc,dec)x3 (15)
Rnd 24. (3sc,dec)x3 (12)
Rnd 25. (2sc,dec)x3 (9)
Rnd 26. (1sc,dec)x3 (6)
Close the remaining opening using a crochet hook or a needle.
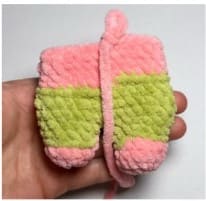
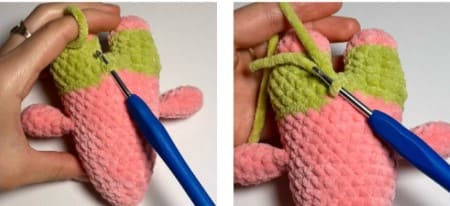
Finishing the top edge of the shorts
Work in the shorts color (green). Place the toy with the head facing you, face down.
We will crochet into the back loops of Round 10 of the body.
Rnd 1. Insert the hook into the back loop in the center of the back, pull up the working yarn.
Do not secure the yarn tail yet- leave it loose for now.
Work in the round, placing 1 slst in each half stitch. At the end, make 1 slst.
Cut the yarn and secure it. Thread the tail through to the beginning tail created when joining the yarn.
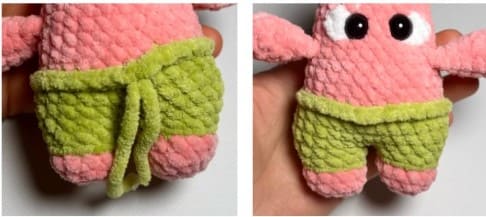
Tie a knot and hide the yarn ends inside the body.
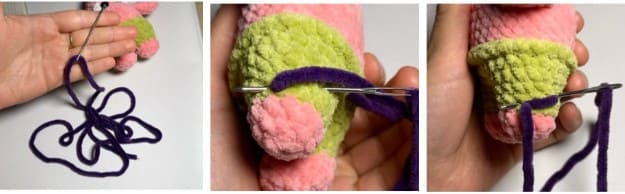
Flowers on the shorts
Embroider flowers using purple yarn.
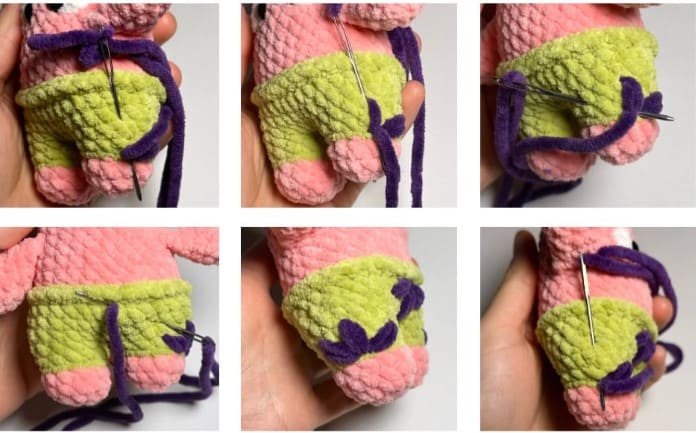
For each flower, first determine the center. On the front and back of the body, place the flower center in the middle of the piece, just below the crocheted edge of the shorts. On the side sections, place the center at the color transition line.
From the center, embroider petals in different directions, following the reference photo.
If desired, you can make the flowers larger or smaller by changing the length and number of stitches used for the petals.
Finishing/ assembly
Embroider using black yarn.
Following the reference photos, embroider the mouth, eyebrows, and belly button.
I split the yarn in half to make the details look neater.
Optionally, attach the keychain clasp (carabiner).