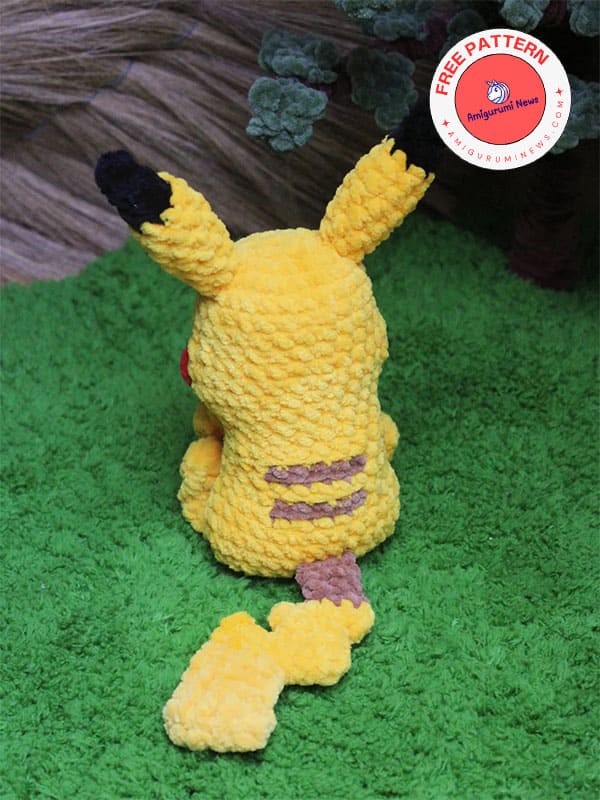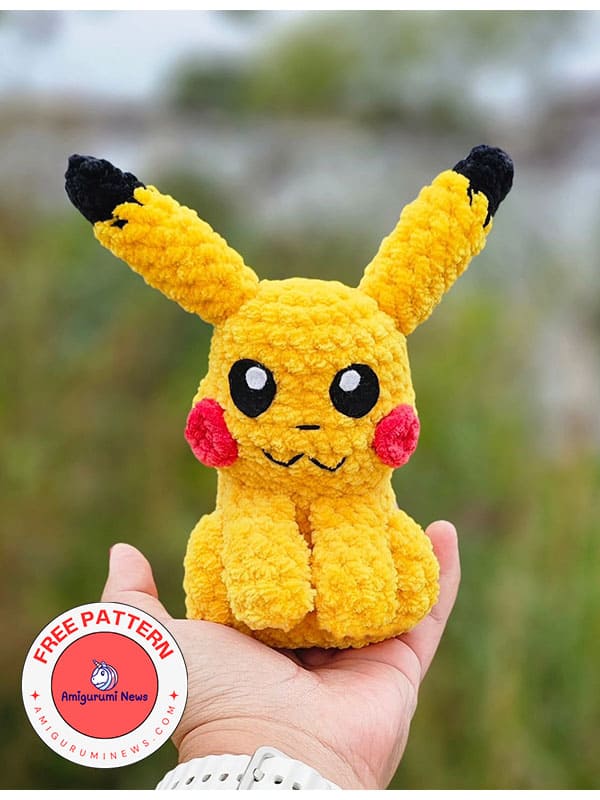
A free crochet pikachu pattern is coming to Pokemon lovers. You can make this adorable crocheted Pikachu step by step. This amigurumi pattern tutorial covers every detail step by step. I’ve shared plenty of crocheted Pokemon patterns with you before. Here’s the plush crochet Pikachu. This little electric mouse, beloved by children, is now being transformed into an amigurumi toy. You’ll learn how with this amigurumi pattern tutorial. Here’s the free crochet Pikachu.
Little crochet pikachu free pattern
Designer: maris_stuffies
Abbreviations:
R: roun/row
MR: magic ring
st: stitch
sc: single crochet
ch: chain
slst: slip stitch
hdc: half double crochet
inc: increase (2 sc in the same stitch)
dec: decrease (sc 2 stitches together, I use an invisible dec)
FLO: front loops only
BLO: back loops only
CC: color change
Materials
• Yarn in the colour of your choice. If you want to make the original mouse, yellow, brown, black and red.
I used weight 6 yarn (100g/120m)(3.5oz/131yds), you will need about half a skein of the main colour and very little of the other colours. Some black yarn for the nose and mouth, I used 8/4 cotton yarn.
• Stuffing.
• Safety eyes, I used 21mm with weight 6 yarn.
• Hook that goes with your yarn, I used a 4.5mm with Hobbii Baby Snuggle yarn (6 super bulky). If using smaller or bigger yarn, change the hook size accordingly.
• Darning needle.
• Scissors.
• Stitch markers.
• Ami sticks or wooden skewers for sewing.
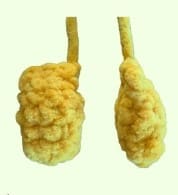
Arms (MAKE TWO)
In yellow.
R1: 4ch, starting in the second loop from your
hook: (3sc), repeat on the other side of the chain [6]
R2: (sc, inc, sc) x2 [8]
R3-4 (2 rounds): 8sc [8]
R5: (dec, 2sc) x2 [6]
Stuff the arm.
R6: add or take away as many sc as you need to get to the side of the arm, I added 1sc, then fold in half and make 3sc through both sides [3] FO, no need for a long yarn tail, the arms are crocheted into the body.
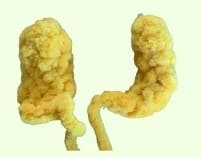
Legs (MAKE TWO)
In yellow, do NOT stuff.
R1: MR with 6sc [6]
R2-3 (2 rounds): 6sc [6]
R4-5 (2 rounds): 3slst, 3hdc [6]
R6: hdc, 3slst, 2hdc [6]
R7: dec, then fold in half and make 2sc through both sides (I skipped the last dec) [2]
FO, no need for a long yarn tail, the feet are crocheted into the body.
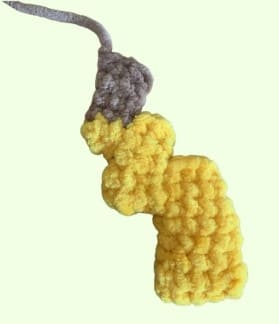
Tail
Starting in yellow, do NOT stuff.
R1: 6ch, starting in the second loop from your hook: (5sc), repeat on the other side of the chain [10]
R2: 10sc [10]
R3: 4sc, dec, 4sc [9]
R4-5 (2 rounds): 9sc [9]
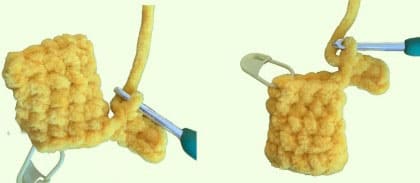
After working into the chain your work should look like this. Flip the big piece over so you can continue in the round.
To create the zigzag in the tail you will make a chain in the next round and working back into the chain. Then to continue working in the round you will need to flip your piece over.
R6: 5sc, slst, 4ch, starting in the second loop from your hook: 3sc in the chain, flip your work and continue in the previous round: slst, 2sc [12+3ch]
R7: dec, 4sc, 3sc in the chain, 6sc [14]
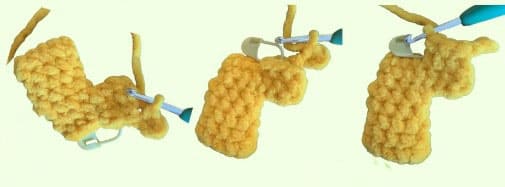
In R8a, make sure you’re on the side before making the stitches through both sides.
After R8a.
R8a: sc (or however many you need to get to the side of the tail), 3sc through both sides [3]
The first st of the next round is your new starting stitch, you will not be working into the stitches of R8a after this. Continue working in the round.
R8b: slst, 6sc, slst [8]
After R9.
In R9 you will be doing the same as in R6, making a chain and flipping
your work to continue.
R9: 2sc, dec, 3ch, starting in the second loop from your hook: 2sc in the chain, dec, 2sc [8+2ch]
R10: 3sc, 2sc in the chain, 5sc [10]
R11a: sc (or however many you need to get to the side), 2sc through both sides [2]
The first st of the next round is your new starting stitch, you will not be working into the stitches of R11a after this.
R11b: CC to brown, slst, 4sc, slst [6]
R12-13 (2 rounds): 6sc [6]
R14: make sure you’re at the side of the tail, I added 1sc, 3sc through both sides [3]
FO, no need for a long yarn tail, the tail is crocheted into the body.
Head & Body
Starting in yellow.
R1: MR with 8sc [8] R2: 8inc [16]
R3: (sc, inc) x8 [24]
R4-7 (4 rounds): 24sc [24]
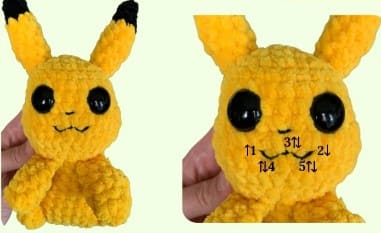
R8: 5sc, 3inc, (sc, inc) x3, sc, 3inc, 6sc [33] You can mark the dec in the next round, this marks the centre of the face and might make it easier to place the eyes.
R9: 16sc, dec, 15sc [32]
R10: 32sc [32]
R11: 5sc, (sc, dec) x8, 3sc [24]
R12: 5sc, (2sc, dec) x4, 3sc [20]

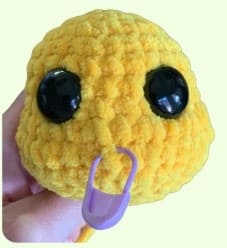
Place the safety eyes between R6-7 with 5 stitches between the posts, about 3 visible stitches between the eyes.
Start stuffing and keep stuffing as you go.
Attach the arms in R13, remember you’re only using the front loops of the body piece.
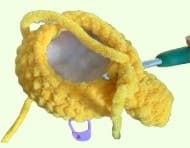
You’re attaching the arms in the next round, make sure they are centred at the front of the body, adjust your starting stitch/stitch marker if necessary.
R13: 5sc, *FLO: 3sc, 3sc with arm, sc, 3sc with arm, 3sc*, 2sc [20]
R14: 5sc, inc, 11sc, inc, 2sc [22]
The bold stitches in the following rounds are made in brown. Make sure the brown stripes are on the center of the back. Adjust your starting stitch/stitch marker if necessary.
R15: 10sc, (inc, 4sc) x2, sc, *BLO: sc* [24]
R16: *BLO: 5sc*, 18sc, *BLO: sc* [24]
R17: *BLO: 5sc*, 17sc, inc, *BLO: sc* [25]
R18: *BLO: 5sc*, dec, 2sc, inc, 10sc, inc, 3sc, *BLO: sc* [26]
R19: *BLO: 5sc*, 5sc, inc, 8sc, inc, 6sc [28]
R20: 8sc, (inc, sc) x2, 8sc, (sc, inc) x2, 4sc [32]

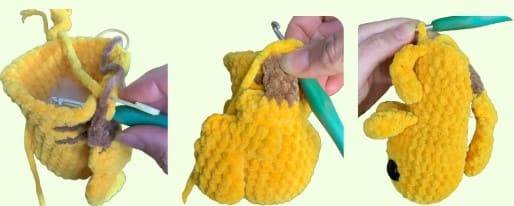
In the next round, make sure the tail is centred at the back of the body and the feet are centred at the front, adjust your starting stitch/stitch marker if necessary.
R21: sc, 3sc with tail, sc, (dec, 2sc) x2, 2sc with foot, 7sc, 2sc with foot, (sc, dec, sc) x2 [28]
R22: 6sc, (sc, dec) x2, 8sc, (sc, dec) x2, 2sc [24]
R23: 5sc, 4dec, 3sc, 4dec [16]
R24: dec, 5sc (or however many to get to the side), leave the rest of the stitches unworked [6]
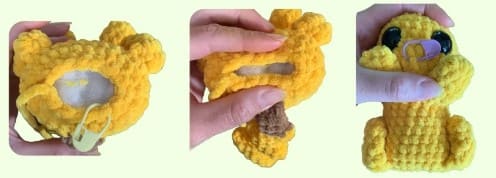
FO, leave a long tail. Finish stuffing, make sure to stuff the thighs well. Then sew the hole closed by pinching the two sides together using the opposing front loops. Secure the feet to the thighs with the same tail, I just did a stitch or two halfway down the foot and hide the tail.
Ears (MAKE TWO)
Starting in black.
R1: MR with 4sc [4]
R2: 3sc, inc [5]
R3: 2sc, inc, 2sc [6]
R4: CC to yellow, *BLO: inc, 5sc* [7]
R5: 3sc, inc, 3sc [8]
R6-8 (3 rounds): 8sc [8]
Start stuffing and keep stuffing as you go. Make sure the last part is stuffed well so the ears stay upright after sewing them on.
R9: dec, 6sc [7]
R10: 3sc, dec, 2sc [6]
FO, leave a tail for sewing.

Sew the ears on R3-4 of the head on either side of the MR.
Nose
With black yarn, I used cotton.
Embroider a little nose over one stitch betwen R7-8, centred between the eyes.

Mouth
With black yarn, I used cotton.
First make a straight line between R8-9, going over 4-5 stitches. Don’t pull it too tight, then secure it in the middle by looping around the thread and inserting the needle in the same spot. Then to create the two curves, repeat the looping around in the middle of the the two
parts, halfway down R9.
Cheeks
With red yarn, I used chenille like the rest of the plushie.
Embroider the cheeks over R9-10. The spots where you insert your needle are about one stitch away from the eyes. I went over each spot 6 times. Make sure the threads lay next to eachother to create a circle.
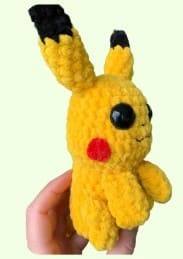
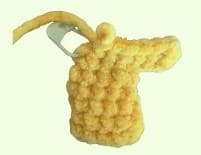
Crochet plush pikachu is ready!