
If you are someone who loves crochet animals and enjoys creating pieces that instantly make people smile, this adorable crochet frog is going to steal your heart. Just one look at this chubby little frog, holding a soft pink heart, is enough to feel its warmth and charm. With its round body, tiny legs, and gentle facial expression, this amigurumi frog feels like a small bundle of happiness made from yarn.
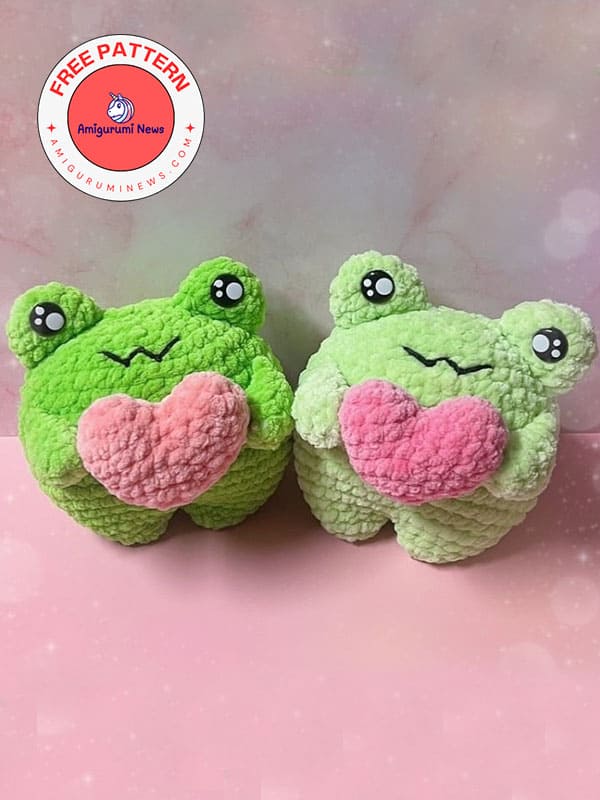
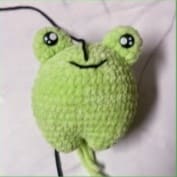
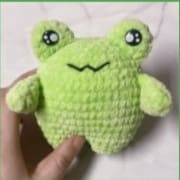
The image shows two crochet frogs sitting side by side, each carefully crafted with plush, textured stitches. One frog is a brighter green, while the other has a softer pastel tone, giving them both unique personalities. Their shiny eyes add a cute, almost innocent expression, and the slightly curved stitched smile makes them look calm and loving. The pink heart they hold is the perfect detail, turning this design into a meaningful crochet frog with heart that symbolizes affection and care.
Chubby crochet frog with heart pattern
This crochet frog design is ideal for both beginners and experienced crocheters who enjoy making soft toys with personality. Its simple shape makes it approachable, while the textured yarn gives it a modern and cozy look. As part of the crochet animal world, this frog stands out because it’s not only decorative but also evokes a sentimental feeling. The heart it’s holding makes it a wonderful handmade gift for Valentine’s Day, anniversaries, or just to say “I care about you.” Here’s that cute chubby frog pattern that will warm your sweetheart’s heart on Valentine’s Day.
Designer: theloopyfairyy
Materials for chubby frog:
Yarn (parfait chunky): base color, heart color.
Worsted yarn for mouth (black caron yarn)
Hook (4.5 mm)
Safety eyes (14 mm)
Sewing needles
Stitch markers
Stuffing
Yarn cutter/scissors
Abbreviations:
MR- magic ring
R- row/round
sc- single crochet
inc- increase
dec- decrease
FO- fasten off
Heart
In pink color:
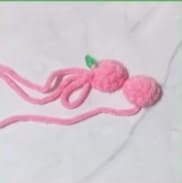
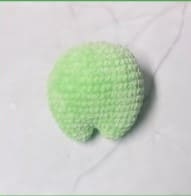
Bump #1:
R1: MR [6] (6)
R2: inc x 6 (12)
R3: 12sc (12)
F.O. and cut yarn, leaving a short yarn tail for use later. Repeat for Bump #2, but do not F.O. or cut yarn.
R4: Connect both bumps with sc; place stitch marker here to mark the first stitch of the row.
• another 11sc around Bump #1
• 12sc around Bump #2 (24)
• There will be a gap in between the two bumps. Using the short yarn tail from Bump#1, close the gap between the two bumps.
R5: (2sc, dec) x 6 (18)
R6: 18sc (18)
Start stuffing and continue as you go.
R7: (sc, dec) x 6 (12)
R8: dec x 6 (6)
Close hole. F.O.
Make two bumps. Do not cut the tail of bumps #2.
Connect both bumps together.
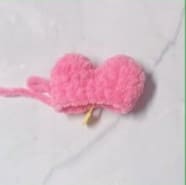
Complete.

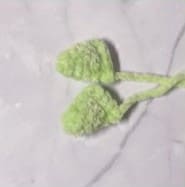
Frog legs X2
In green base color:
R1: MR [6] (6)
R2: inc x 6 (12)
R3: 12sc around (12)
F.O. and cut yarn, leaving a short yarn tail for use later.
Repeat for Leg# 2, but do not cut yarn.
Frog body
R4: Connect Leg# 1 to Leg# 2, with sc, place stitch marker here to mark the first stitch of the row.
Then: inc, (sc, inc) x 11 (36)
There should be a gap in between the two legs. Using the short yarn tail from first leg, close the gap between both legs.
R5-6: 36sc (36)
R7: (2sc, inc) x 12 (48)
R8-12: 48sc (48)
R13: (4sc, dec) x8 (40)
Start stuffing and continue as you go.
R14-15: 40sc (40)
R16: (3sc, dec) x 8 (32)
R17: (2sc, dec) x 8 (24)
R18: (sc, dec) x 8 (16)
R19: (dec) x 8 (8)
Sew close. F.O.
Frog eyes X2
In green color:
R1: MR [8] (8)
R2: (sc,inc)x4 (12)
R3-4: 12 sc (12)
FO. Insert safety eyes to R2.
Let’s make arms for the frog.

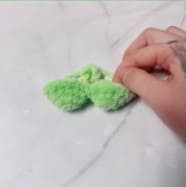
Frog arms X2
In green color:
R1: MR [6] (6)
R2: 6 sc (6)
R3: (sc,inc)x3 (9)
R4-5: 9 sc (9)
Stuff very lightly.
Fold in half and 4 sc across.
FO, and leave a tail for sewing.
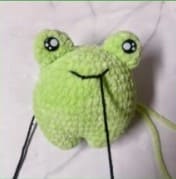
Assembly
1: Sew eyes on to (R14-18) or adjust for your preference.
2: Mouth detail with worsted black yarn. (see photos)
• Insert yarn from the back into R15, lining up with the inner corner of the eye and into the inner corner of the other eye.
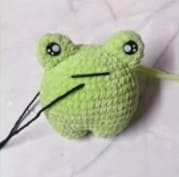
• Pull yarn out from R14, one stitch from the corner of the mouth. Using the yarn, go underneath the mouth and pull downwards. Repeat for the other side.
• Now, pull the yarn out from the center of the mouth on R15, pulling the center of the mouth upwards. This will create a horizontal zig zag.
• Complete. Your mouth should look like this.
3: Sew arms to body on R9-12. Use the heart to measure the amount of space required between the arms for the heart to fit comfortably.
4: Sew sides of heart to each arm.


