
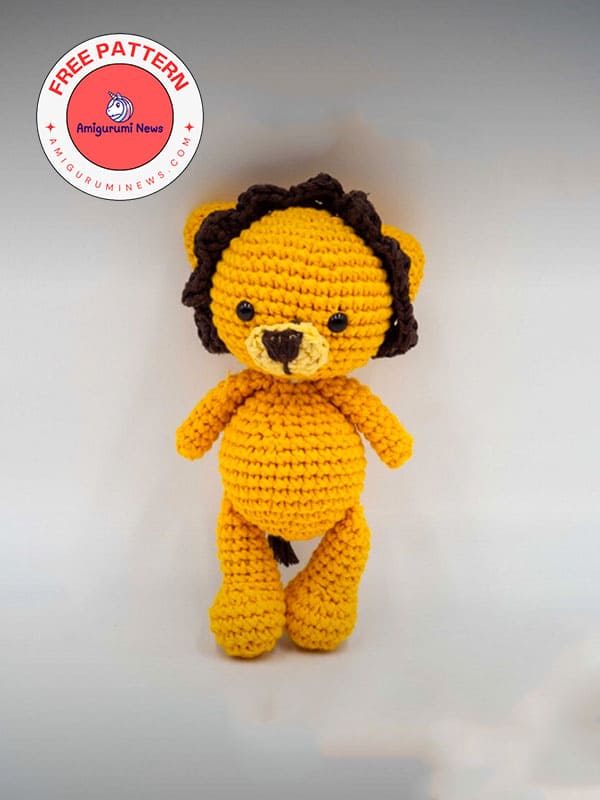
If you are looking for a charming and beginner-friendly crochet lion project, this amigurumi lion is the perfect choice. Lewis the Lion stands out with his soft stitches, rounded body, and adorable handmade details that make him a favorite among crochet animals lovers. Designed with simplicity and cuteness in mind, this crochet lion amigurumi works beautifully as a nursery decoration, a handmade gift, or a collectible toy for amigurumi fans.
The warm yellow yarn combined with the textured brown mane gives this crochet lion a friendly and calm personality. Unlike overly complex patterns, this design focuses on clean shapes and smooth transitions, making it ideal for crocheters who enjoy relaxing projects. Whether you are new to amigurumi or already experienced, this amigurumi lion pattern is enjoyable and rewarding to complete.
One of the best things about this crochet lion is its versatility. You can easily customize the size by changing hook or yarn thickness, and color variations can turn it into a unique handmade creation. From pastel nursery tones to bold safari-inspired colors, this crochet lion adapts beautifully to different styles.
Crochet lion lewis pattern
This amigurumi lion is designed to highlight what makes crochet animals so lovable: soft texture, expressive details, and a balanced body shape. The rounded head, stitched facial features, and fluffy mane give the lion a gentle expression that appeals to both children and adults. Safety eyes and tight stitches help ensure durability, making it suitable for display or play.
Pattern: erikadu.crochet
Abbreviations:
st – stitch
sl st- slip stitch
ch – chain
sc – single crochet
Inc – increase
Hdc-half double crochet
Dc-double crochet
dec – decrease
tr cr -treble crochet
What you will need:
• I used Slim Cotton yarn from Retwist: yellow, brown and light yellow
• Hook size 3.5 mm
• Fiberfill
• 2 black safety eyes- 9 mm diameter
• Tapestry needle
• Sewing needle
• Stitch marker
• Scissors
• Pins
Crochet lion head
The head of this crochet lion is worked in continuous rounds to create a smooth and rounded shape. Tight and even stitches help the amigurumi lion hold its form while keeping the surface neat. The placement of the safety eyes plays a key role in giving the crochet animal its gentle expression.
For the head we will use yellow color yarn and a 3.5 mm crochet hook. Stuff while advancing.
Round 1. 6 sc in magic ring (6)
Round 2. 6 inc (12)
Round 3. (sc, inc) x6 (18)
Round 4. (sc, inc, sc) x6 (24)
Round 5. (sc 3, inc) x6 (30)
Round 6. (sc 2, inc, sc 2) x6 (36)
Round 7. (sc 5, inc) x6 (42)
Rounds 8-13. Sc around (42)
Round 14. (sc 5, dec) x6 (36). Inserts eyes between rounds 11-12, 7 stitches apart.
Round 15. (sc 2, dec, sc 2) x6 (30)
Round 16. (sc 3, dec) x6 (24)
Round 17. (sc, dec, sc) x6 (18)
Round 18. (sc, dec) x6 (12)
Round 19. 6 dec (6). Fasten off.
Amigurumi lion muzzle and nose details
The muzzle adds personality to this amigurumi lion and helps define the face. Using a lighter yarn color creates contrast and highlights the lion’s features. Simple embroidery techniques are enough to shape the nose and mouth without making the design too complex. These small details give the crochet lion a warm and calm expression, making it perfect for both decorative and gift purposes.
For the muzzle we will use light yellow color yarn and 3.5 mm crochet hook.
Round 1. Ch 4, starting in the second chain from the hook sc 2 sc 3 in the last chain, continue on the other side of the chain, sc, sc 2 in the last chain (8)
Round 2. Inc, sc, inc 3, sc, inc 2 (14). Fasten off leaving a long tail for sewing.
With brown color yarn we sew in place the nose and the mouth for the lion.
Lion legs (make 2)
For the legs we’ll use yellow color yarn and a 3.5mm crochet hook. Stuff while advancing.
Round 1. 6 sc in magic ring (6)
Round 2. 6 inc (12)
Round 3. (sc, inc) x6 (18)
Rounds 4-5. Sc around (18)
Round 6. Sc 3, 6 dec, sc 3 (12)
Round 7. Sc 3, 3 dec, sc 3 (9)
Rounds 8-13. Sc around (9)
Round 14. 4 dec, sc (5). Fasten off leaving a long tail for sewing.
Amigurumi lion body
The body of this crochet lion is built with gradual increases and decreases to create a stable and well-balanced shape. A slightly rounded belly gives the lion a playful look while helping it sit or stand nicely when displayed. Consistent stitch count is essential for a clean finish. This body structure works well for many crochet animals, making it a versatile amigurumi base.
For the body we will use yellow color yarn and a 3.5 mm crochet hook. Suff while advancing.
Round 1. 6 sc in magic ring (6)
Round 2. 6 inc (12)
Round 3. (sc, inc) x6 (18)
Round 4. (sc, inc, sc) x6 (24)
Round 5. (sc 3, inc) x6 (30)
Round 6. (sc4 , inc, sc 5) x3 (33)
Rounds 7-10. Sc around (33)
Round 11. (sc 4, dec, sc 5) x3 (30)
Round 12. (sc 3, dec) x6 (24)
Round 13. (sc 3, dec, sc 3) x3 (21)
Round 14. (Sc 5, dec) x3 (18)
Round 15. (sc 2, dec, sc 2) x3 (15)
Round 16. (sc 3, dec) x3 (12). Fasten off leaving a long tail for sewing.
Here we are, with the body of the amigurumi lion completed. We can say that most of the work is almost finished.
Lion arms (make 2)
For the arms we will use yellow color yarn and a 3.5mm crochet hook. Do not stuff.
Round 1. 7 sc in magic ring (7)
Rounds 2-9. sc around (7). Fold the arms in two and sc the two sides together with 3 sc.
Fasten off leaving a long tail for sewing.
We’ve finished the lion’s arms, now we can move on to the next piece: its ears.
Lion ears (make 2)
For the ears we will use yellow color yarn and a 3.5 mm crochet hook.
Round 1. 6 sc in magic ring (6)
Round 2. (sc, inc) x3 (9)
Round 3. (sc, inc, sc) x3 (12)
Round 4. (sc 3, inc) x3 (15)
Round 5. Sc around. Fasten off leaving a long tail for sewing.
We’ve finished the crocheted lion’s ears, and now its face is emerging. All that’s left is to make its mane, which will give it a true lion’s appearance. Let’s finish the mane!
Crochet lion mane
The mane is one of the most distinctive parts of a crochet lion amigurumi. Textured stitches or loop techniques can be used to create volume without adding too much complexity. Paired with small rounded ears, the mane frames the face and adds depth to the design. This combination gives the lion its signature look and makes it stand out among other amigurumi animals.
For the mane we will use brown color yarn and a 3.5 mm crochet hook.
Chain 33, starting the second chain from the hook, ( hdc, [dc, tr cr, dc in the next chain], hdc, sl st) repeat across the chain 8 times. Fasten off leaving a long tail for sewing.
Assembly of lewis the lion
Sew the muzzel in place just below the eyes.
Sew the sides of the ears and sew them to the head.
Sew the mane in place before the ears.
Sew the body to the head.
Sew the arms in place on the sides of the body just below the head.
Sew the legs in place on the sides of the body bewteen rounds 6-7.
For the tail we attache yellow color yarn on the bottom of the body and ch 5, in the last chain we add some brown color yarn we secure it ahdn waeve in the ends from the chain (yellow yarn)


