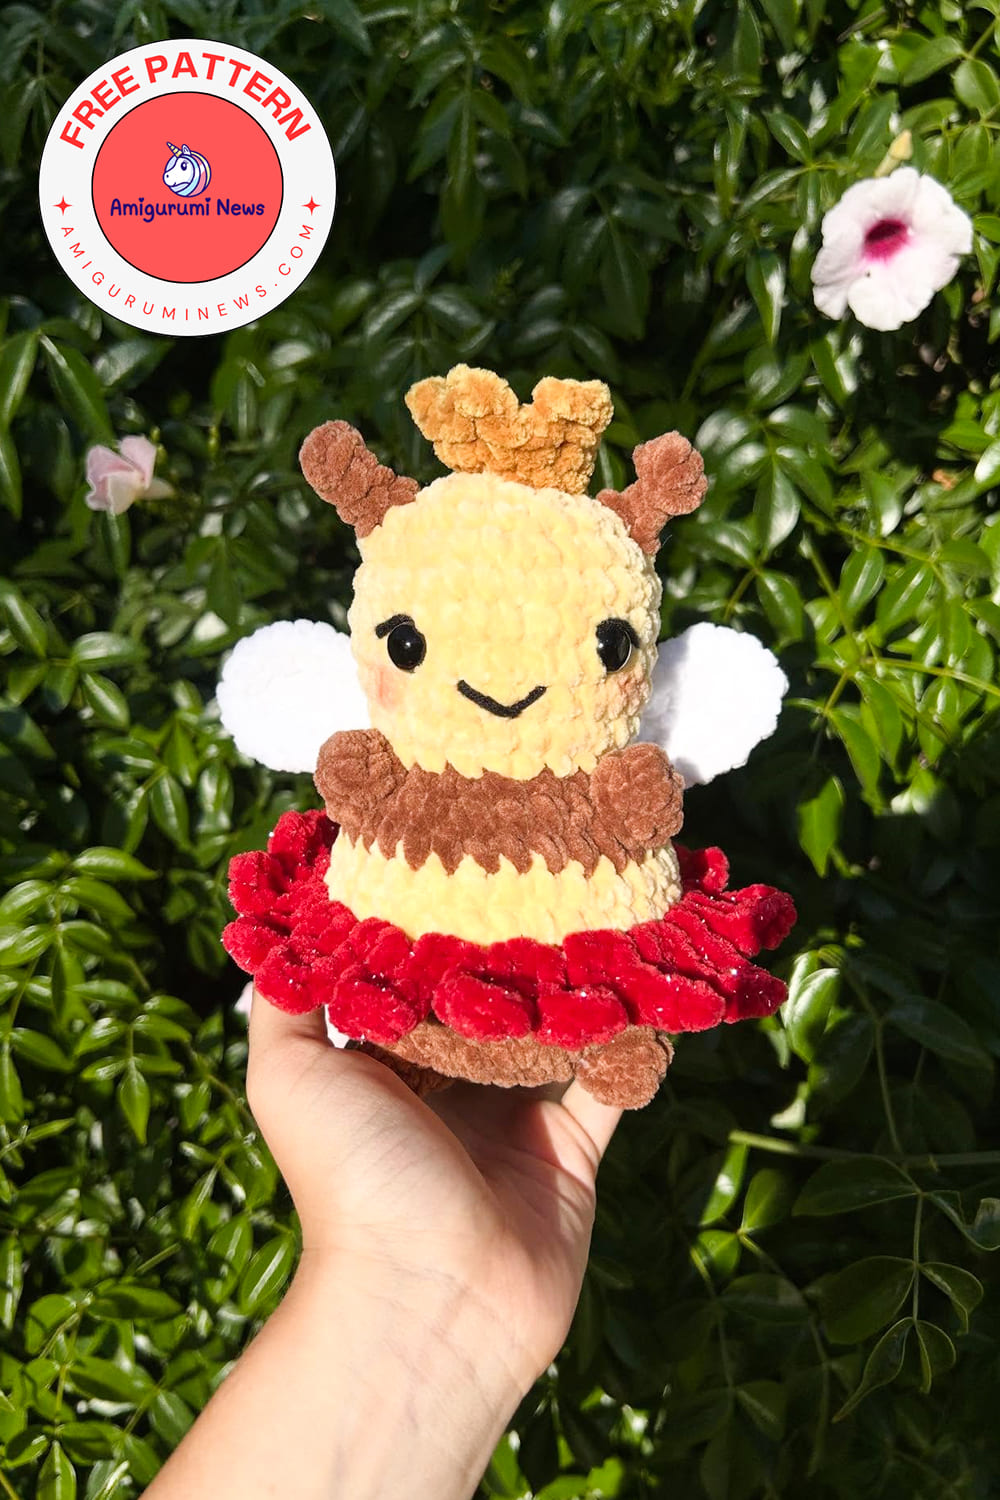
Not every bee has to look ordinary. This adorable crochet bee design stands out with its tiny crown, fluffy texture, and sweet personality. If you enjoy creating cute handmade characters, a royal-inspired bee can be a fun and memorable addition to your crochet collection.
An amigurumi bee like this combines the charm of classic bee patterns with playful fantasy details. The soft yellow body, delicate wings, and crown create a unique character that feels both whimsical and lovable. It’s the kind of project that instantly catches attention and makes people smile.
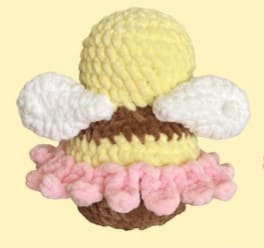
Crochet bee princess amigurumi pattern
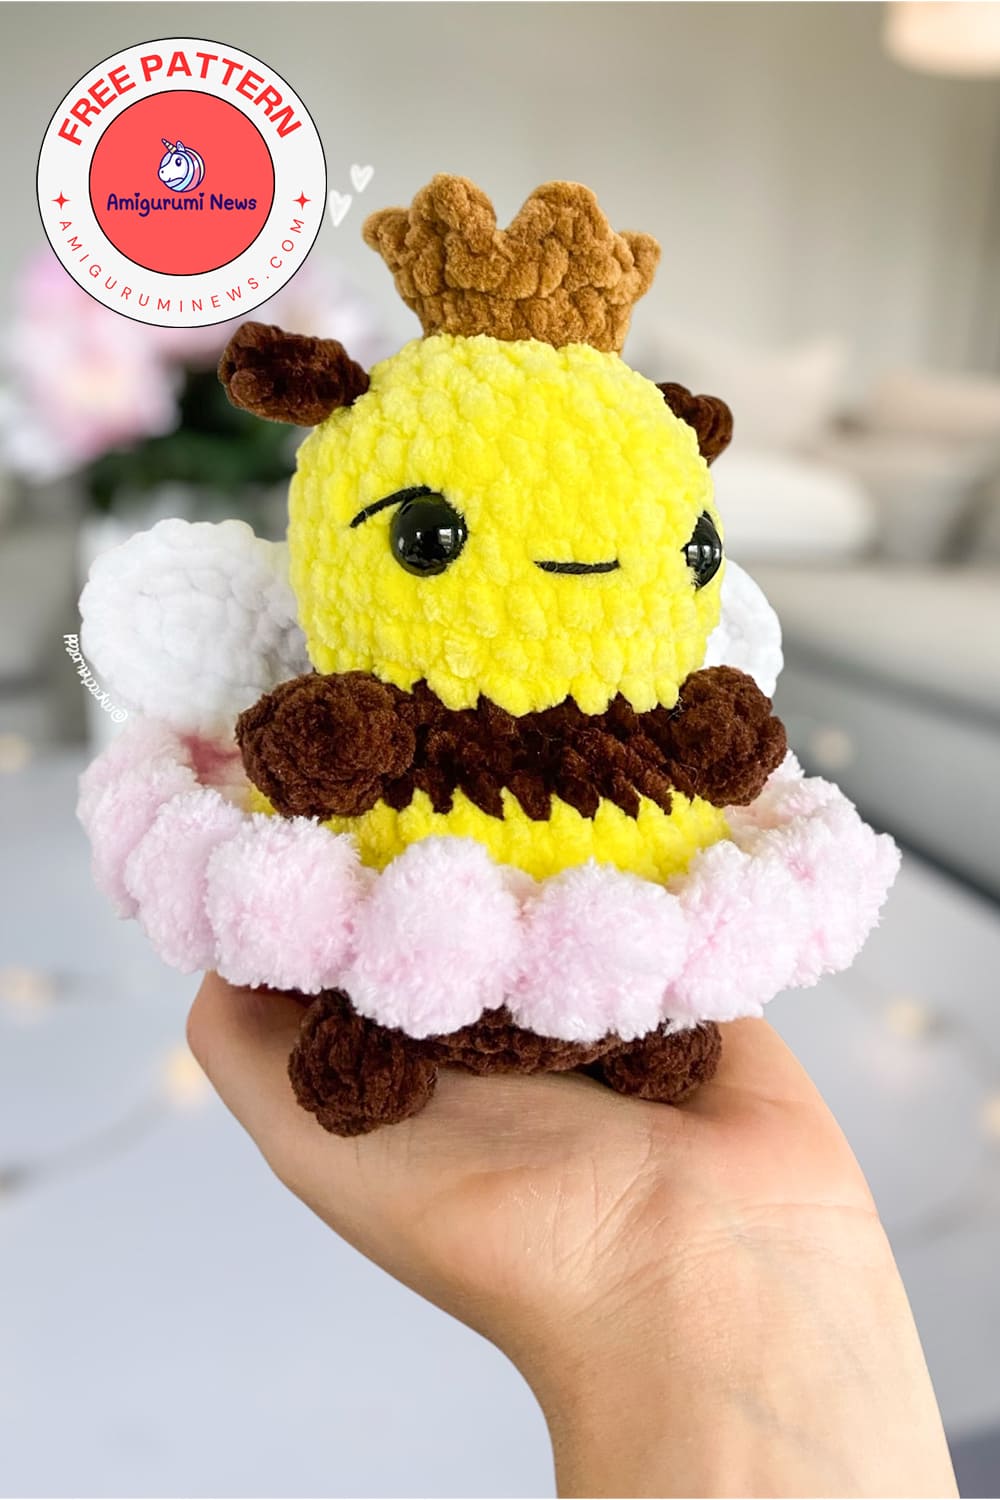
Many crafters enjoy making crochet animals because they allow endless creativity. Instead of following traditional designs, you can experiment with accessories, colors, and textures to create something truly special. A queen bee amigurumi is a perfect example of how a simple concept can become a one-of-a-kind crochet creation.
Whether you’re making gifts for friends, adding new pieces to your handmade collection, or simply looking for a relaxing project, this crochet bee is a delightful choice. The best part is that there are plenty of free amigurumi patterns available online, making it easy to find inspiration and start crocheting right away.
From beginners to experienced amigurumi lovers, everyone who loves crocheted animals will want to experience the irresistible cuteness of an adorable amigurumi bee wearing a tiny crown.
Designer: plushloopia
Materials:
Yarn in any weight (I used leami chenille yarn in yellow, kurkuma, brown, pink and white)
Black cotton thread for the mouth.
10 mm safety eyes.
4.0 mm hook or hook size that matches your yarn.
Sewing needle and scissors.
Stuffing.
Abbreviations:
BBO- bobble (3 loops on hook)
BLO- back loop only
cc- color change
ch- chain
dec- decrease
inc- increase
FLO- front loop only
fo- fasten off
MR- magic ring
sc- single crochet
slst- slip stitch
Head and Body
Color brown.
R1: 8 sc in MR (8)
R2: inc around (16)
R3: (sc, inc) x 8 (24)
R4: (3 sc, inc) x 6 (30)
R5: sc, inc, (4 sc, inc) x 5, 3 sc (36)
R6: sc around (36)
CC to yellow.
R7-R8: sc around (36) (2 rounds)
R9: BLO sc around (36) (place a stitch marker in the first FLO for later)
R10: (4 sc, dec) x 6 (30)
CC to brown.
R11: sc around (30)
R12: (3 sc, dec) x 6 (24)
R13: (2 sc, dec) x 6 (18)
Start stuffing, CC to yellow.
R14: (2 sc, inc) x 6 (24)
R15: sc, inc, (3 sc, inc) x 5, 2 sc (30)
R16-R19: sc around (30) (4 rounds)
Add safety eyes between R17-R18, 4 sts apart.
R20: (3 sc, dec) x 6 (24)
R21: (2 sc, dec) x 6 (18)
R22: (sc, dec) x 6 (12), finish stuffing.
R23: (dec) x 6 (6)
• Slst, FO and sew close.
• Embroider the mouth between R16-R17 over 2 stitches.
Arms (2x) and Legs (2x)
Color brown.
R1: 6 sc in MR (6)
R2: sc around (6)
• No need to stuff, FO and leave a long tail for sewing.
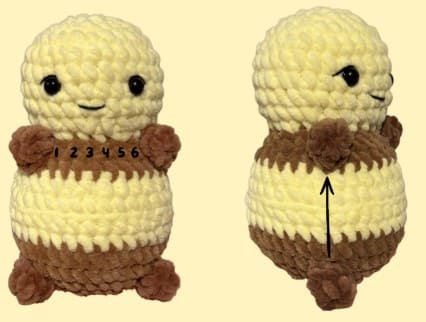
• Sew the arms onto the brown stripe between R11-R14 on each side of the body, about 6 sts apart.
• Sew the legs between R3-R6 on each side of the body, roughly aligned with the arms.
Floral Skirt
Color pink.
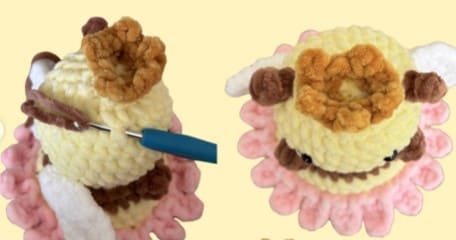
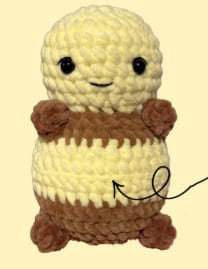
Working in FLO of R9 (see photo below): (sist, ch 4, hdc in 2nd ch from hook, dc in next 2 ch, slst back in same st, slst in next st) x 18
→ each petal is worked over 2 sts.
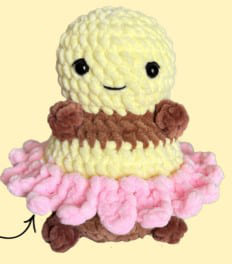
• Slst in first st to join. FO and weave in ends.
• Note: Use your fingers to gently shape the petals. Adjust them slightly outward or inward until you like their shape.
Insert hook into the front loop of round 9 where the stitch marker is placed.
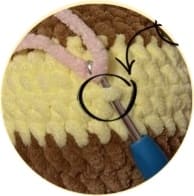
Make sure the hook is pointing downward (not toward the head).
Front loops of round 9 (36 in total).
You’ll get 18 petals.
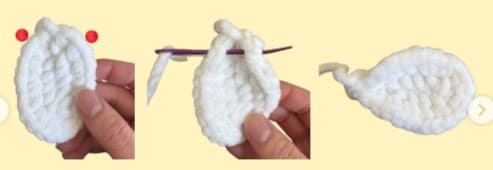
Wings (2x)
Color white.
R1: ch 8, starting from 2nd ch from hook: sc in next 6 ch, 2 sc in last ch. Continue on the other side of the chain: sc in remaining 6 ch. (14) R2: inc around (28)
• slst and FO. Insert your needle through both sides of the wing and pull tight, as shown below. Leave a long tail for sewing.
• Sew the wings onto the back of the body between R13 and R14.
Crown
Color golden.
R1. ch 11, sc in the first ch to form a ring.
R2. sc around (10)
R3. (slst, ch 3, slst back in same st, slst in next st)x5 – each spike is worked over 2 sts.
• FO and leave a long tail for sewing.
• Sew the crown between R22-R23, centered between the eyes.
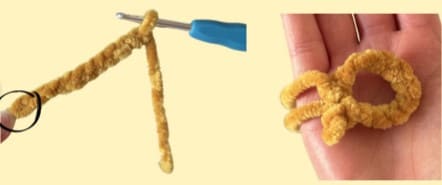
Antennas (2x)
Color brown.
Insert hook between R20-R21 on one side of the crown, roughly centered (as shown below). Join the yarn with a sl st, ch 4 and start in 2nd ch from hook: work a BBO (3 loops on hook), sc in the next 2 ch. slst back into same stitch. Repeat on the other side.
• FO and weave in ends.