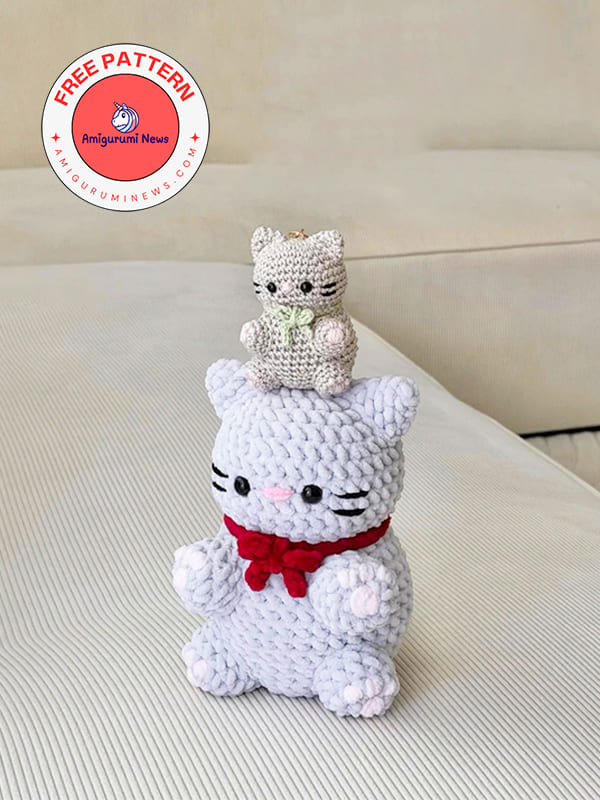
If you’re looking for a fun weekend amigurumi project, this crochet cat free pattern is a great choice. Inspired by the charming kawaii style, this tiny cat has a round body, sweet little ears, and a cute scarf that adds plenty of personality. There’s also a keychain version of this crochet cat, which you can make step-by-step by watching the designer’s YouTube channel.
This amigurumi kawaii cat free pattern is suitable for beginners who already know the basic stitches, while experienced crocheters can easily personalize the design with different colors, embroidered details, or small accessories. Soft chenille yarn creates a plush toy with a cozy texture, while classic cotton yarn gives the cat a neat, traditional amigurumi look.
Kawaii Cat Crochet Free Pattern
If you love collecting crochet animals free patterns, this adorable cat should definitely be on your project list. It combines a simple construction technique with a cute look that appeals to both children and adults. Display it on your shelf, decorate your workspace, or gift a handmade friend to someone special.
Save this crochet cat pattern for your next crochet adventure and enjoy bringing this adorable kawaii cat to life with individual stitches. With its timeless design and beginner-friendly technique, it’s a project you’ll likely want to make again and again.
Designer: lau_crochetstudio
Materials
• Yarns: (choose any colour you like)
• Hooks: (I used 5 mm for the large kitty and 2.5 mm for the keychain version)
• Needle
• Stuffing
• Scissors
• Safety eyes
Abbreviations
MR- magic ring
sc- single crochet
inc- increase
dec- decrease
slst- slip stitch
FLO- front loop only
You can make this small crochet cat keychain version using the step-by-step video tutorial from the designer’s YouTube channel.
Head + body
Ch 5 to begin.
Starting in the second chain from the hook.
R1. 3sc, 3 sc in one, 2 sc, inc (10)
R2. (sc,inc)x5 (15)
R3. (2sc,inc)x5 (20)
R4. (3sc,inc)x5 (25)
R5. (4sc,inc)x5 (30)
R6. (5sc,inc)x5 (35)
R7-10. 35 sc (4 rounds)
R11. (5sc,dec)x5 (30)
R12. (4sc,dec)x5 (25)
R13. (3sc,dec)x5 (20)
Insert the eyes between R8-9.
4 stitches apart.
Begin to stuff.
R14. FLO (sc,inc)x10 (30)
R15. (5sc,inc)x5 (35)
R16-20. 35 sc (5 rounds) (35)
R21. (5sc,dec)x5 (30)
R22-23. 30 sc (2 rounds) (30)
R24. (4sc,dec)x5 (25)
R25. (3sc,dec)x5 (20)
Stuff again.
R26. (2sc,dec)x5 (15)
R27. (sc,dec)x5 (10)
Cut the yarn and sew the hole closed.
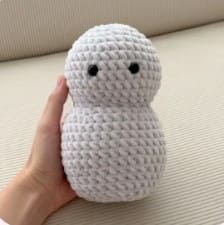
This will be the finished body of your kitten.
Paws (4)
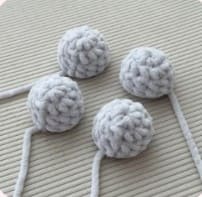
R1. 8 sc in MR (8)
R2. (sc,inc)x4 (12)
R3-4. 12 sc (2 rounds) (12)
Make 4 in total.
Cut the yarn leaving a long tail.
Stuff lightly.
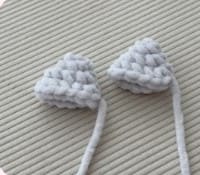
Ears (2)
R1. 3 sc in MR (3)
R2. 3 inc (6)
R3. (sc,inc)x3 (9)
R4. (2sc,inc)x3 (12)
Make 2.
Leave a long yarn tail for sewing.
No need to stuff.
Tail
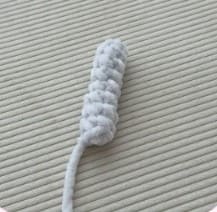
R1. 4 sc in MR (4)
R2-8. 4 sc (7 rounds) (4)
This is the finished tail.
Fasten off, leaving a long tail for attaching.
Do not stuff.
Collar
Ch 61.
Starting from the second chain from the hook, work 60 slst back into bumps of the chain.
At the end, leave a long tail of yarn to secure the collar in place and tie a bow at the front.
You can also use the yarn tail from the beginning of the chain to help tie it.
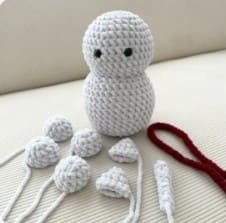
At this point, we have everything ready to sew our kitten together.
The final step is to embroider the nose, whiskers and the little pink details on the paws.