Hello everyone who loves amigurumi,
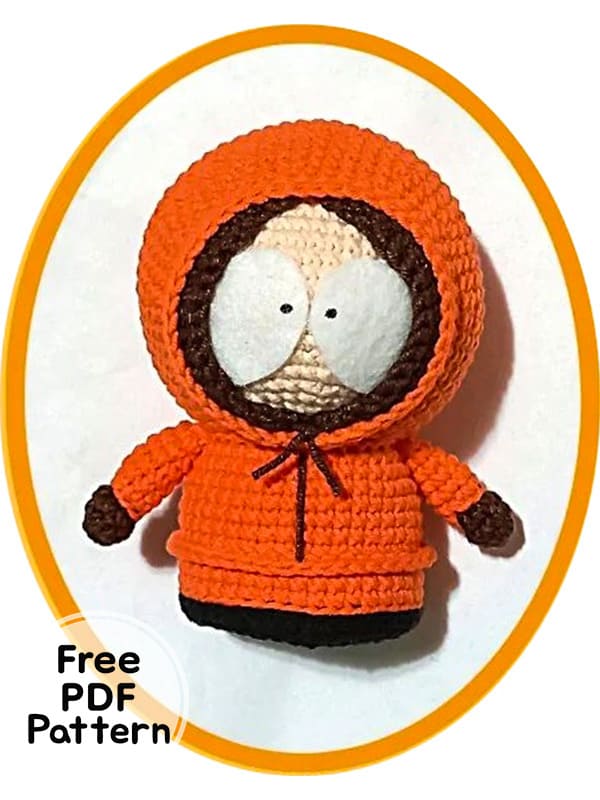
Today I shared Kenny South Park cartoon character crochet doll for you guys. The free amigurumi pattern is easy to crochet step by step. This amigurumi pattern, similar to the Kenny McCormick character, has a final length of 10 cm. You can crochet for children and for your loved ones. You can change the thread color of the free pattern. The amigurumi pattern consists of three basic parts. Trunk, head and arms. We will prepare these three parts separately. After we complete the parts, we will sew them into place on the body part. Thanks to the creator of the amigurumi pattern. Do not forget to add it to your favorites list and share it with your loved ones.
South Park Kenny Crochet Doll Amigurumi PDF Pattern
Designer: agu_murumi
Abbreviations
MR – magic ring
sc – single crochet
slst- Slip Stitch
inc– increase
dec- decrease
BLO- Back loop only
FLO- Front loop only
ch – chain
Rnd- round
Materials
• Orange, brown, black and nude yarn, I used the YarnArt jeans line.
• White panolensis.
• Paint or black pencil for gender
• Crochet 2.2mm
• Scissors
• Wool needle
• Silicone
• Synthetic padding
Body
Color black
Rnd 1. MR from 6sc
Rnd 2. 6 inc
Rnd 3. (sc, inc) x 6 (18)
Rnd 4. (2sc, inc) x 6 (24)
Rnd 5. (3sc, inc) x 6 (30)
Rnd 6. (4sc, inc) x 6 (36)
Rnd 7. (5sc, inc) x 6 (42)
Rnd 8. 42sc BLO
Orange color
Rnd 9-11. 42sc
Rnd 12. 42sc BLO
Rnd 13-17. 42sc
Rnd 18. (5sc, dec) x 6 (36)
Leave a long thread and then cook the body. We return to row 13 and by the FLO we make 42sc
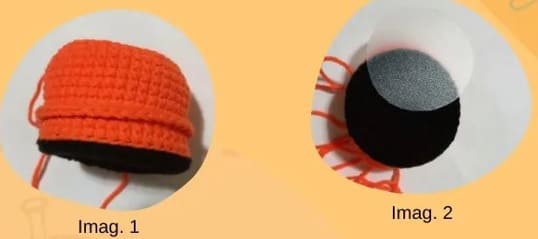
Cut a plastic circle as seen in image 2 to place it on the base and fill.
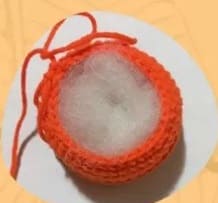
Arms
Brown color
Rnd 1. MR from 8sc
Rnd 2-3. 8sc
Orange color
Rnd 4. 8sc
Fill lightly
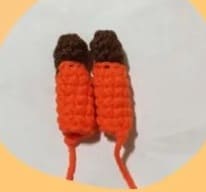
Head
Skin color
Rnd 1. MR 6sc
Rnd 2. 6 inc
Rnd 3. (sc, inc) x 6 (18)
Rnd 4. (2sc, inc) x 6 (24)
Rnd 5. (3sc, inc) x 6 (30)
Rnd 6. (4sc, inc) x 6 (36)
Rnd 7. (5sc, inc) x 6 (42)
Rnd 8. (6sc, inc) x 6 (48)
Rnd 9-18. 48sc
Rnd 19. (6sc, dec) x 6 (42)
Rnd 20. (5sc, dec) x 6 (36)
Rnd 21. (4sc, dec) x 6 (30)
At this point start filling.
Rnd 22. (3sc, dec) x 6 (24)
Rnd 23. (2sc, dec) x 6 (18)
Rnd 24. (sc, dec) x 6 (12)
Rnd 25. 6 dec
Close with needle.
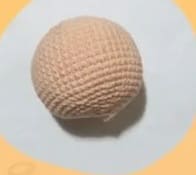
Hood
Orange color
Rnd 1. MR 6sc
Rnd 2. 6 inc
Rnd 3. (sc, inc) x 6 (18)
Rnd 4. (2sc, inc) x 6 (24)
Rnd 5. (3sc, inc) x 6 (30)
Rnd 6. (4sc, inc) x 6 (36)
Rnd 7. (5sc, inc) x 6 (42)
Rnd 8. (6sc, inc) x 6 (48)
Rnd 9. (7sc, inc) x 6 (54)
Rnd 10. (8sc, inc) x 6 (60)
Rnd 11. (9sc, inc) x 6 (66)
Rnd 12-18. 66sc
Rnd 19. (9sc, dec) x 6 (60)
Rnd 20-21. 60sc
Rnd 22. (8sc, dec) x 6 (54)
Rnd 23. (7sc, dec) x 6 (48)
Rnd 24. (6sc, dec) x 6 (42)
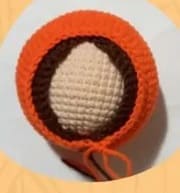
Brown color
In this part you are going to divide the hood stitches into two sections each of 21 stitches, those who should knit in a row, not in a spiral as usual, should do the following:
Rnd 25. 21sc through the BLO of the stitches, make a chain and turn the fabric.
Rnd 26. Skip one stitch and in the next one slst, then do 6sc, dec, 7sc, skip one stitch and in the next one slst. Make a chain and turn the fabric.
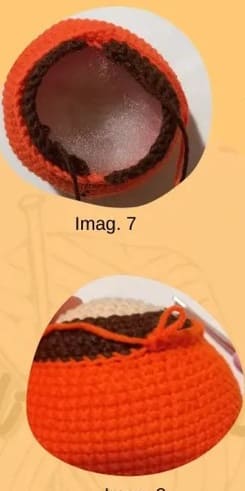
Rnd 27. You must skip the slst and the point that follows, and in the next one make a slst, then 8 sc, and skip a point and in the next one make a slst. Bind off and cut the thread. Finish off the orange color on the 25th row, here you will have to knit the remaining FLO.
Rnd 25. 42sc FLO
Rnd 26. 42sc
Finish off and cut the thread, they must also fill in a little the base of the hood as seen in the image.
Assembly
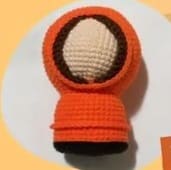
1. Place the head inside the hood, then use pins to accommodate the head on the body, so that it is well centered for later cooking.
2. Sew the arms to the body
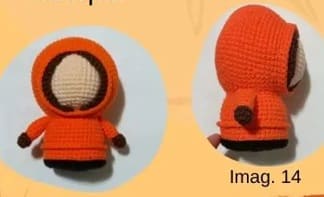
3. For the eyes, make 2 ovals of white panolensis 3.5mm long and 2.5mm wide. Arrange them and stick them to the face with silicone, then with paint or pencil to generate the black dot.
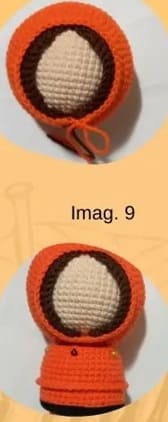
4. With brown thread make the line of the jacket and the cords of the hood.
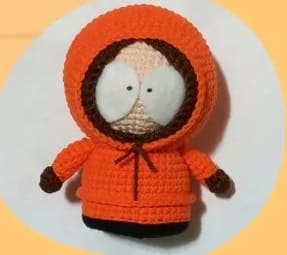
Congratulations, you have completed the amigurumi doll. 🙂


