
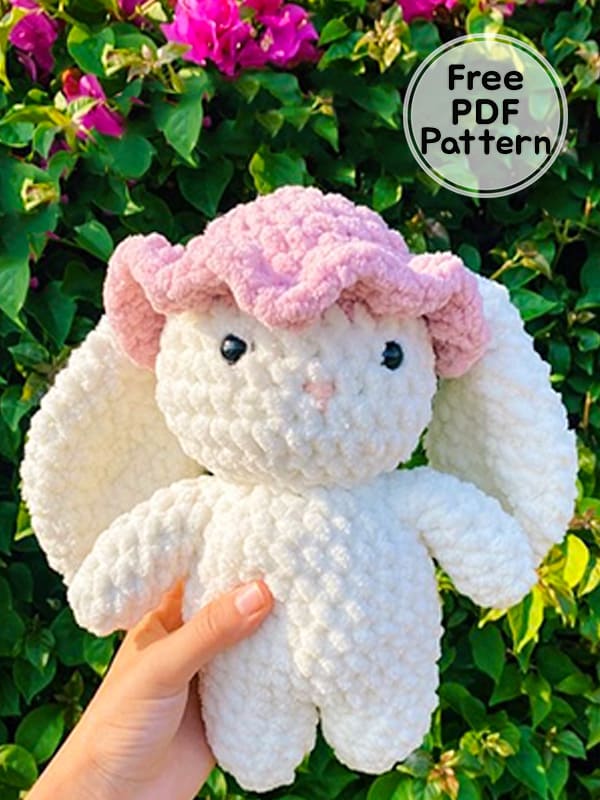
I am with you, my friends, with the crochet bunny maya amigurumi pattern. I would like to thank the designer for sharing his cute crochet bunny with us. Thanks to the step by step detailed pictures showing how to do it, our users who are at the beginner level can complete the cute bunny without difficulty. Check out the free amigurumi pattern instruction right now to make a safe plush crochet bunny amigurumi toy for your kids.
Crochet Bunny Maya Amigurumi Free PDF Pattern
Designer: crochetwmariah
Materials
6 mm crochet hook
#6 super bulky yarn (primary color [A] and secondary color [B])
14 mm safety eyes
Polyfil
Yarn needle
Stitch marker
Scissors
Abbreviations
MR: Magic ring
Ch: Chain
Sc: Single crochet
Inc: Increase
Dec: Decrease
Dc: Double crochet
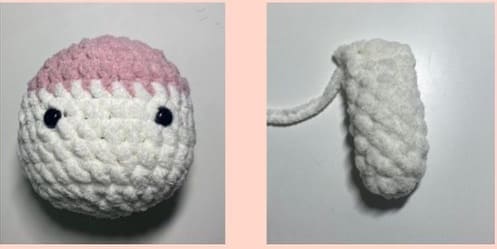
Head
Color B.
Rnd 1. MR 6
Rnd 2. 6 inc (12)
Rnd 3. (1sc,inc)*6 (18)
Rnd 4. (2sc,inc)*6 (24)
Rnd 5. (3sc,inc)*6 (30)
Rnd 6. sc (30)
Color change to A.
Rnd 7-11. (5 rows) sc (30)
Rnd 12. (3sc,dec)*6 (24)
Rnd 13. (2sc,dec)*6 (18)
Rnd 14. (sc,dec)*6 (12)
Stuff.
Rnd 15. (dec)*6 (6)
Fasten off and close off and safety eyes between rnd 8 and 9 4 stitches in between.
Arms (Make 2)
Color A.
Rnd 1. 4 MR
Rnd 2. 4 inc (8)
Rnd 3-8. (6 rows) sc (8)
Lightly stuff, sc together, and lastly leave a long tail for sewing.
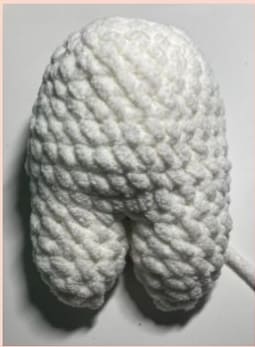
Legs and body
Color A.
Rnd 1. MR 4 sc
Rnd 2. 4 inc (8)
Rnd 3. (sc,inc)*4 (12)
Rnd 4-6. (3 rows) sc (12)
Fasten off 1st leg but not the 2nd.
Rnd 7. connect both legs by sc into any stitch, sc again 11 times.
Then do an additional 12 sc in the next leg (24).

Rnd 8. sc (24)
Rnd 9. (5sc,inc)*4 (28)
Rnd 10-12. (3 rows) sc (28)
Rnd 13. (5sc,dec)*4 (24)
Stuff legs.
Rnd 14-15. (2 rows) sc (24)
Rnd 16. (4sc,dec)*4 (20)
Rnd 17. (3sc,dec)*4 (16)
Stuff rest of body. Fasten off leaving a long tail for sewing. Close off.
Hat
Color B.
Rnd 1. ch 32
Rnd 2-30. Dc into 2nd stitch from the hook, then do another Dc into that same stitch.
Continue to do two Dc into the same stitches for the remaining of stitches.
Fasten off and leave a long tail for sewing.
For more of a ruffle effect, you can do 3 Dc into each stitch.
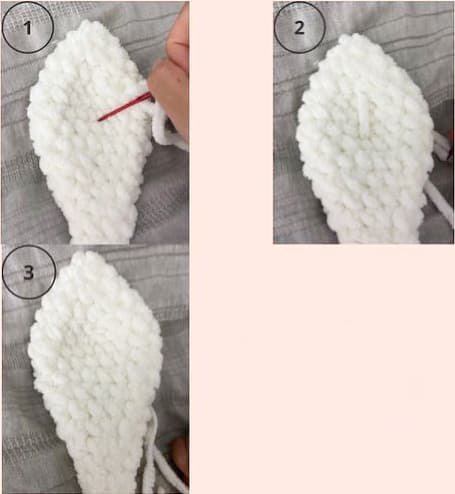
Ears (Make 2)
Color A.
Rnd 1. MR 4
Rnd 2. 4 inc (8)
Rnd 3. (sc,inc)*4 (12)
Rnd 4. (2sc,inc)*4 (16)
Rnd 5. sc (16)
Rnd 6. (3sc,inc)*4 (20)
Rnd 7. sc (20)
Rnd 8. (3sc,dec)*4 (16)
Rnd 9. sc (16)
Rnd 10. (2sc,dec)*4 (12)
Rnd 11-12. (2 rows) sc (12)
Rnd 13. (sc,dec)*4 (8)
Rnd 14-15. (2 rows) sc (8)
Rnd 16. dec around (4)
Ears do not need to be stuffed.
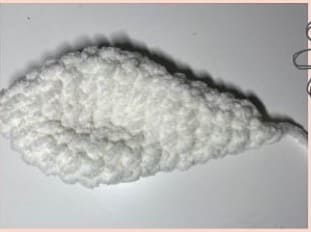
I curled my ears by adding a yarn in between 2-3 stitches and pulling the yarn tight.
There are examples below. Adjust to how you like it.
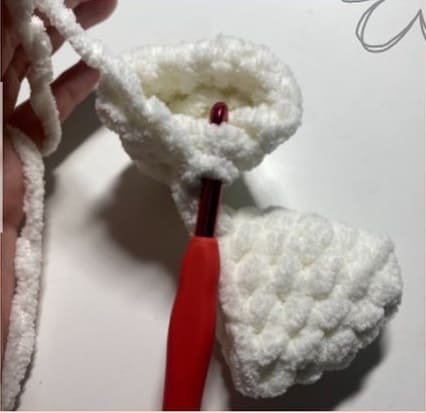
Assembly
1. Sew hat onto the head where color A and color B separate.
2. Attach body on head.
3. Attach arms on round 16 of the body.
4. Attach ears on round 5 on top of the hat. About 14 stitches apart.
5. Sew on nose with pink below the eyes vertically. It should be around round 9 covering about 3 stitches.


