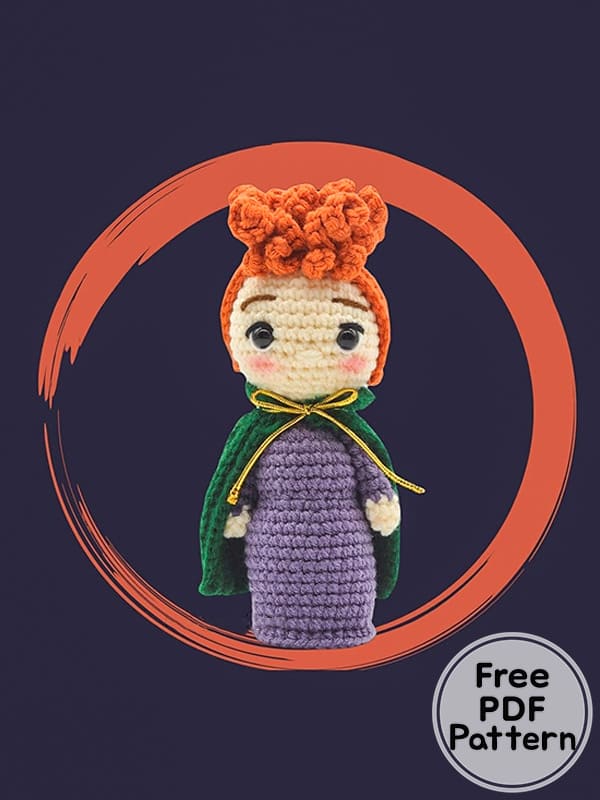
Hello friends, we continue the sanderson sisters series from the Hocus Pocus cartoon series. Our crochet doll character for today is Winnie Sanderson. First of all, I would like to thank our designer for this Hocus Pocus sanderson sisters series. You can complete the cute crochet doll winnie sanderson character thanks to the detailed and easy step by step amigurumi pattern instruction. Check out the free amigurumi instruction right now and complete the pattern.
Winnie Sanderson Crochet Doll Amigurumi PDF Free Pattern
Designer: kkrochett
Abbreviations
MR: Magic ring
Ch: Chain
BLO: Back loop only
FLO: Front loop only
Fo: Fasten off
Hdc: Half double crochet
Inc: Increase
Dec: Decrease
Rnd: Round
Sc: Single crochet
Slst: Slip stitch
St: Stitch
Head
Start with skin color.
Rnd 1. 6 sc in MR (6)
Rnd 2. 6 inc (12)
Rnd 3. (1sc,inc)*6 (18)
Rnd 4. (2sc,inc)*6 (24)
Rnd 5. (3sc,inc)*6 (30)
Rnd 6. (4sc,inc)*6 (36)
Rnd 7-12. 36 sc
Rnd 13. (4sc,dec)*6 (30)
Rnd 14. (3sc,dec)*6 (24)
Rnd 15. (2sc,dec)*6 (18)
Rnd 16. (1sc,dec)*6 (12)
Rnd 17. (2sc,dec)*3 (9)
Change color to purple, continue with body.
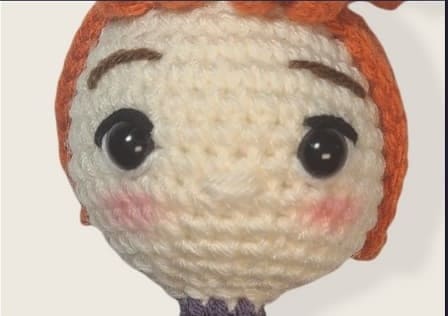
Stop and place the 10mm eyes between rounds 10 and 11 , 7 st apart.
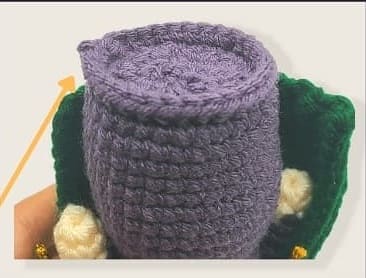
Body
With purple yarn.
Rnd 1-2. 9 sc (9)
Rnd 3. 9 inc (18)
Rnd 4. (1sc,inc)*9 (27)
Rnd 5-8. 27 sc (27)
Rnd 9. (1sc,dec)*9 (18)
Rnd 10. (1sc,inc)*9 (27)
Rnd 11. (8sc,inc)*3 (30)
Rnd 12-20. 30 sc
Stuff.
Rnd 21. BLO- (3sc,dec)*6 (24)
Rnd 22. (2sc,dec)*6 (18)
Rnd 23. (1sc,dec)*6 (12)
Rnd 24. 6 dec (6)
Fasten off.
Don’t stuff too much at the end so the base remains flat.
Arms (Make 2)
Start with skin color.
Rnd 1. 6 sc in MR
Rnd 2. 6 sc (6)
Change color to purple.
Rnd 3. (2sc,inc)*3 (9)
Rnd 4-9. 9 sc (9)
Fasten off, leave long thread to attach to the body.
Upside down FLO of round 21 (with new thread): 30 sc
Fasten off.
Hair
With orange yarn.
Rnd 1. 6 sc in MR (6)
Rnd 2. (1sc,inc)*3 (9)
Rnd 3. BLO- (2sc,inc)*3 (12)
Don’t fasten off.
1ST Layer
Rnd 1-4. 13 ch, 12 hdc, slst (12)
Rnd 5-8. 4 ch, 3 inc, slst (6)
Rnd 9-13. 13 ch, 12 hdc, slst (12)
(12 and 13 strands in same st)
Fasten off.
2ND Layer
(in free loop of round 2- new thread)
Rnd 1-10. 10 ch, 9 inc, slst
(9 and 10 strands in same st)
Fasten off.
2nd layer goes here.
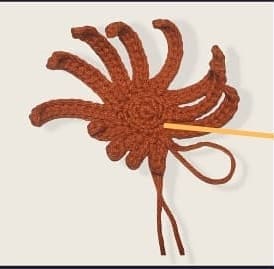
1st layer- you’ll count 12 strands in the picture, but it covers the head better with 13 strands.
2nd layer- 10 strands.

Stick the hair wig to the head.
Cape
With green yarn.
Rnd 1. ch 20 (start on 3rd ch from hook), 18 hdc, ch 1, turn
Rnd 2-14. BLO 18 hdc, ch 1, turn
Rnd 15. BLO 18 hdc
Fasten off and leave long thread.
Collar
Rnd 1. ch 15 (start on 2nd ch from hook), 14 sc, ch 1, turn
Rnd 2. (1sc,ch1)*14, turn
Rnd 3. (1sc,ch1)*14, (sc in the ch of previous round)
Fasten off and leave a long thread.
With a threading needle, make a running stitch along top edge of the cape, in and out of the rounds (see picture above).
Once you get to the other end, pull the thread firmly to shorten that end a bit.

Use the long thread to join the collar to the top of the cape (the side that you shortened in the step above).