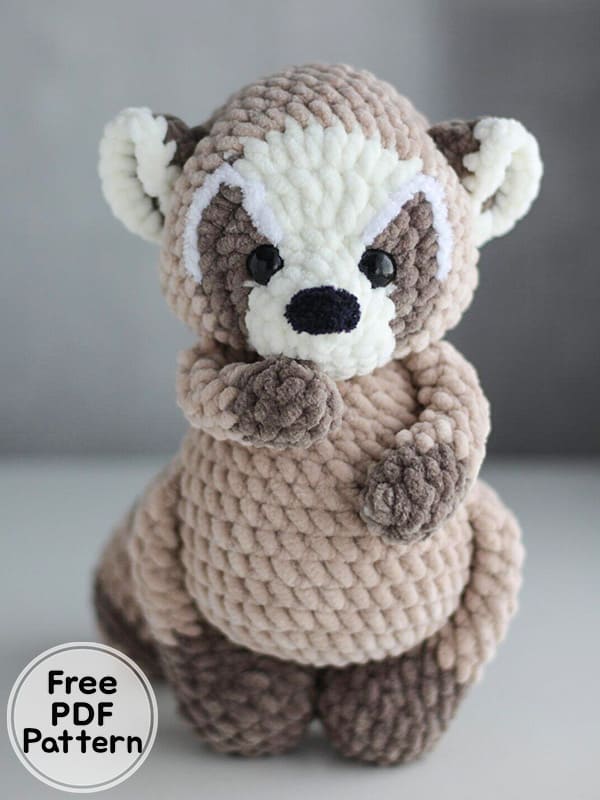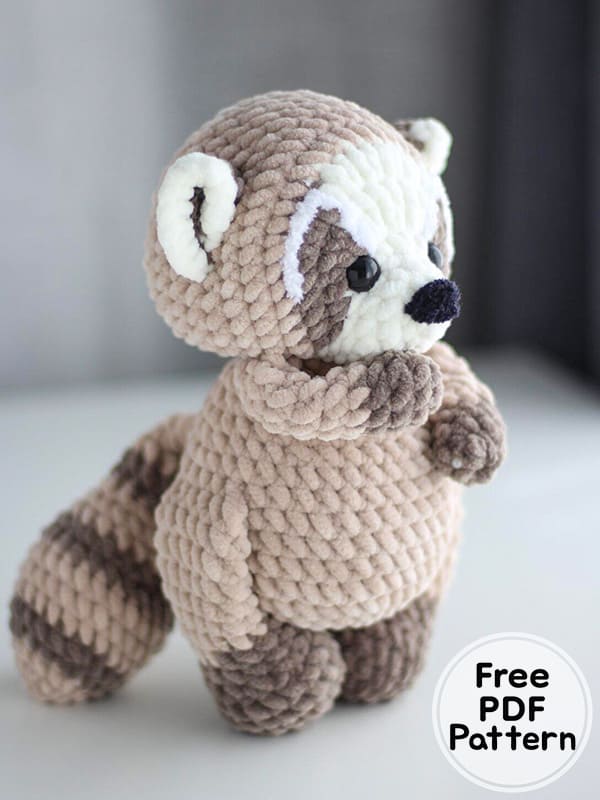
Today we will work with you amigurumi plush raccoon pattern. The height of the amigurumi raccoon toy is about 21 cm. To make such a crochet raccoon, the author used YarnArt Dolce plush yarn and a 4 mm hook. While knitting the body, the legs, handles and tail of the toy are crocheted, and the remaining parts are sewn. The description of the plan is detailed step by step, contains many photos and descriptions from the author that will help you in the process of creating a raccoon.
Crochet Raccoon PDF Amigurumi Free Pattern
Designer: @annushkini_igrushki
Necessary materials
YarnArt DOLCE yarn or equivalent (yardage 100g/120m, colors beige 771, dark beige 754 and dairy 745, consumption is less than one skein)
For the nose and muzzle Softy Alize (black and white)
Thread for tightening and sewing parts, Stapling needle
Filler, Hook number 4
Screw eyes 12mm
Abbreviations
MR: Magic ring
Ch: Chain
Sc: Single crochet
Slst: Slip stitch
Inc: Increase
Dec: Decrease
Hdc: Half double crochet
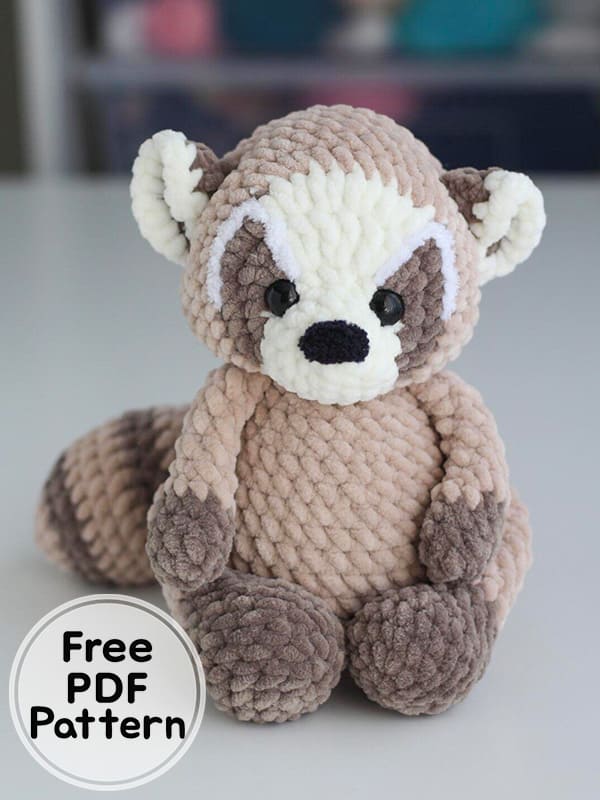
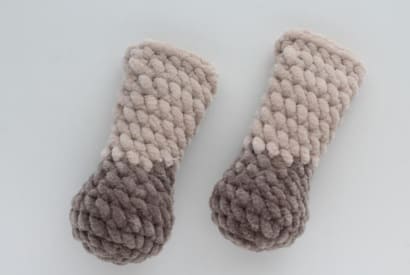
Hands (Make 2)
Do not fill.
2 ch (colour dark beige)
1. in the 2nd ch 6 sc
2. (1sc + inc)*3р (9)
3-4. 9sc (change color to beige)
5. 9sc
6. (1sc + dec)*3times (6)
7-11. 6sc
Fold and crochet together with three sc.
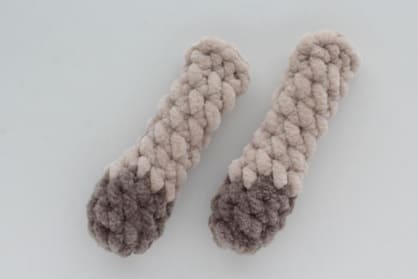
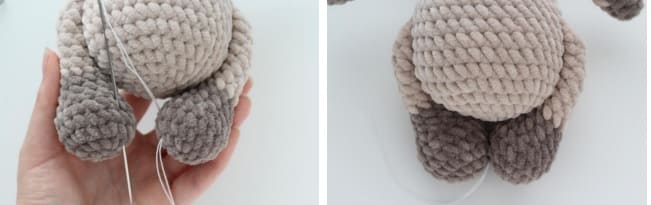
Legs (Make 2)
Fill only the bottom.
2 ch (colour dark beige)
1. in the 2nd ch 6 sc
2. 6inc (12)
3. (1sc + inc)*6 (18)
4-5. 18sc
6. (1sc + dec)*6 (12)
7-8. 12sc (change color to beige)
9-15. 12sc
Fold and crochet together 6 sc.
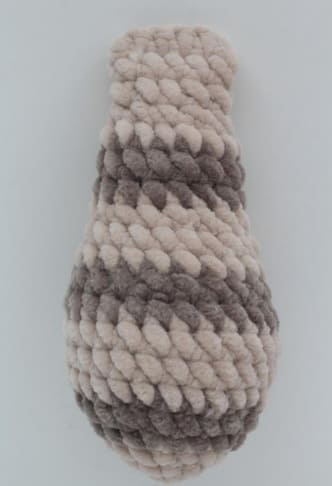
Tail
Fill weakly up to 13 rows.
2 ch (beige color)
1. in the 2nd ch 5 sc
2. 5inc (10)
3. (1sc + inc)*5 (15) (change to theme beige)
4. (2sc + inc)*5 (20)
5. (3sc + inc)*5 (25) (change to beige)
6-8. 25 sc (change to theme beige)
9. 25sc
10. (3sc + dec)*5 (20) (change to beige)
11-12. 20sc
13. (2sc + dec)*5 (15) (change to theme beige)
14-15. 15sc (change to beige)
16. 15sc
17. (1sc + dec)*5 (10)
18-19. 10sc
Fold and crochet together with 5 sc.
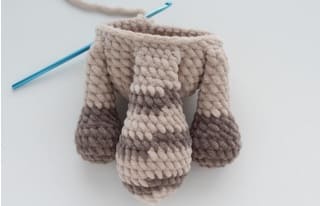
Body
Fill the part in the course of crocheting.
2 ch.
1. in the 2nd ch 6 sc
2. 6inc (12)
3. (1sc + inc)*6times (18)
4. (2sc + inc)*6times (24)
5. (3sc + inc)*6times (30)
6. (4sc + inc)*6times (36)
7-10. 36sc
Beginning marker = middle of the back In the 11th row we crocheting the legs For the last 3 loops of the 11th row and the first 2 loops of the 12th row we crocheting the tail.
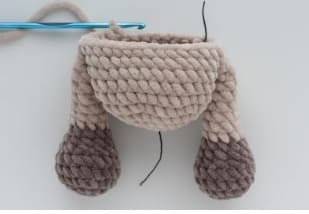
11. 5 sc + 6 sc together with the 1st leg + 14 sc + 6 sc together with the 2nd leg + 2 sc + 3 sc together with the tail (36)
12. 2 sc with tail + 34 sc (36)
13. (4sc + dec)*6times (30)
14. 30sc
15. (3sc + dec)*6times (24)
16. 24sc
17. (2sc + dec) * 6 times (18) + offset loops The beginning of the row should be exactly above the beginning of the 11th row
In the 18th row we crochet hands
18. 3sc + 3sc together with the first hand + 6sc + 3sc together with the second hand + 3sc (18) + sl st

We connect the legs to each other from the inside with a thin strong thread.
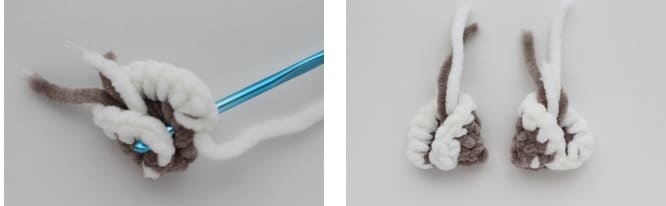
Ears (Make 2)
We crochet in rotary rows.
2 ch (colour dark beige)
1. in the 2nd ch 3sc (turning) at the end of each row we crochet 1ch
2. 3 inc (6)
3. (1sc + inc) * 3 (9) (change color to milky)
4. (2sc + inc) * 3 (12)
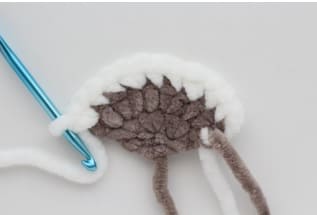
We fold the part in half, connect the 4th row with the 3rd row with a connecting column on both ears mirrored to each other. The front side of the 4th row looks outward. Draw the thread tails according to the photo.
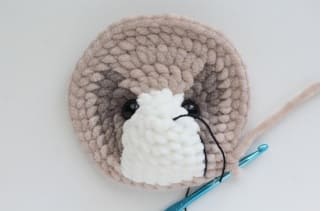
Head
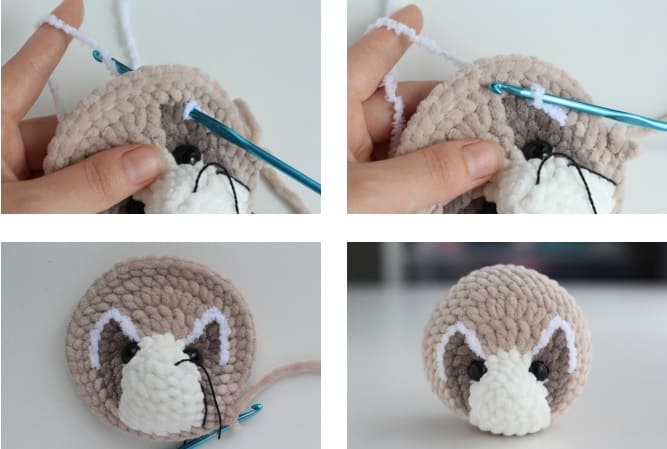
We install screw eyes between 5 and 6 rows under inc from hdc.
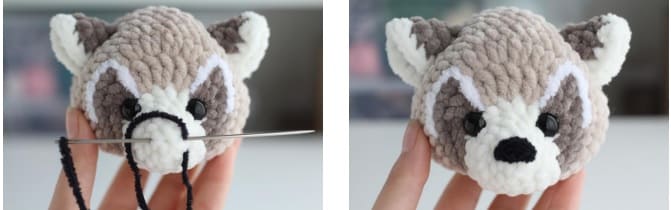
We embroider the nose between the 1st and 2nd rows (6-7 stitches)
2 ch (milky color)
1. in the 2nd ch 5sc
2. 5 inc (10)
3. (1 sc + inc) * 5 (15)
4. 15 sc
5. 2 sc + 3 inc + 10 sc (18)
Change color to beige
6. 1 sc + inc from sc + inc from hdc + inc from dc
Change color to beige and crochet 3 inc from dc
Change the color to beige and crochet further:
inc from dc + inc from hdc + inc from sc + 1 sc
Change color to milky and crochet 7sc (27)
Change color to beige
7. 5sc + 2inc from sc + 1 hdc
Change color to beige and crochet 1 more hdc in the same loop
Next, crochet in beige color 4 inc from hdc + 1 hdc
Change color to dark beige and crochet in the same loop 1 hdc
Next, we crochet with the color beige 2 inc from sc + 5 sc
Change color to milky and crochet 7 sc (37)
Change color to beige
8. (5sc + inc) * 5 times + change color to milky and crochet 7 sc (42)
Change color to beige
9. 42 sc
We crocheting 9 rows and at this stage we insert the eyes and crochet white stripes on the muzzle, stepping back from the milky color 4sc.
10-14. 42sc
15. (5sc + dec)*6 (36)
16. (4sc + dec)*6 (30)
17. (3sc + dec)*6 (24)
We begin to fill the head. And then we fill in the course of crocheting.
18. (2sc + dec)*6 (18)
19. (1sc + dec)*6 (12)
20. 6dec
We tighten the hole. We hide the tail of the thread inside the head.
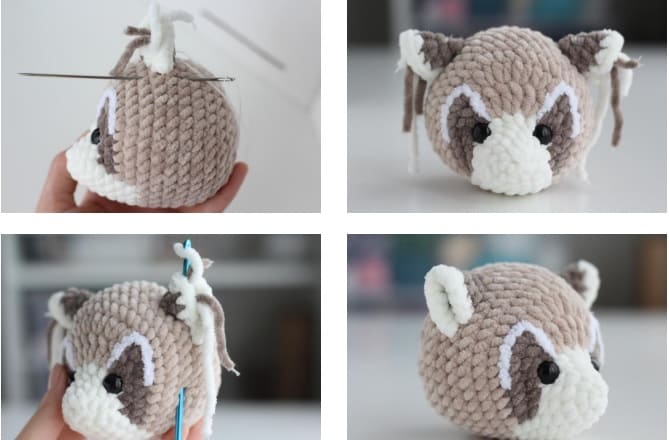
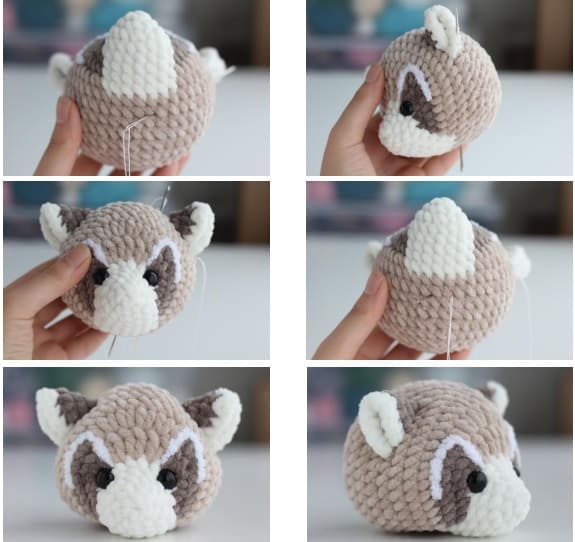
We sew the ears in 2 rows – these are the 11th and 12th rows. There are about 8 loops between the ears. We hide the tails of the threads inside the head.
We embroider the nose between the 1st and 2nd rows. 6-7 stitches.
Ear tightening
We insert the needle from the bottom of the head between 10 and 11 rows, stepping back from the middle 1 loop. We output between 11 and 12 rows from the outside of the ear. We insert between 12 and 13 rows from the inside of the ear (the thread passes behind the eye) , stepping back from the middle 1 loop in the other side Insert the needle from the bottom of the head between 10 and 11 rows, again stepping back from the middle 1 loop Output between 11 and 12 rows from the outside of the eye Insert between 10 and 11 rows from the inside of the eye (the thread passes in front of the eye) Bring the needle from the bottom of the head between 10 and 11 rows, stepping back from the middle 1 loop in the other direction. Tighten to the desired depth, tie a knot, hide the thread inside the head. Pull the second ear in the same way.
We sew the head to the body, filling the neck area.